Ultimate Beginners Guide
Written by - Codiak
Updated: September 10, 2023
|
Posted: September 9, 2023
To level-set right out of the gate this article is going to touch on everything a new player might need to know about the game. We’re not going to dive into specific tips and tricks about nuanced systems, that’s content for another article, but Starfield is so big that we felt it necessary to really break down some of the core systems so you understand how they work, and how you can master them. This video will contain absolutely no story spoilers so sit back and soak it all in.
Creating A Character
From the very beginning you’ll be making key decisions that will influence your gameplay. This all happens during character customization and after close to 100 hours with the game I think it’s important you understand the weight of your decisions.
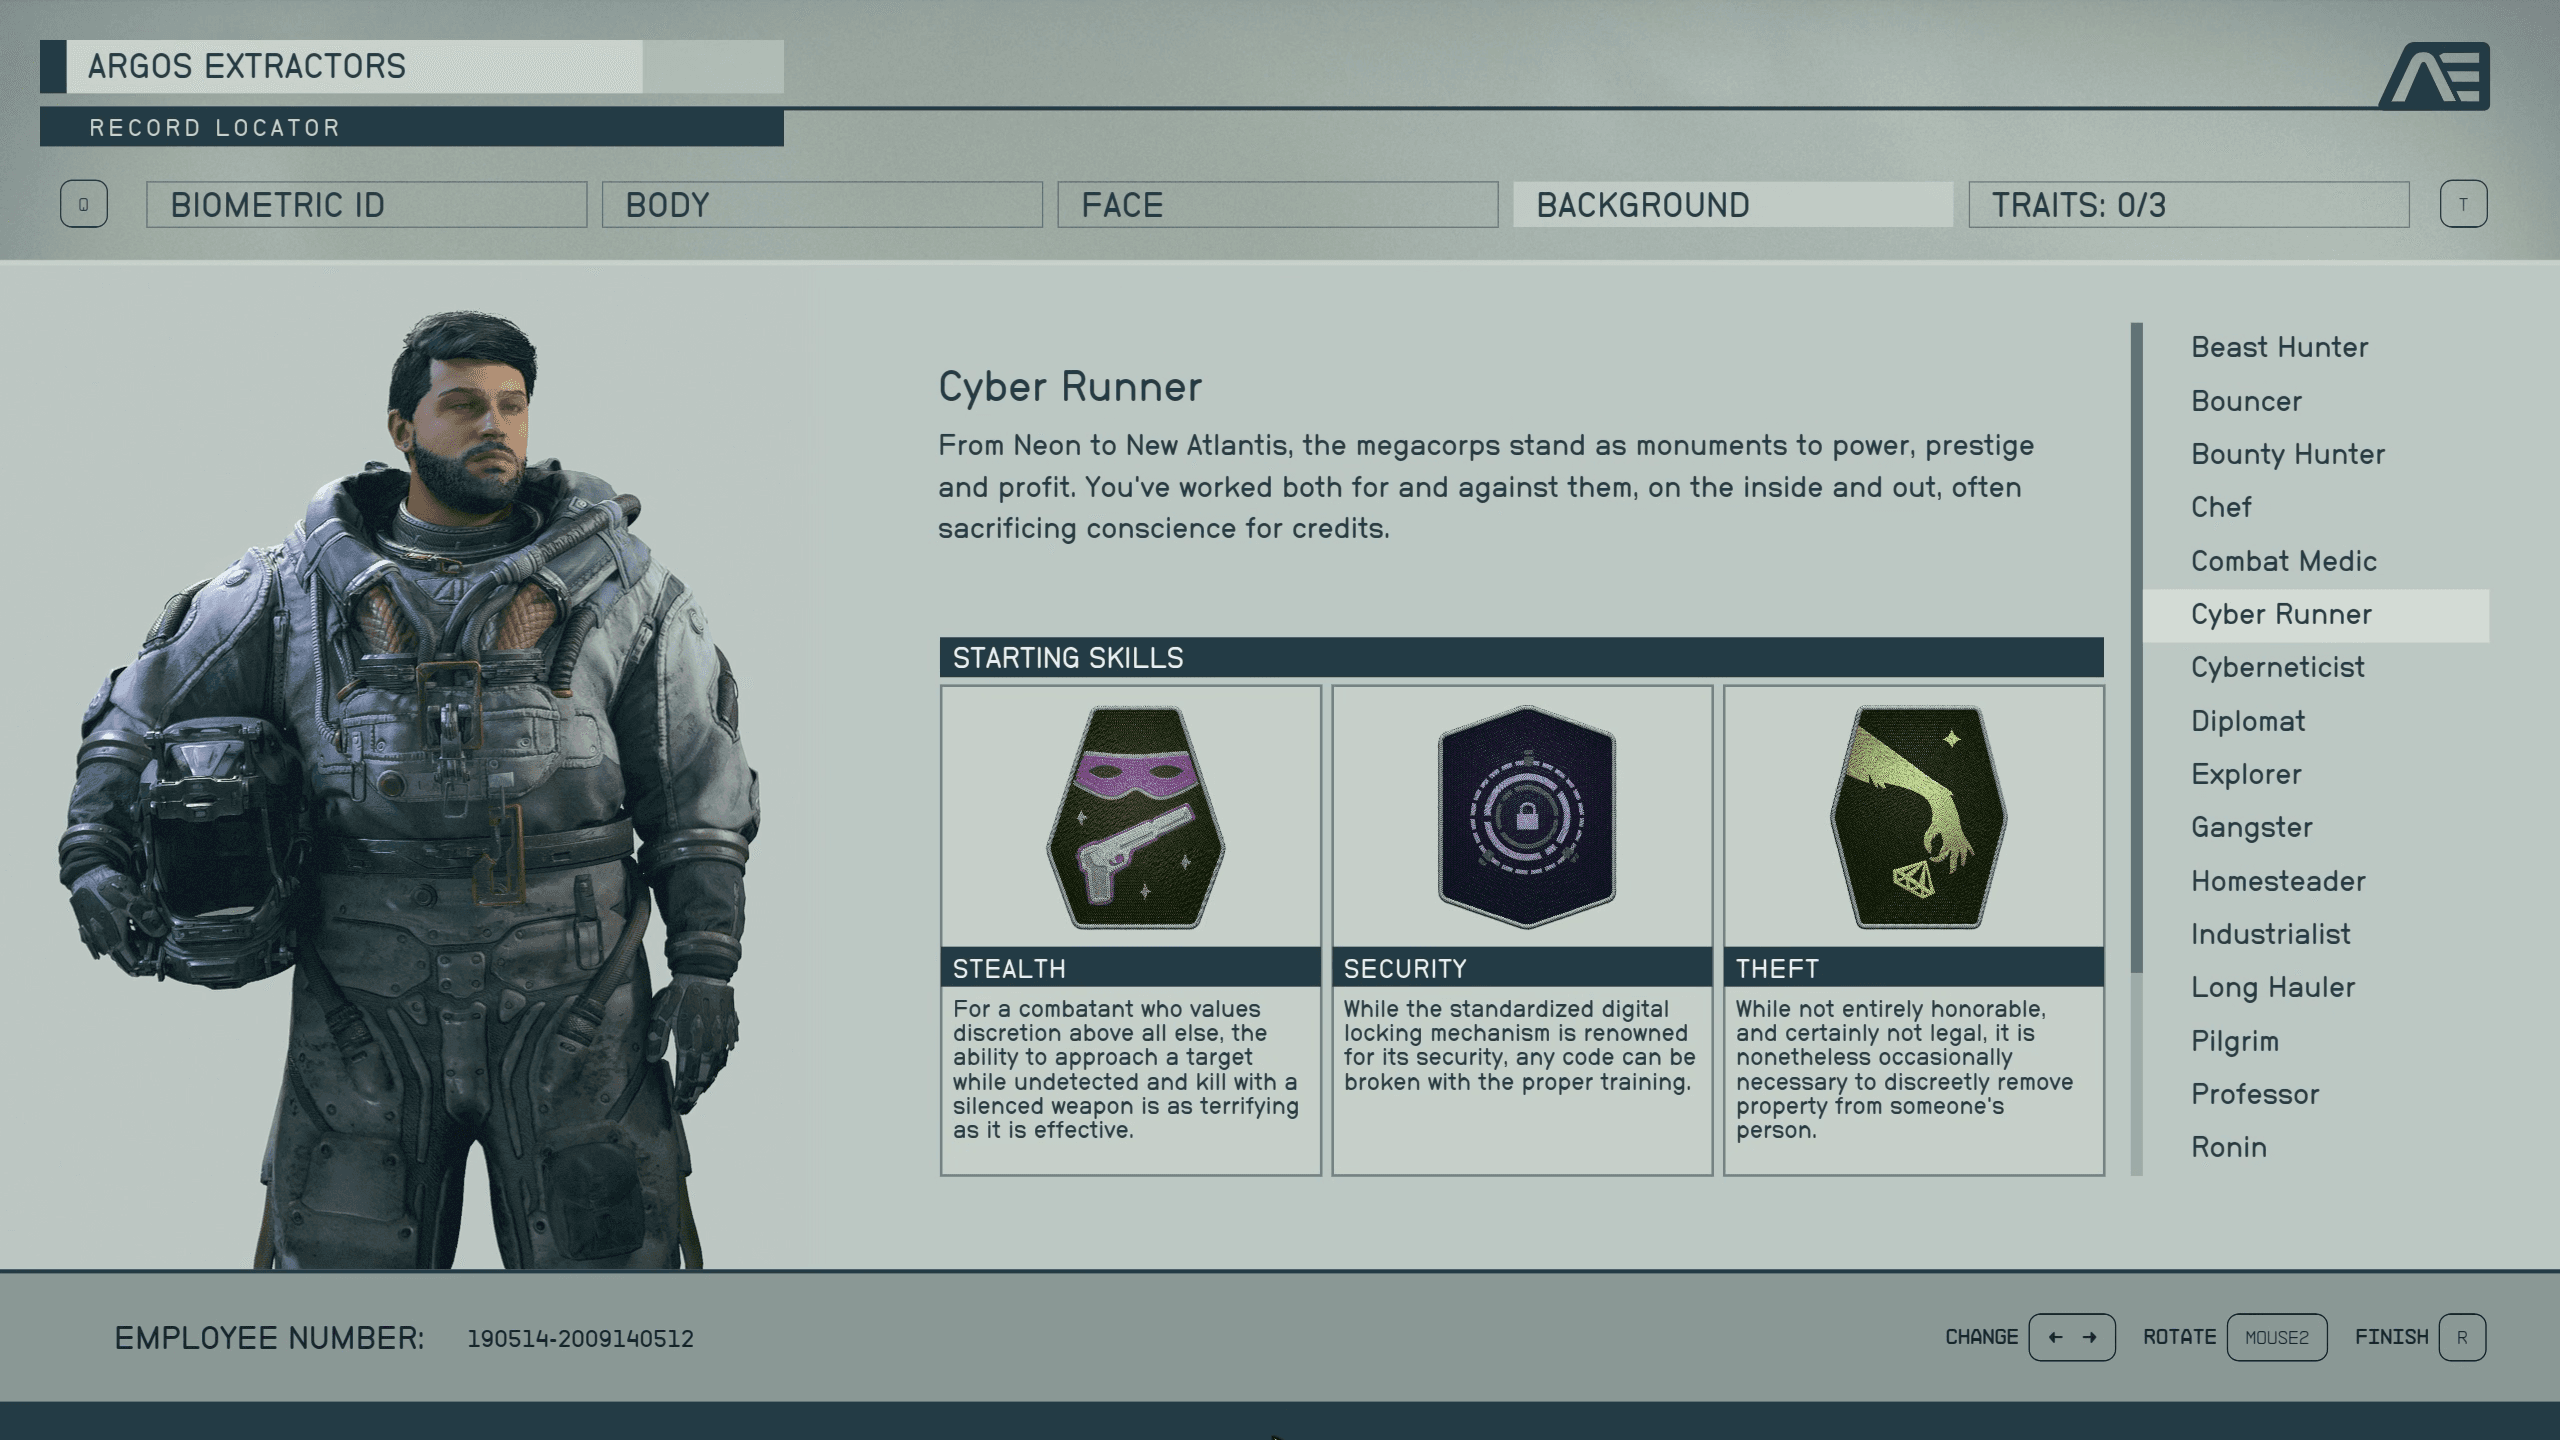
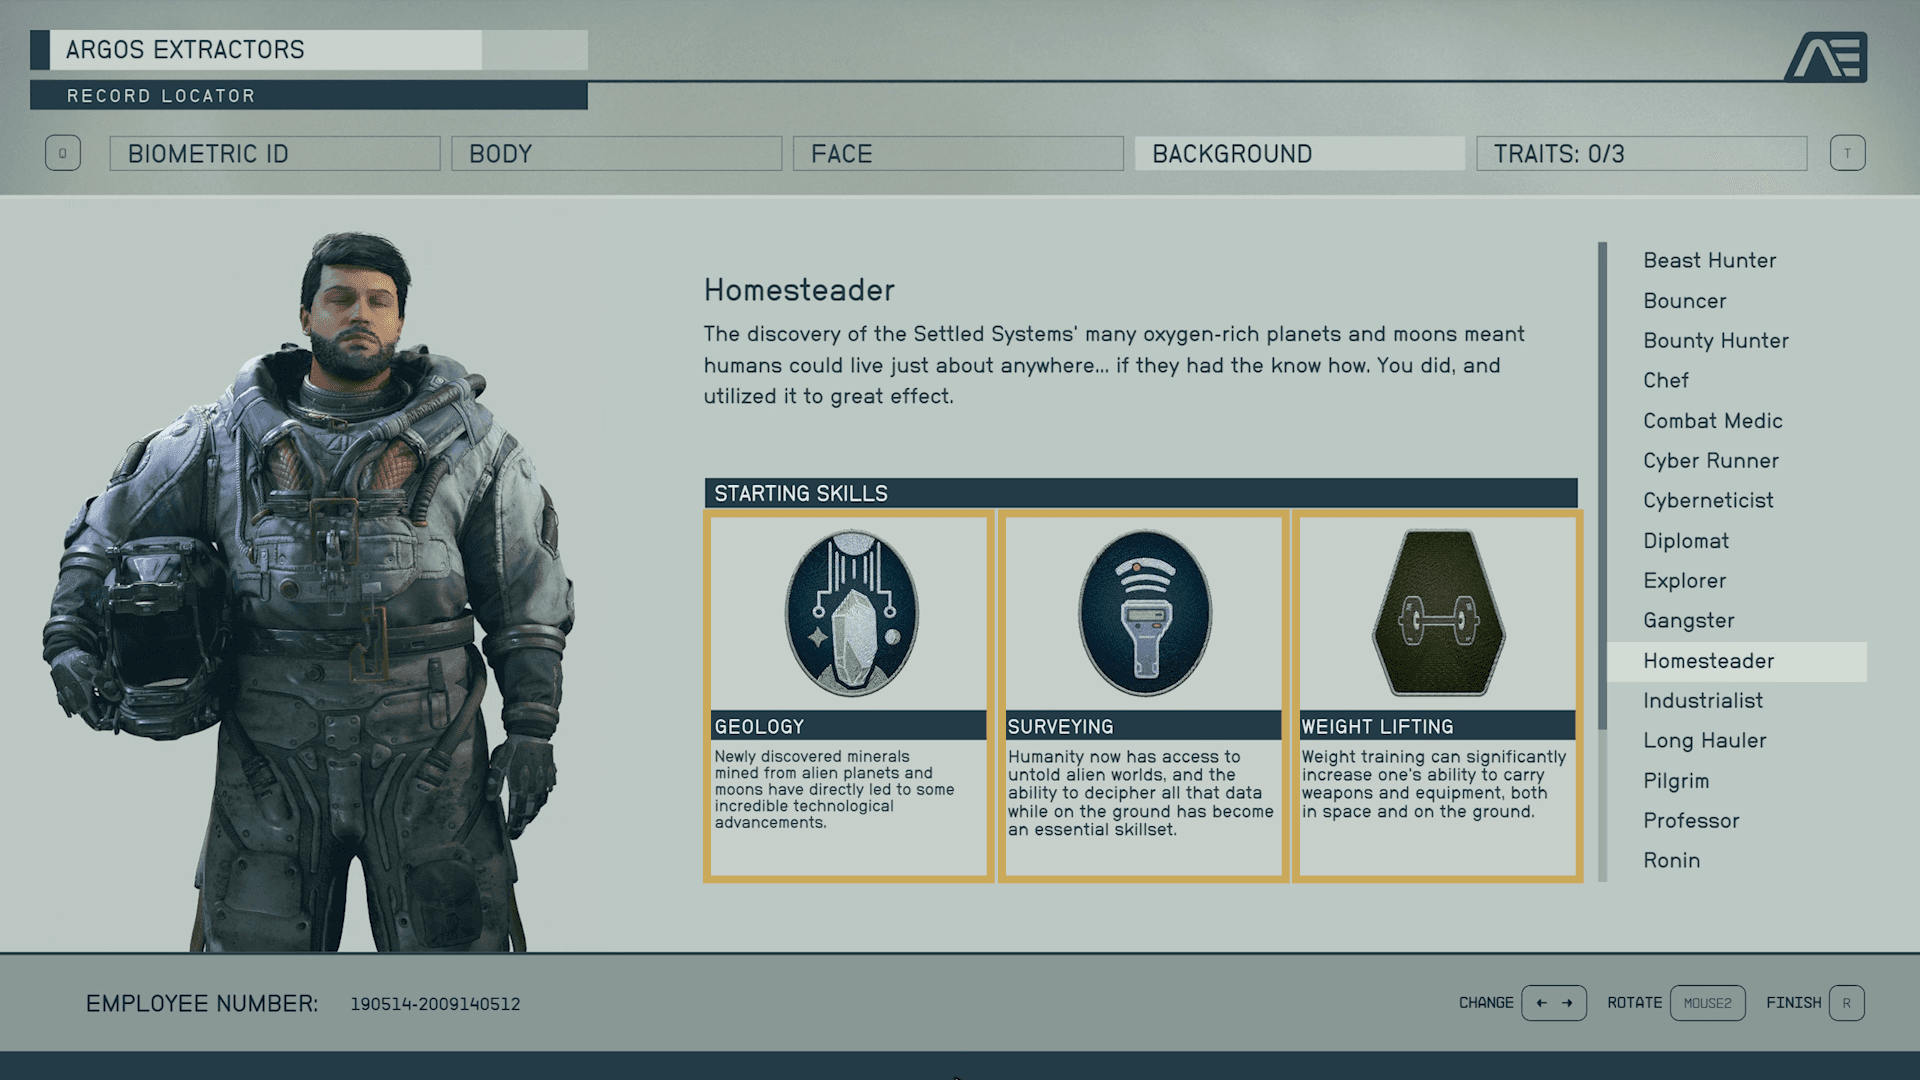
Let’s start with your background. You get to choose from 21 pre-determined “classes” for lack of a better term. With that comes some backstory and this is important as it will play a role in your dialogue options in certain scenarios. In my case I chose the File Not Found backstory hoping it’ll be tied to some extravagant secret down the line. I haven’t personally run into any scenarios where that background has influenced any conversations, but as you can see other backgrounds clearly do, opening up new options for the player.
Each background also comes with 3 starting skills and I want to clarify what this actually means. Once you choose a background you receive a point in those 3 starting skills, which means you get the rank 1 benefits that go alongside having those skills. In the grand scheme of things this means very little as you can level up and unlock dozens of skills, but at the start of the game, when things are arguably the hardest the decision holds a little more merit. Regardless of what you choose you can still access these skills later on so don’t let anyone tell you this decision locks you into those skills.
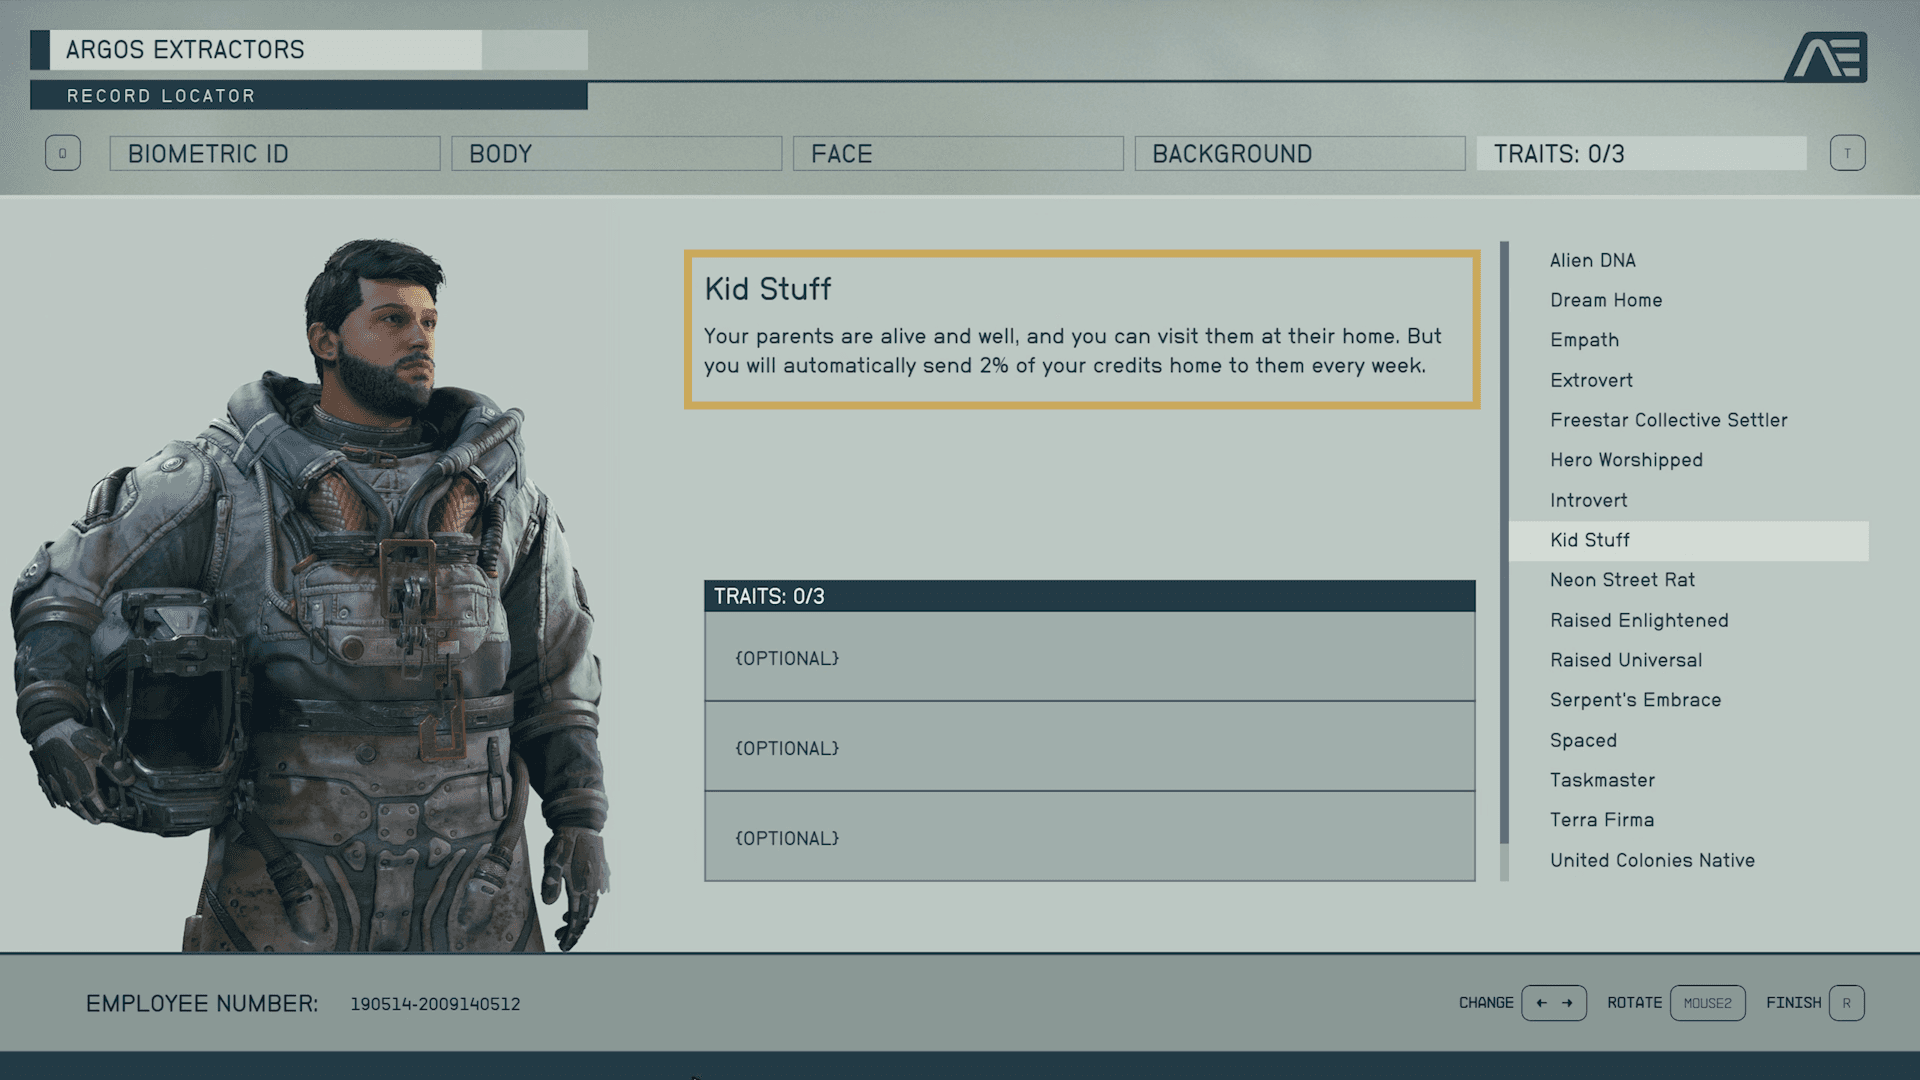
Taking this a step further we have Traits, and these are a little more flexible based on how you want to approach the game. The base game features 17 traits and you can choose anywhere from 0 traits, all the way up to 3. What’s more interesting, you’re given opportunities throughout the game to remove these traits during key moments.
For example, I chose Kid Stuff which means I have a mom and dad in the game that do various things, but that also means I have to pay them 500 credits each week as a sort of reverse allowance. At some point I’m given the option to tell my parents, “you know what, enough”. So what I’m getting at is this, your traits will open new opportunities for you, but not all of them are permanent. That being said these have a much more direct impact on opportunities in the game. For example my parents come to visit Constellation at one point and present me with a special weapon. That never would have happened without the Kid Stuff trait, so think carefully before making your decisions here.

Navigating The Galaxy
One thing I spent a lot of time fumbling around was how to actually navigate Starfield. It’s a massive game and understanding this key system will make moving around the galaxy much smoother. Luckily the Bethesda team was really smart about how they went about this and gave players loads of options, which is actually part of the reason why it’s so tricky when you’re first getting started.
So to be frank there are a ton of load screens, and you can’t really avoid that. If you install the game on an SSD or M.2 you can move through these lightning quick, but this really only impacts the immersion of the game if you choose to fast travel everywhere, and the team gives you a lot of options to do that.
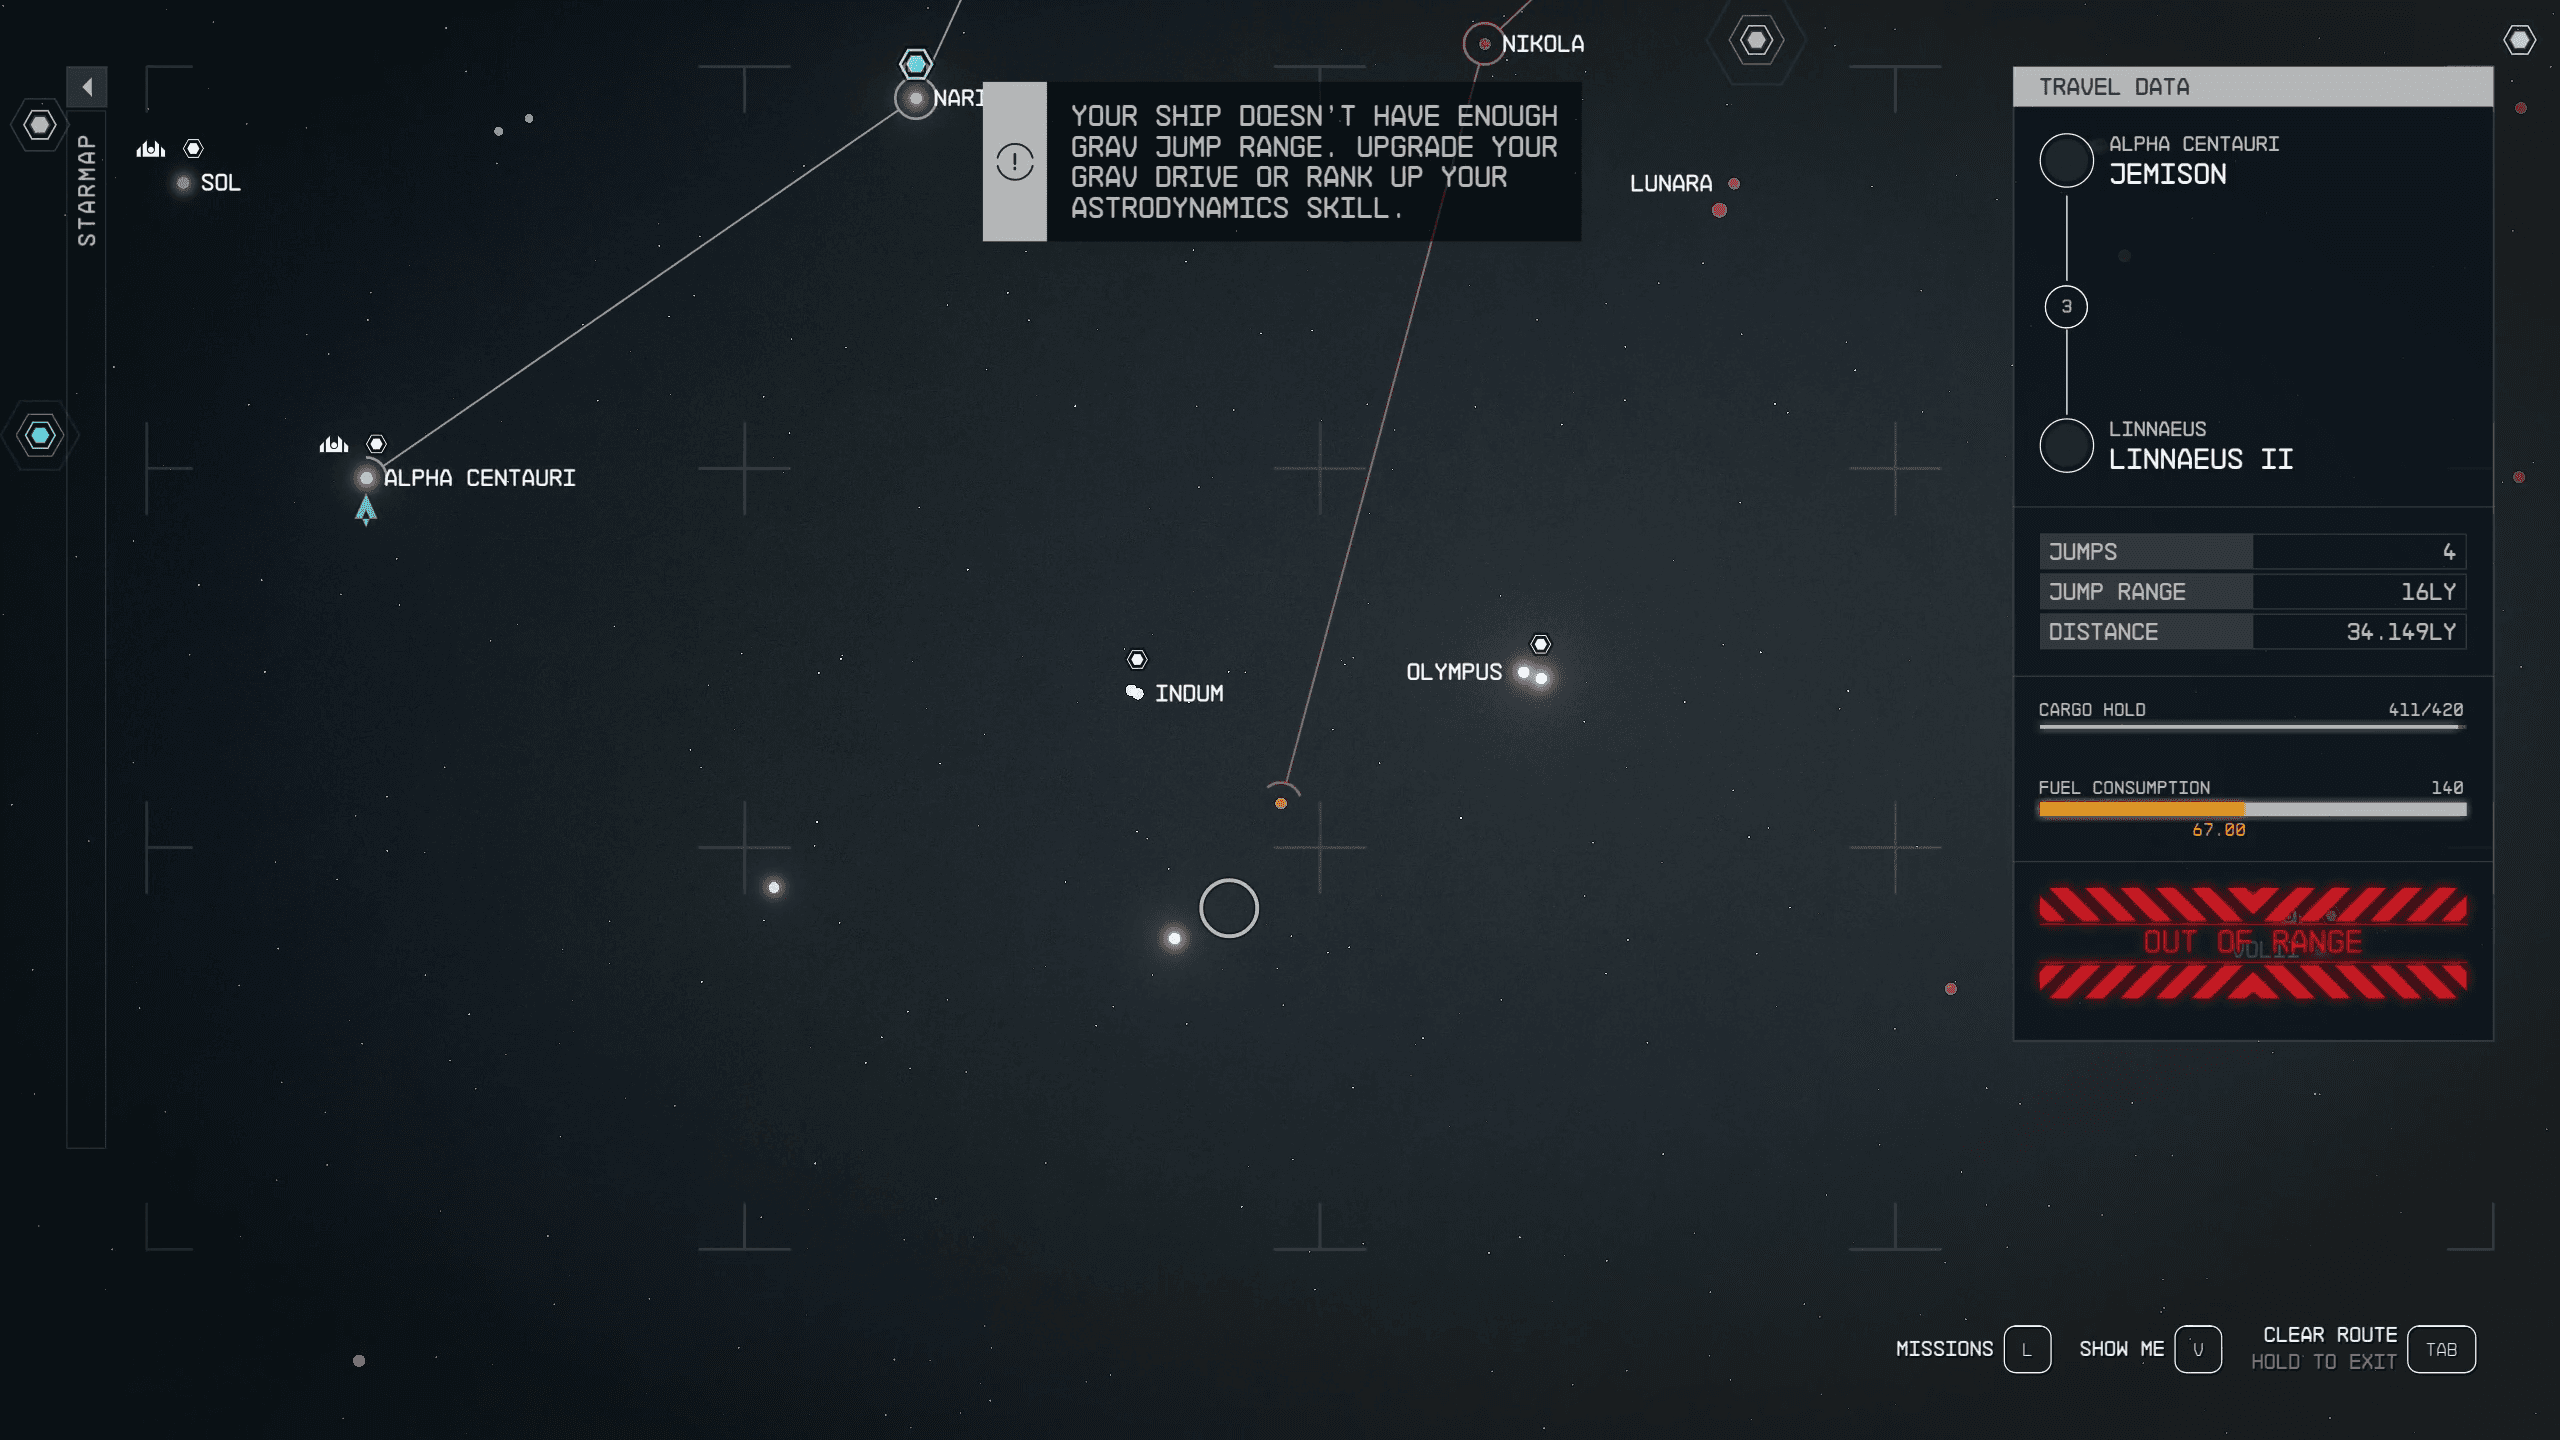
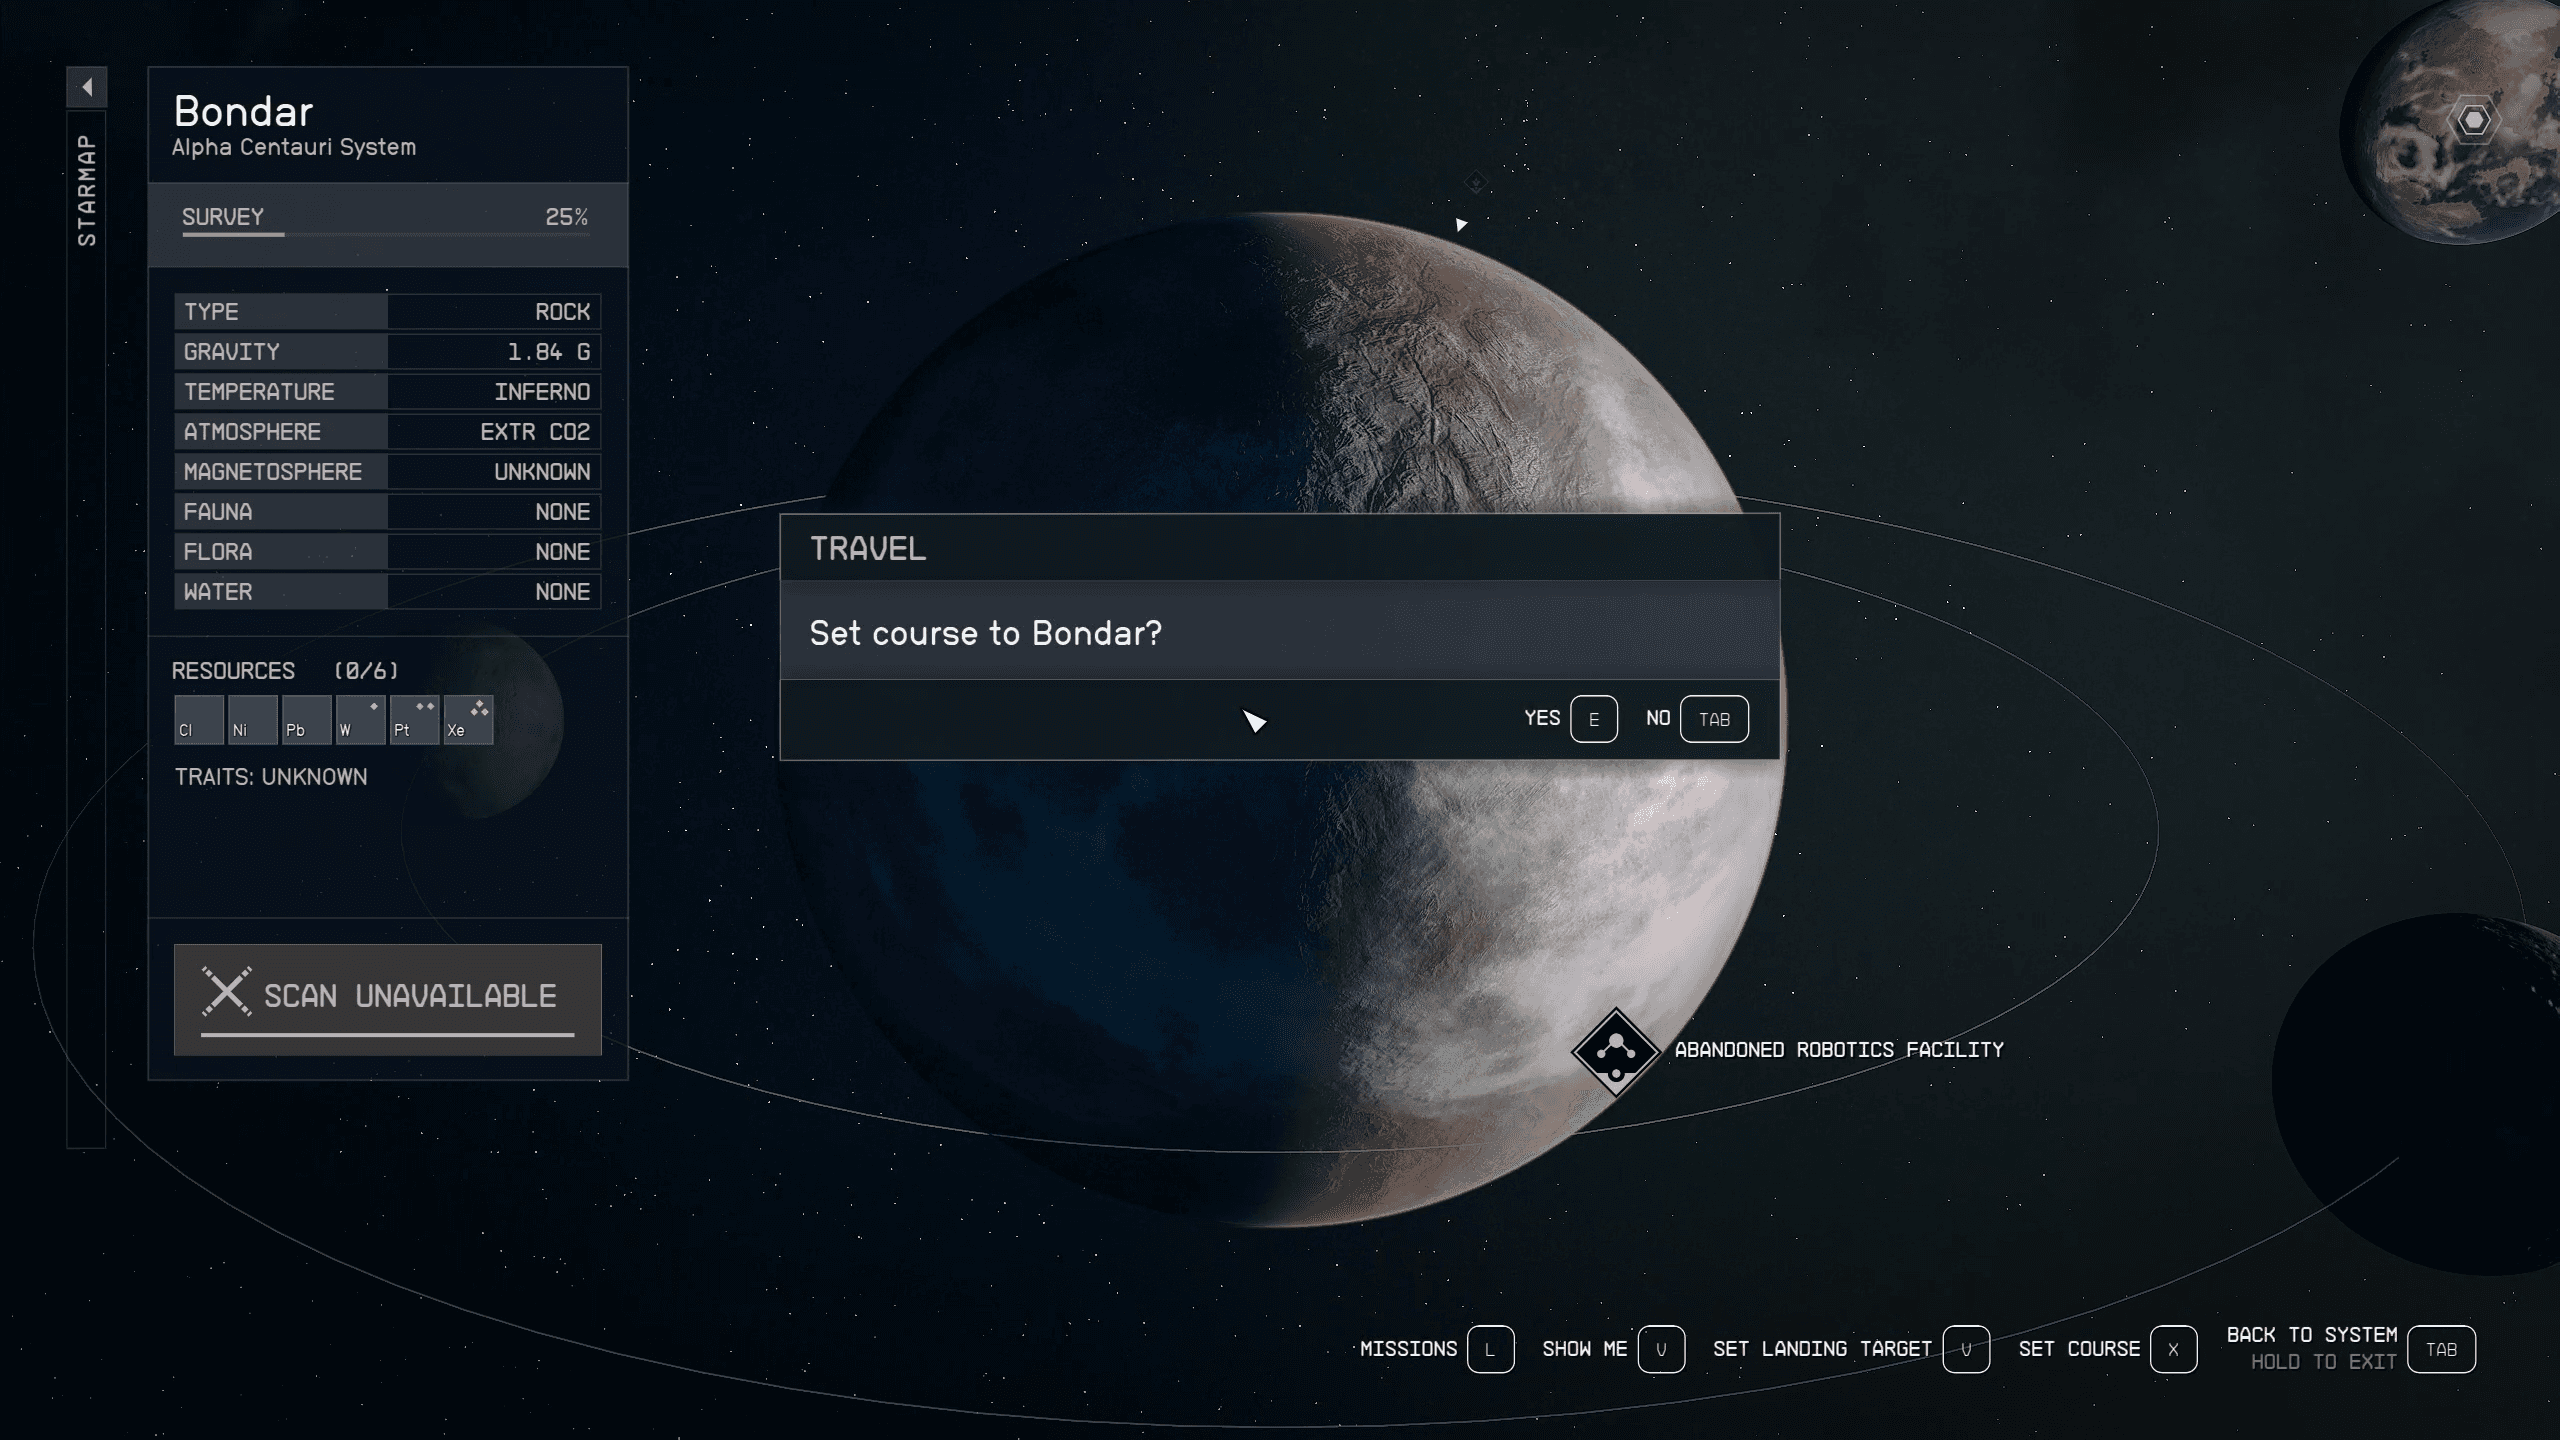
First, you can fast travel from almost anywhere in the universe via your starmap, which you can access at any time. From here you can jump around to systems you’ve already visited, as well as the planets you’ve already landed on. For example, I could be standing on Mars, even exploring a specific point of interest and still access my starmap. From there I pull up the Alpha Centauri system, locate the planet Jemison where I’ll find New Atlantis and since I’ve already been to that planet, and location, I can quickly fast travel to my destination. The only catch 22 here is if you need to fast travel to a planet outside the range of your grav drive. If that’s the case, you’ll need to head back to your ship and hopscotch your way to your destination.
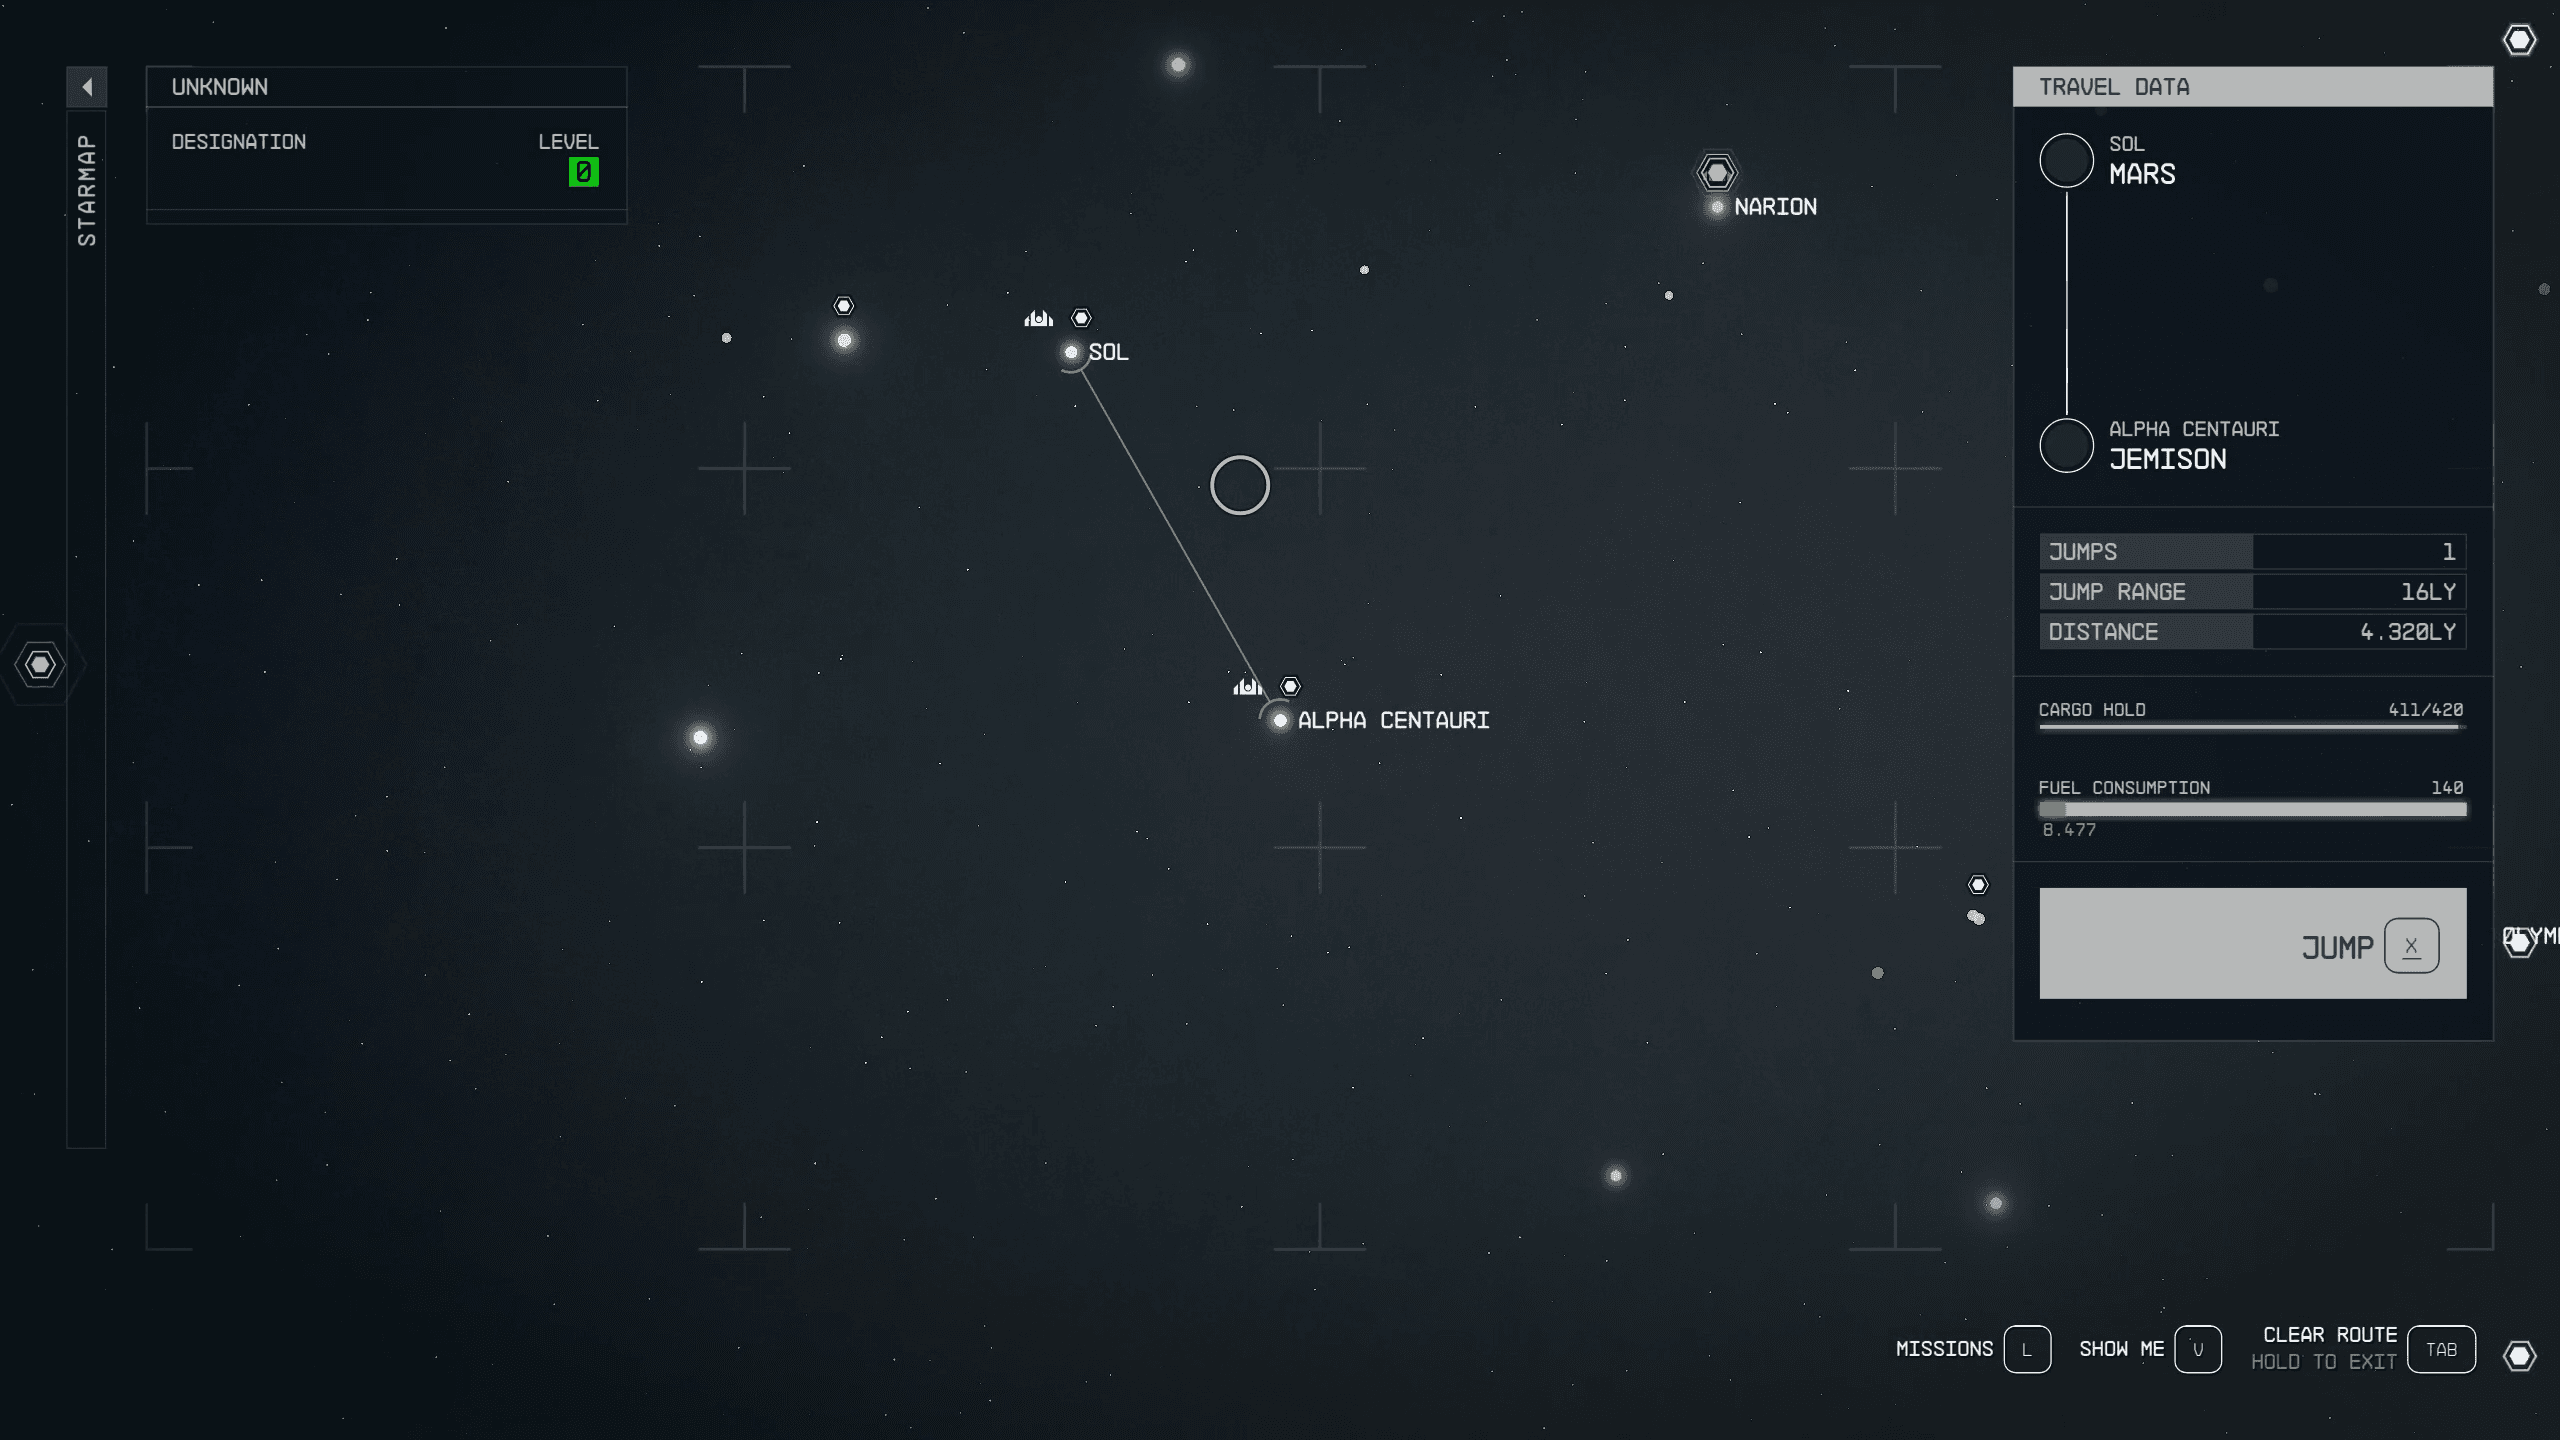
Fast traveling also works as it pertains to quests. From the quest menu you’ll notice the option to ‘plot course’ and this is a dummy-proof way to ensure you head in the right direction of your objective. It certainly removes a layer of immersion, but it’s quick, which some people will absolutely want.
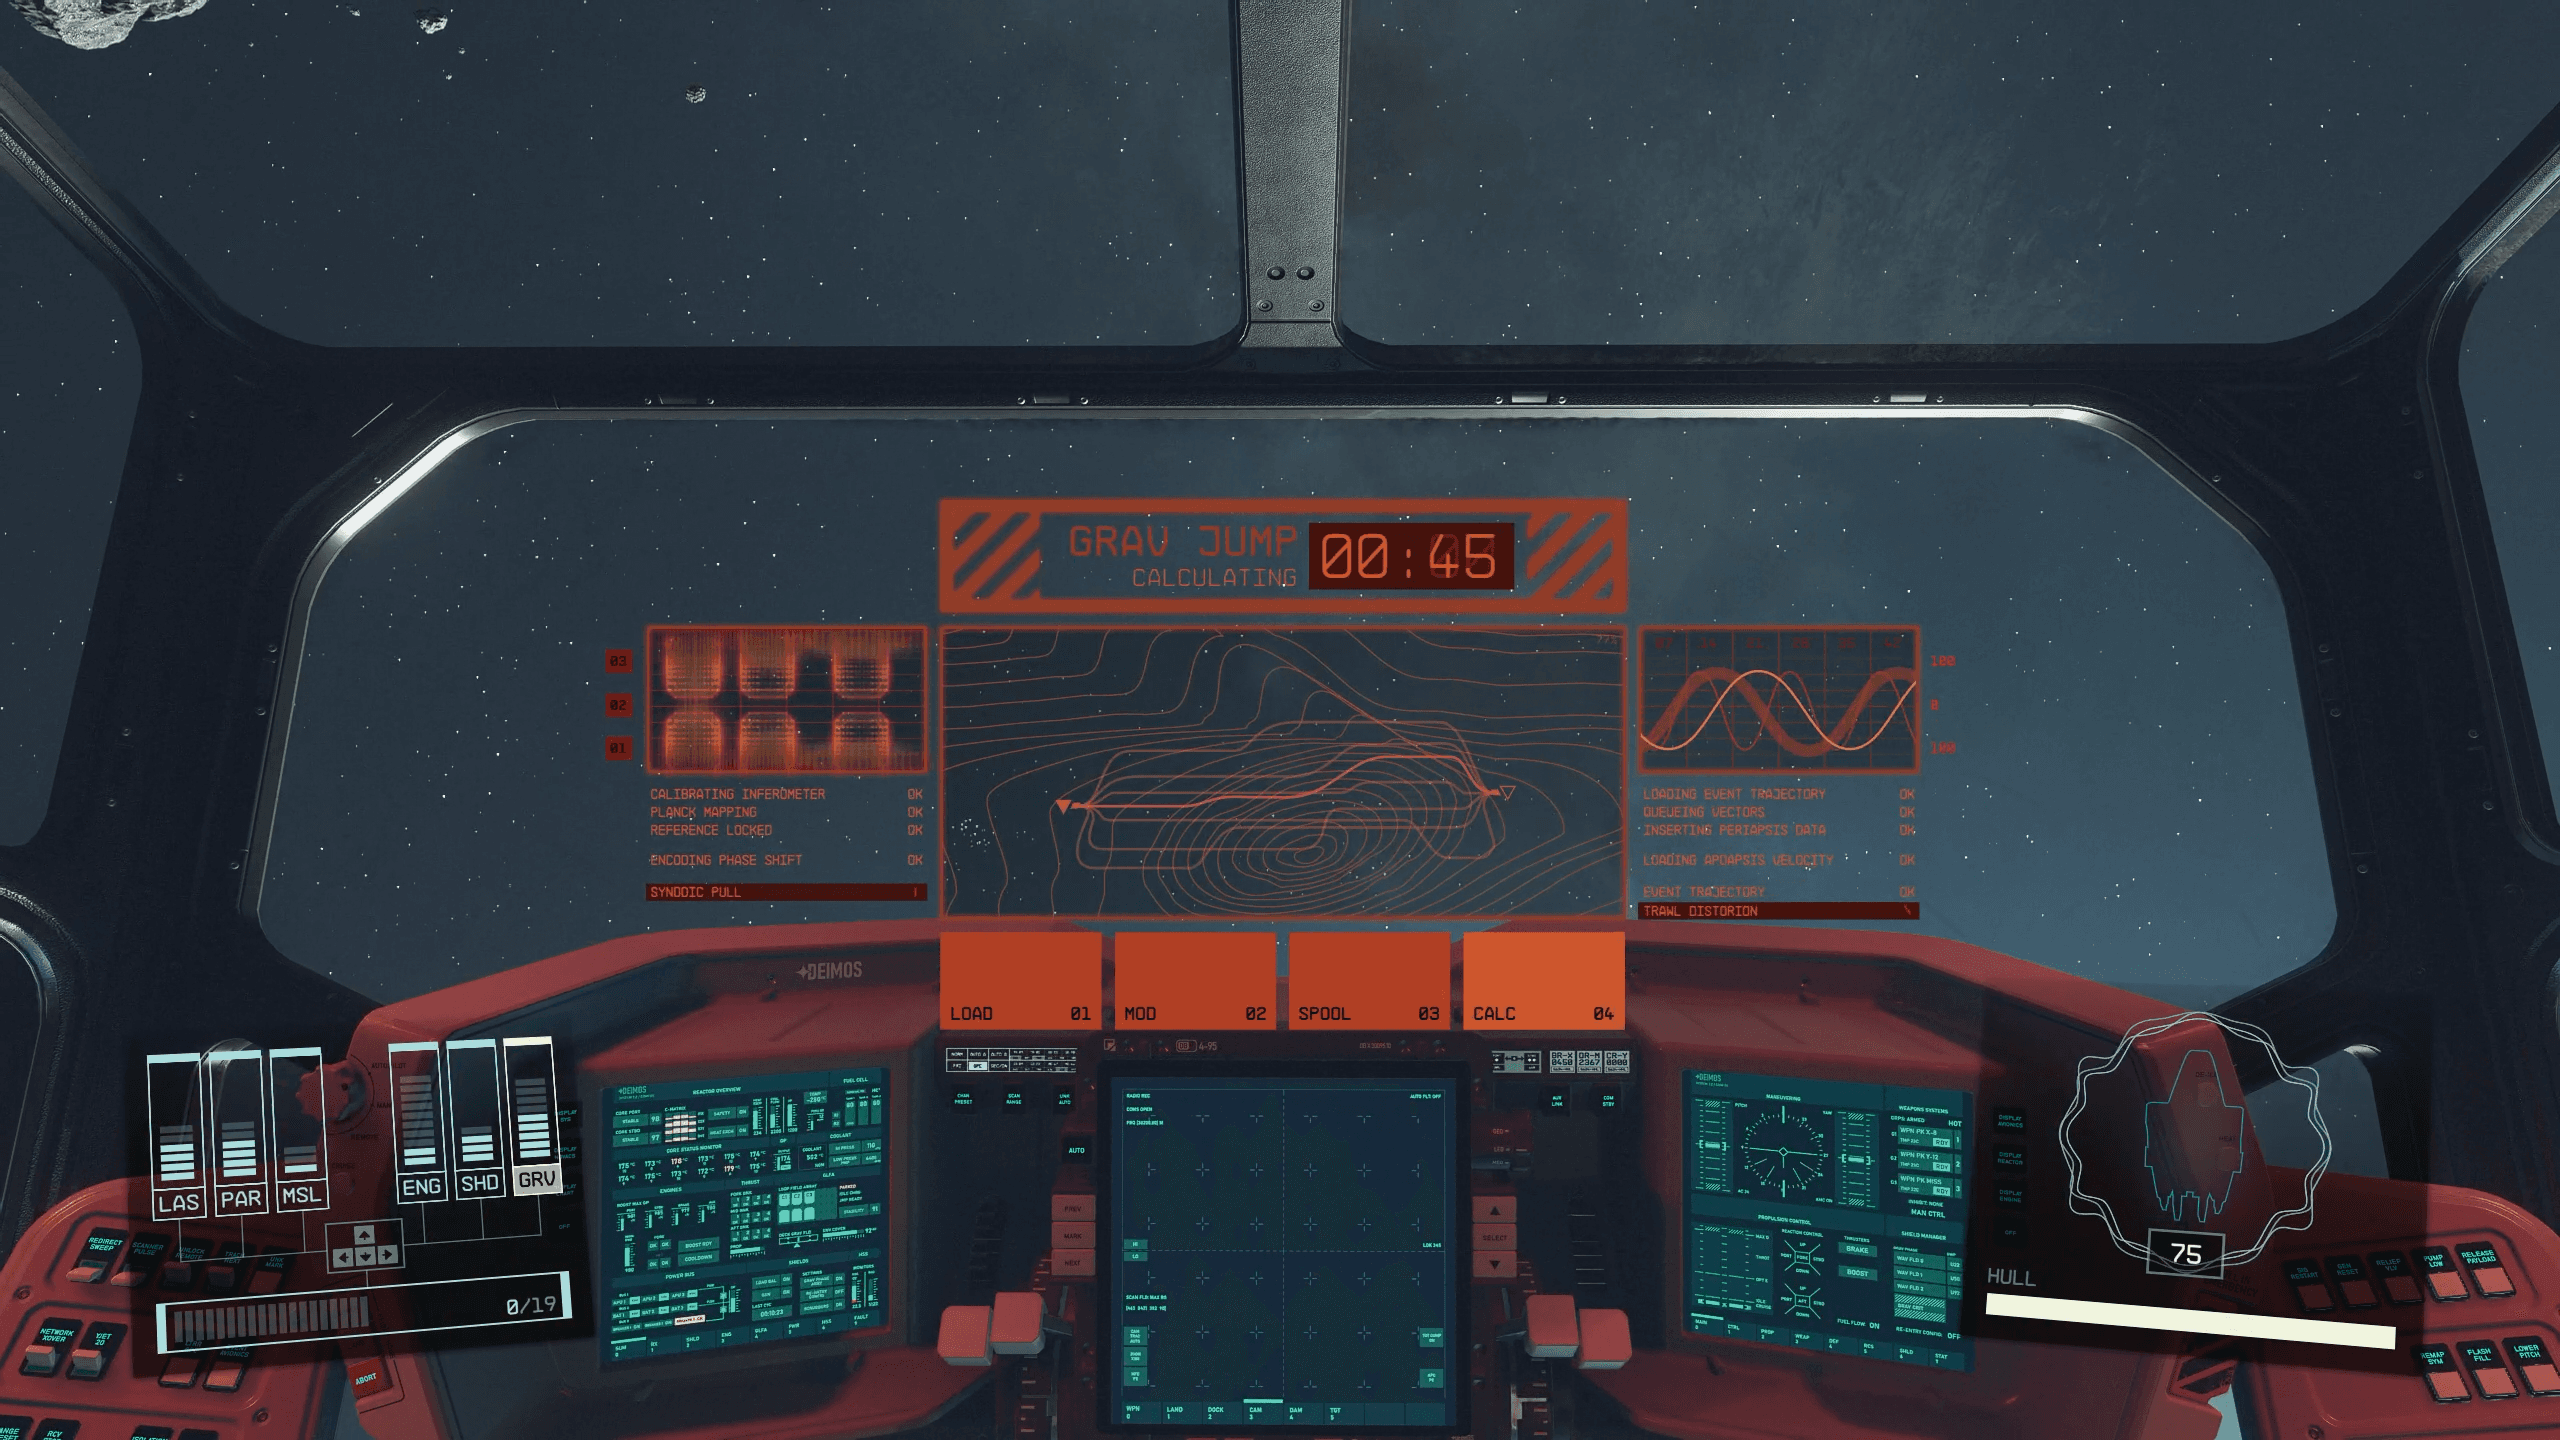
On the flip side you can take the more immersive route, if that’s something you want. You can choose to walk or fast travel back to your ship, climb into the cockpit, and then choose the ‘Lift Off’ option. This will spark a cutscene, and after a brief load screen you’ll be in space. Without entering a menu, you can then navigate to a new destination, so long as you have the mission or activity tracked. By hitting X on Xbox or R on keyboard you will bring up a tracker and can then ‘Set Course’ sending your ship off into space and your destination.
You can do the same thing when you get to your new destination as well, tracking the planet or place you want to land, and then ‘Setting Course’ for that destination. It’s a great way to feel like you’re in complete control of your journey, and while not as fast as simply fast traveling from point A to point B, it’s certainly more immersive. Sadly, there is no way to avoid cutscenes which definitely would have catapulted things to the next level but given the size and scope of the game it’s kind of to be expected.

Managing Your Inventory
One thing that will absolutely dog you throughout much of your game is a lack of inventory space. Bethesda games have always been notorious for throwing everything but the kitchen sink at you and asking you to shove it all in your pockets…well think about that problem on a galactic scale, yeah, it’s kind of a mess.
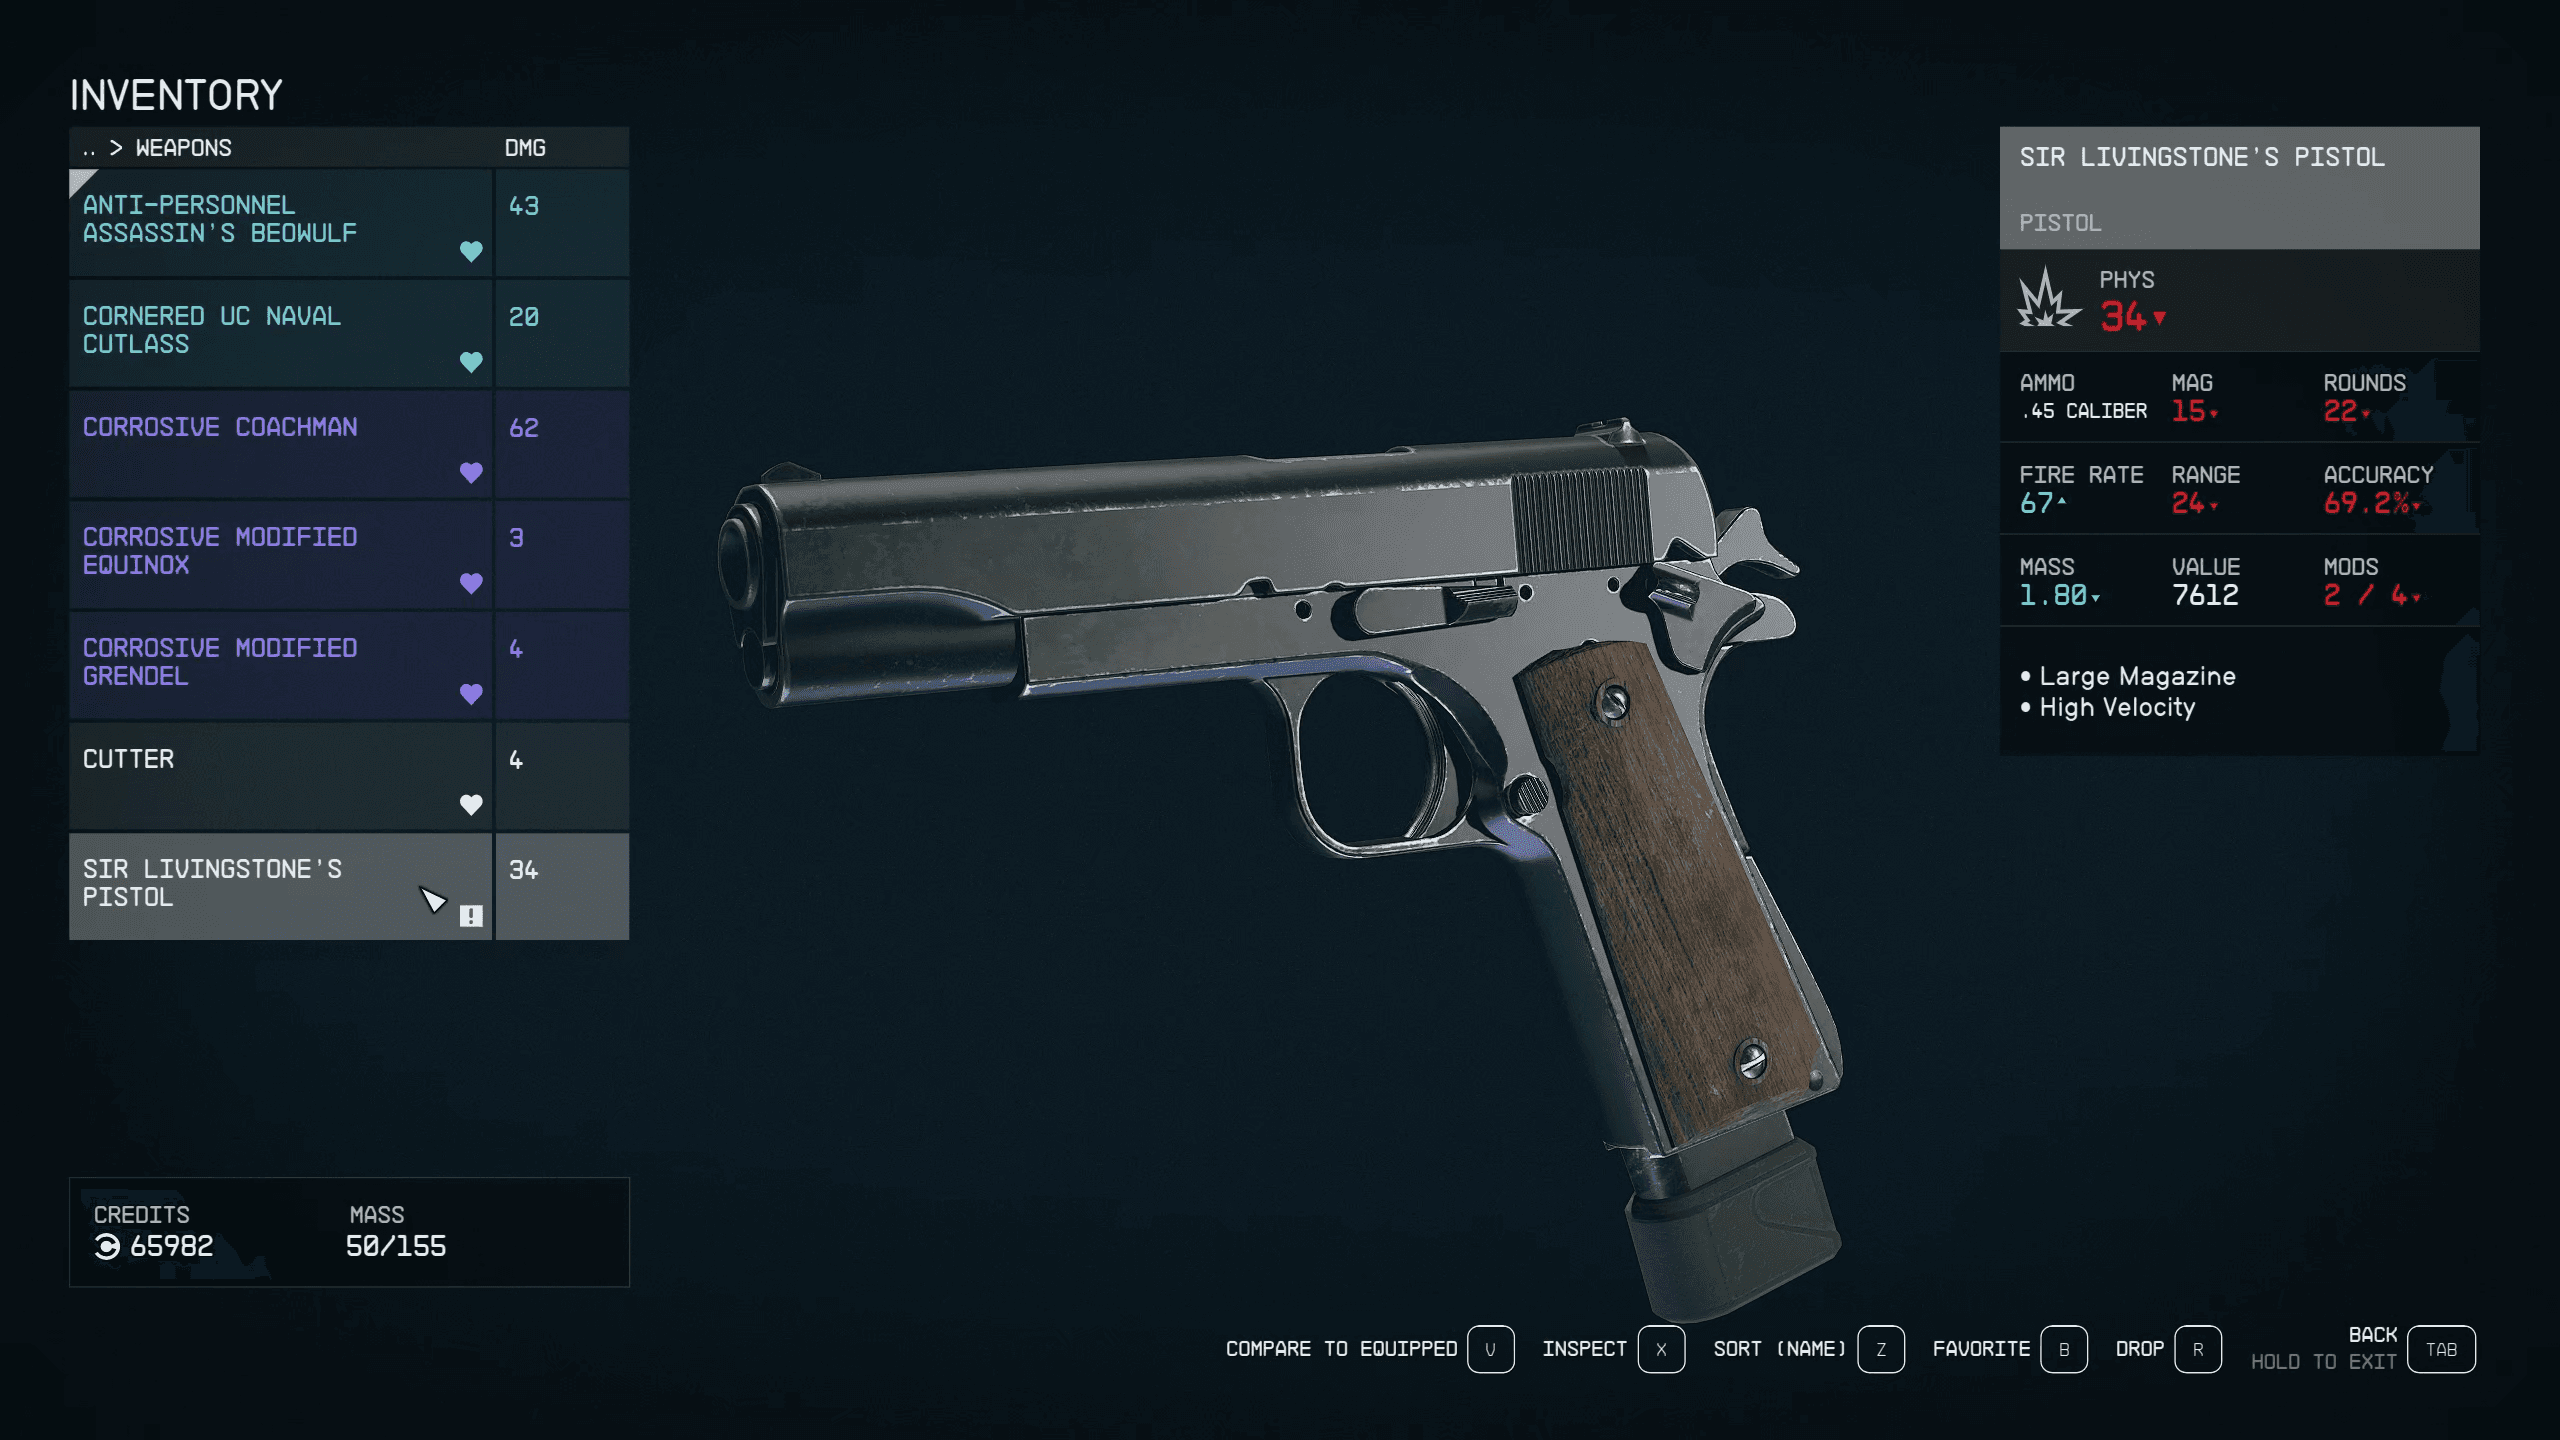
First, we need to talk about the game’s quick-slotting system, because without it you’re in for a rough experience. While in your inventory you can “favorite” items, namely weapons, explosives, and aid to a quick slot. You get to choose which slot to assign the item which also determines how you access it with a corresponding key or button press. While exploring simple press Q on the keyboard or UP on the D-pad to access the full menu.
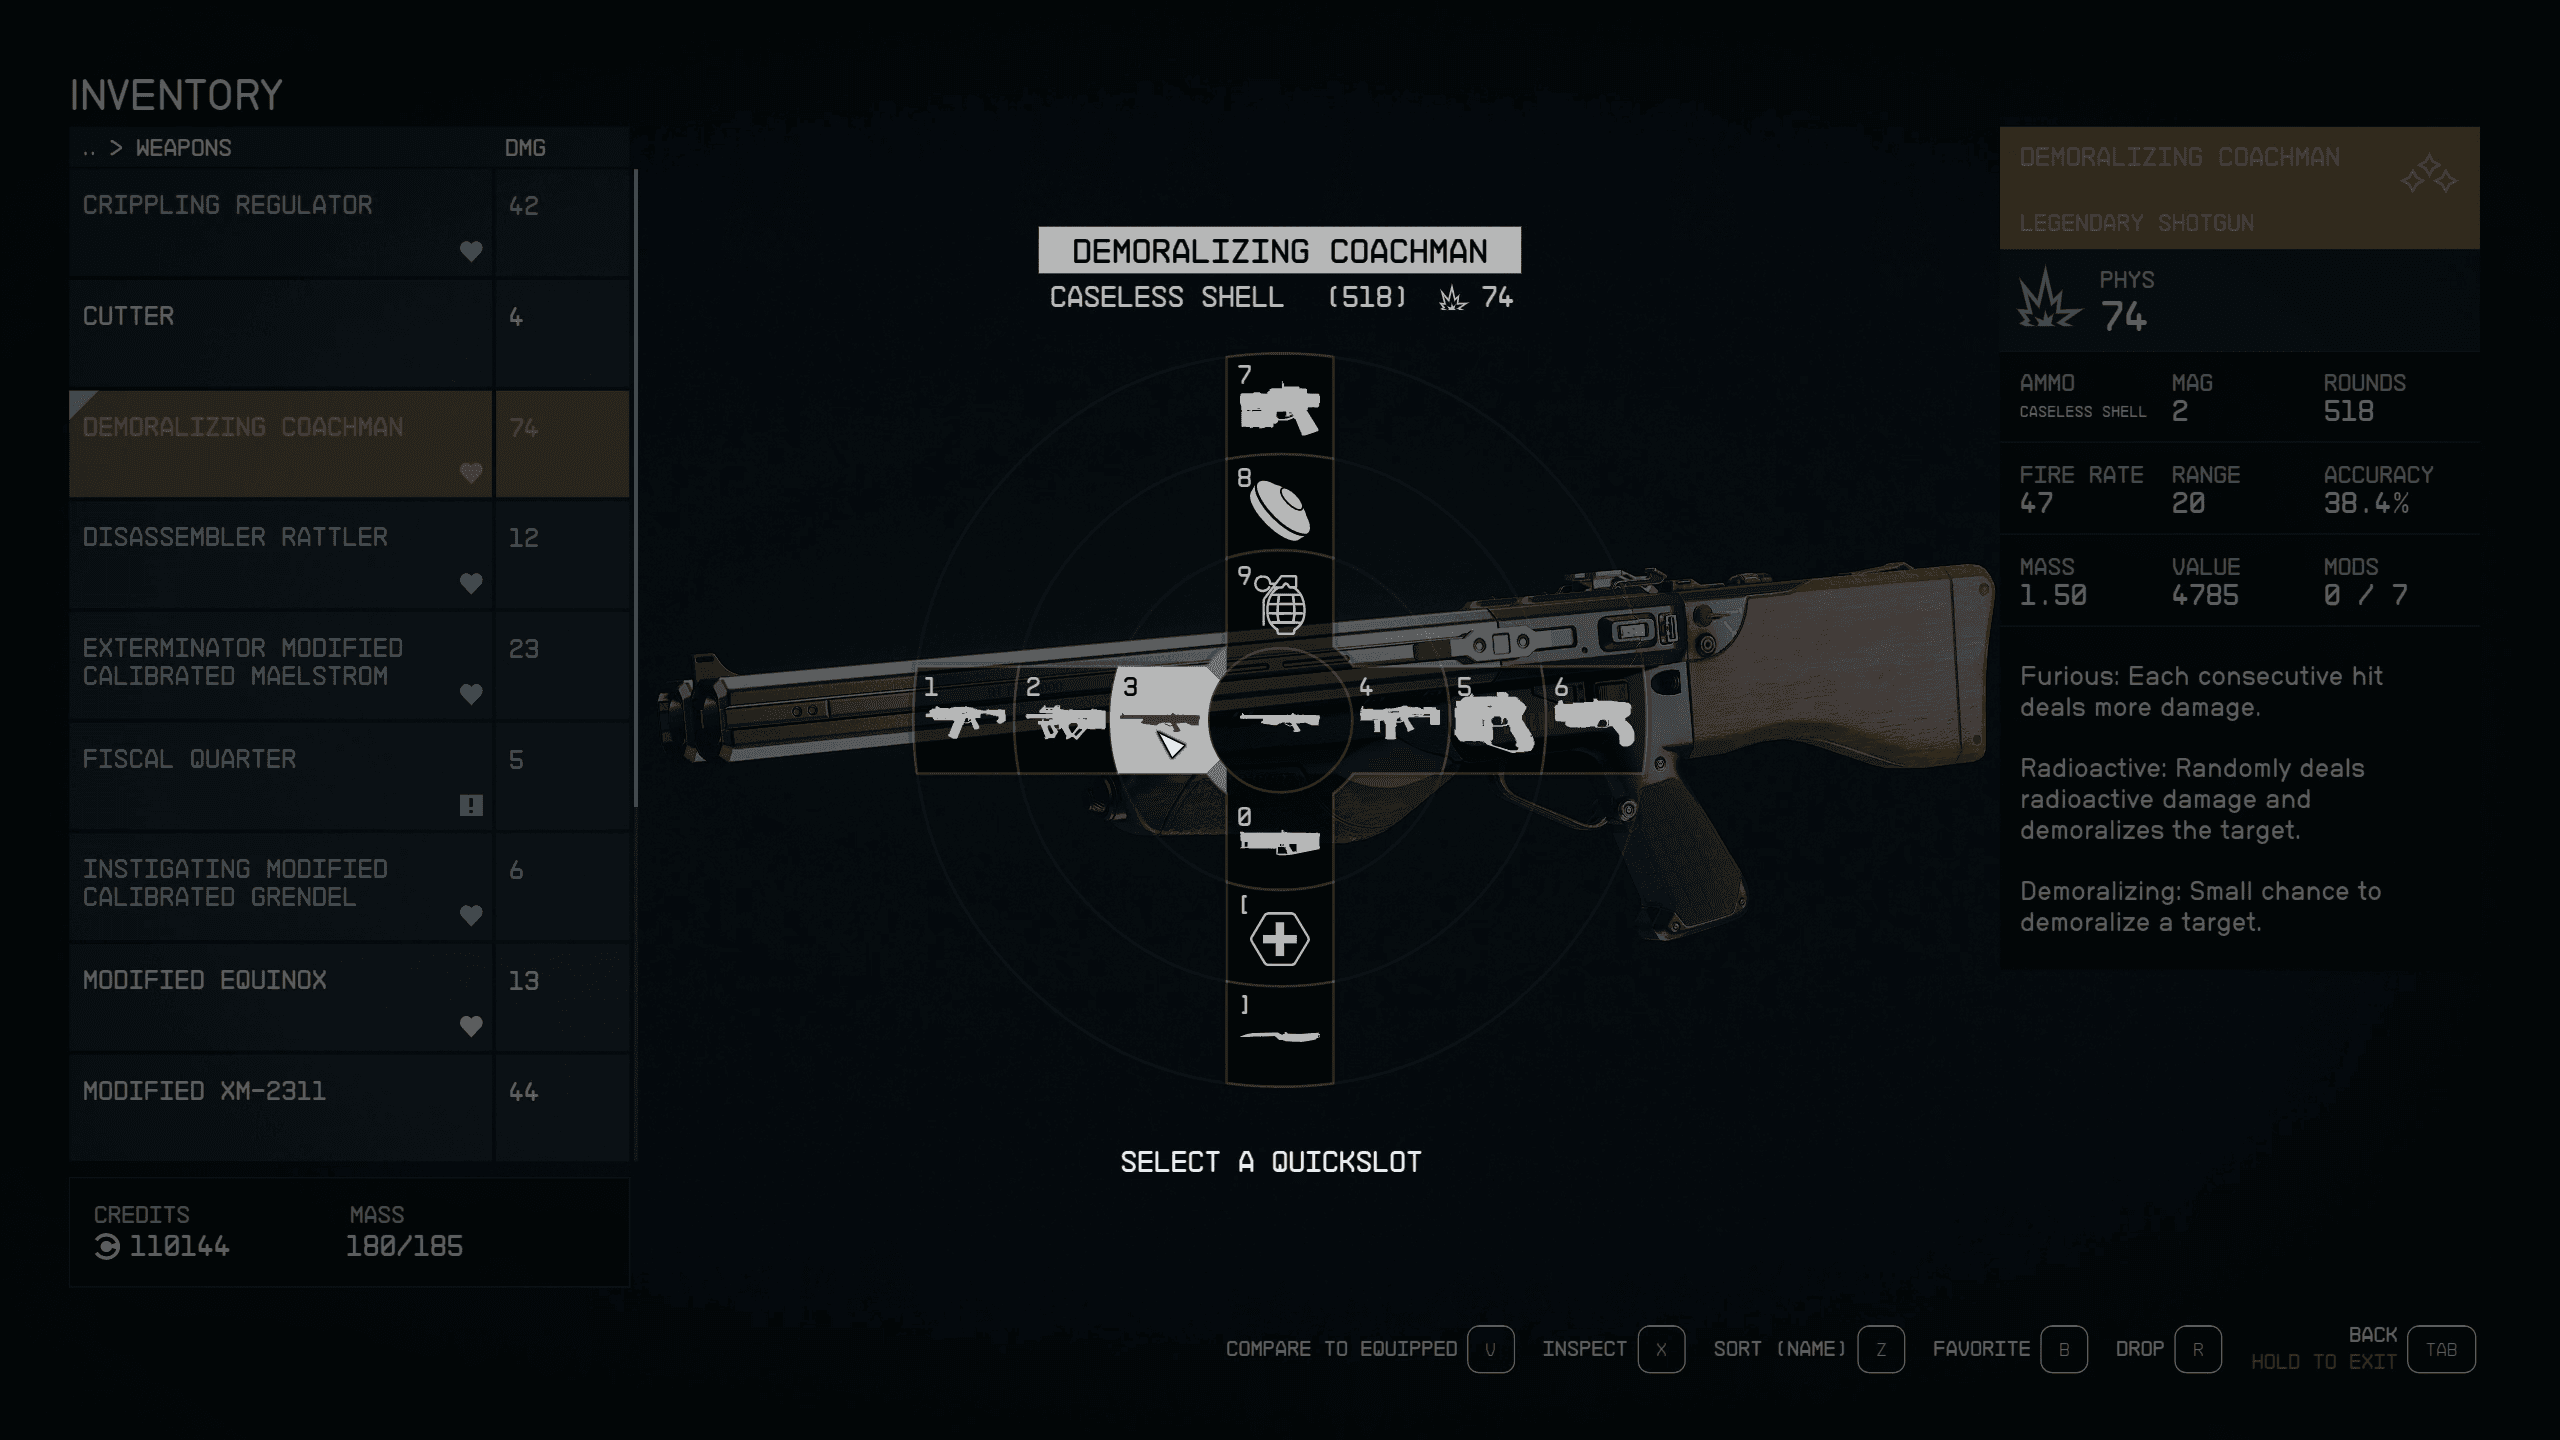
Now to really understand this let’s look at the various layers and options you have for storing gear. Your character can hold a certain amount of gear, depending on your weight limit. This is enhanced with gear, skills, and various aid items, but by no means will you be able to hold everything on your person. Use your surveying skill to highlight items in the environment that you can interact with and be thoughtful, only picking up items that are of value or serve a direct or future purpose. If you do exceed your maximum weight limit, you’ll begin to expend oxygen just by moving, regardless of if you’re walking, running, jumping, whatever. Once your O2 is gone the CO2 meter fills up and once that maxes out, you’re in for a rough time.

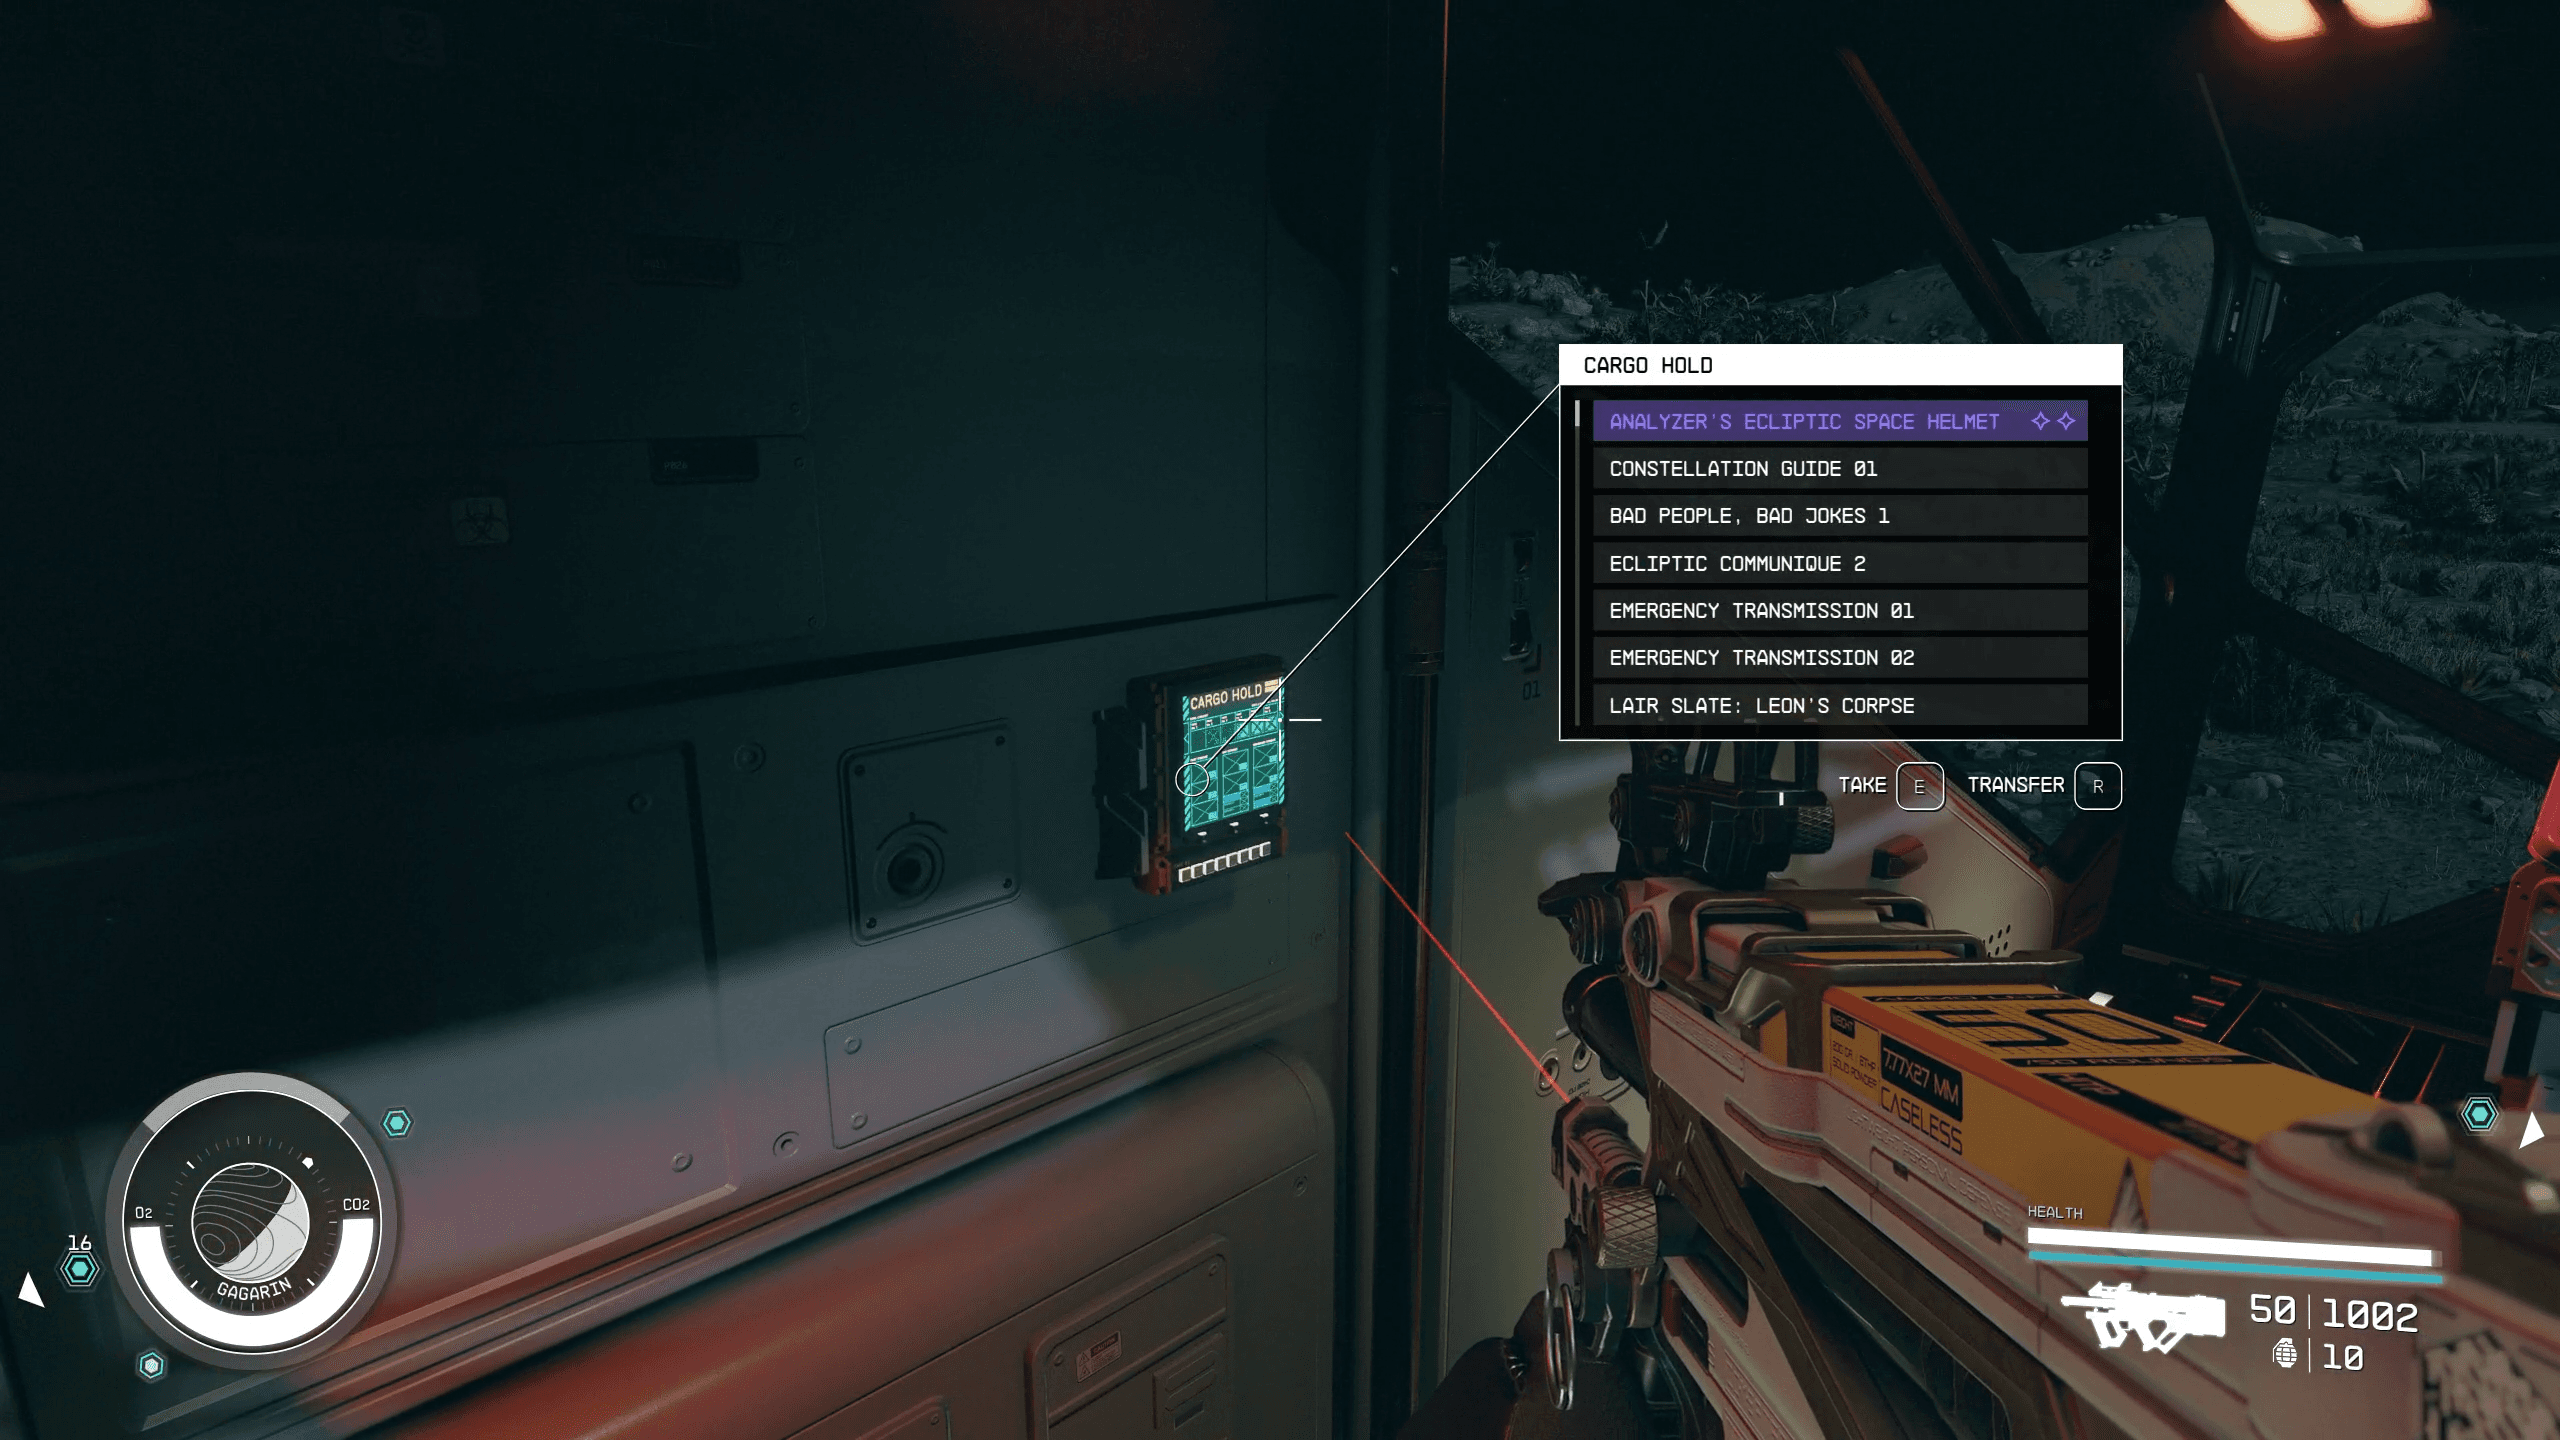
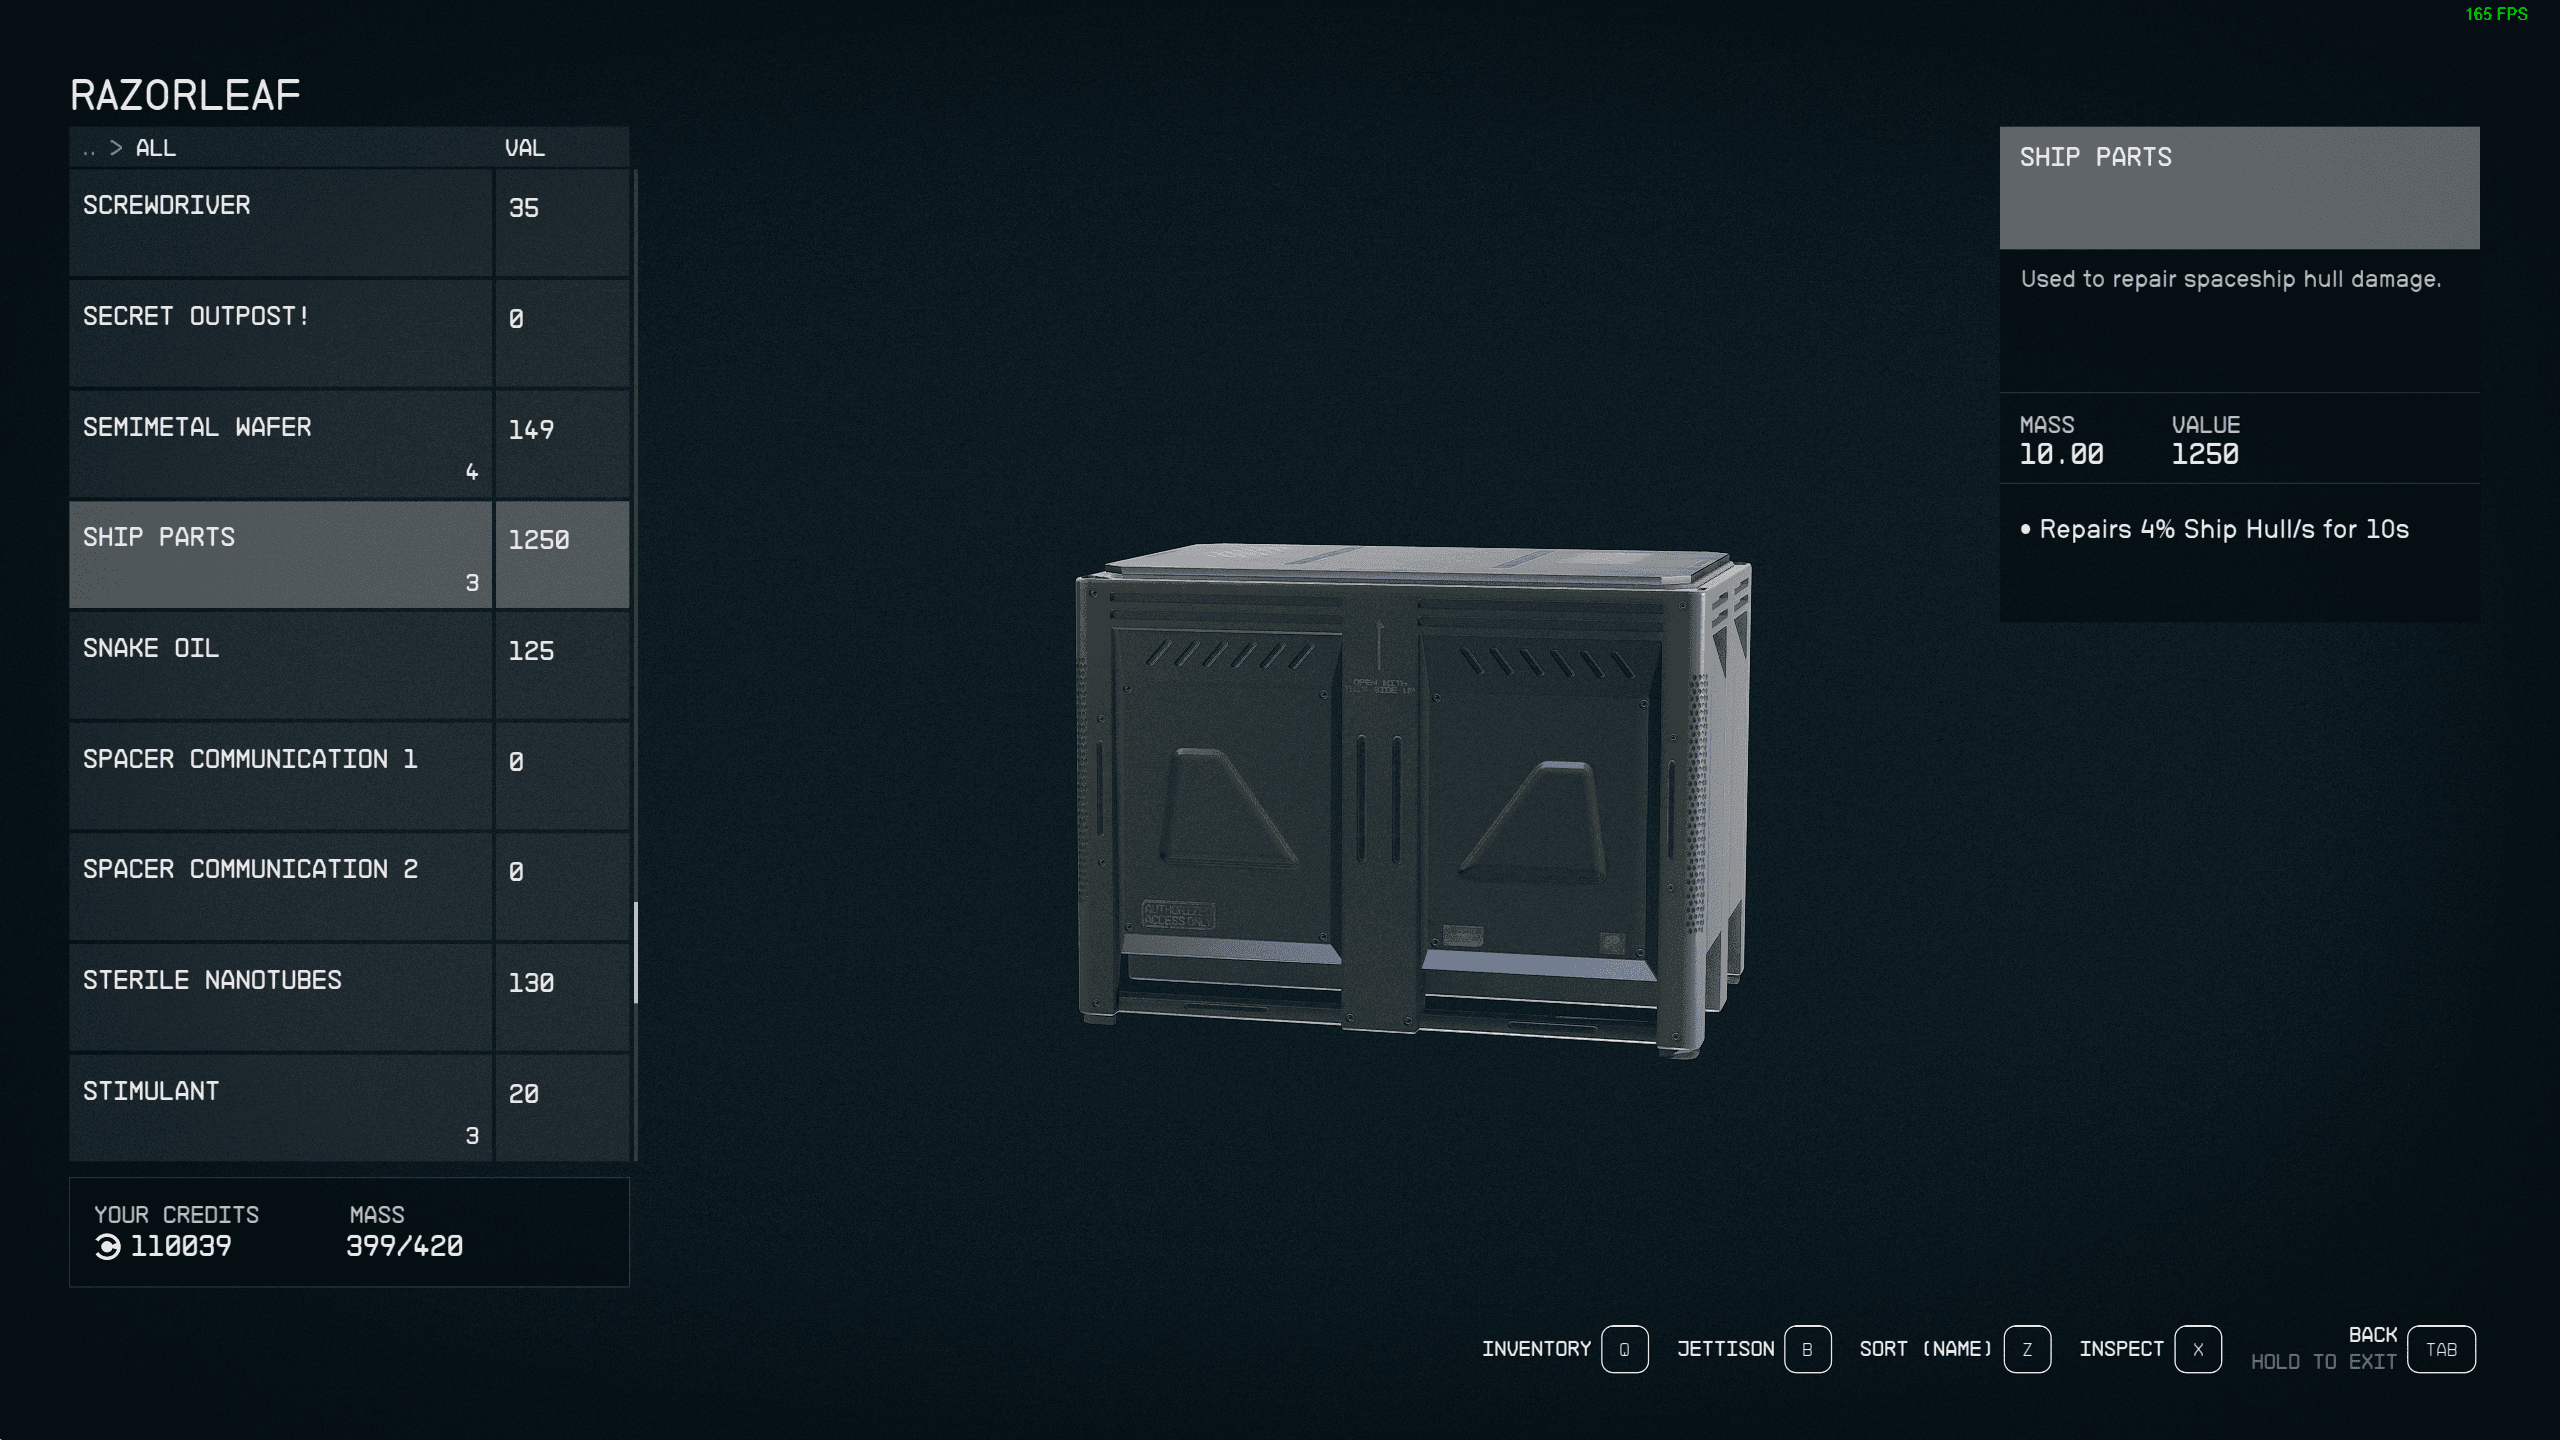
Your ship is a great secondary place to store gear and there are tons of options here. Each ship has a cargo hold and its available size is dictated on how many cargo bays you have built into your ship. The more you have, the more you can store, but there are some drawbacks to creating a freighter, mainly speed, maneuverability, and overall mass.
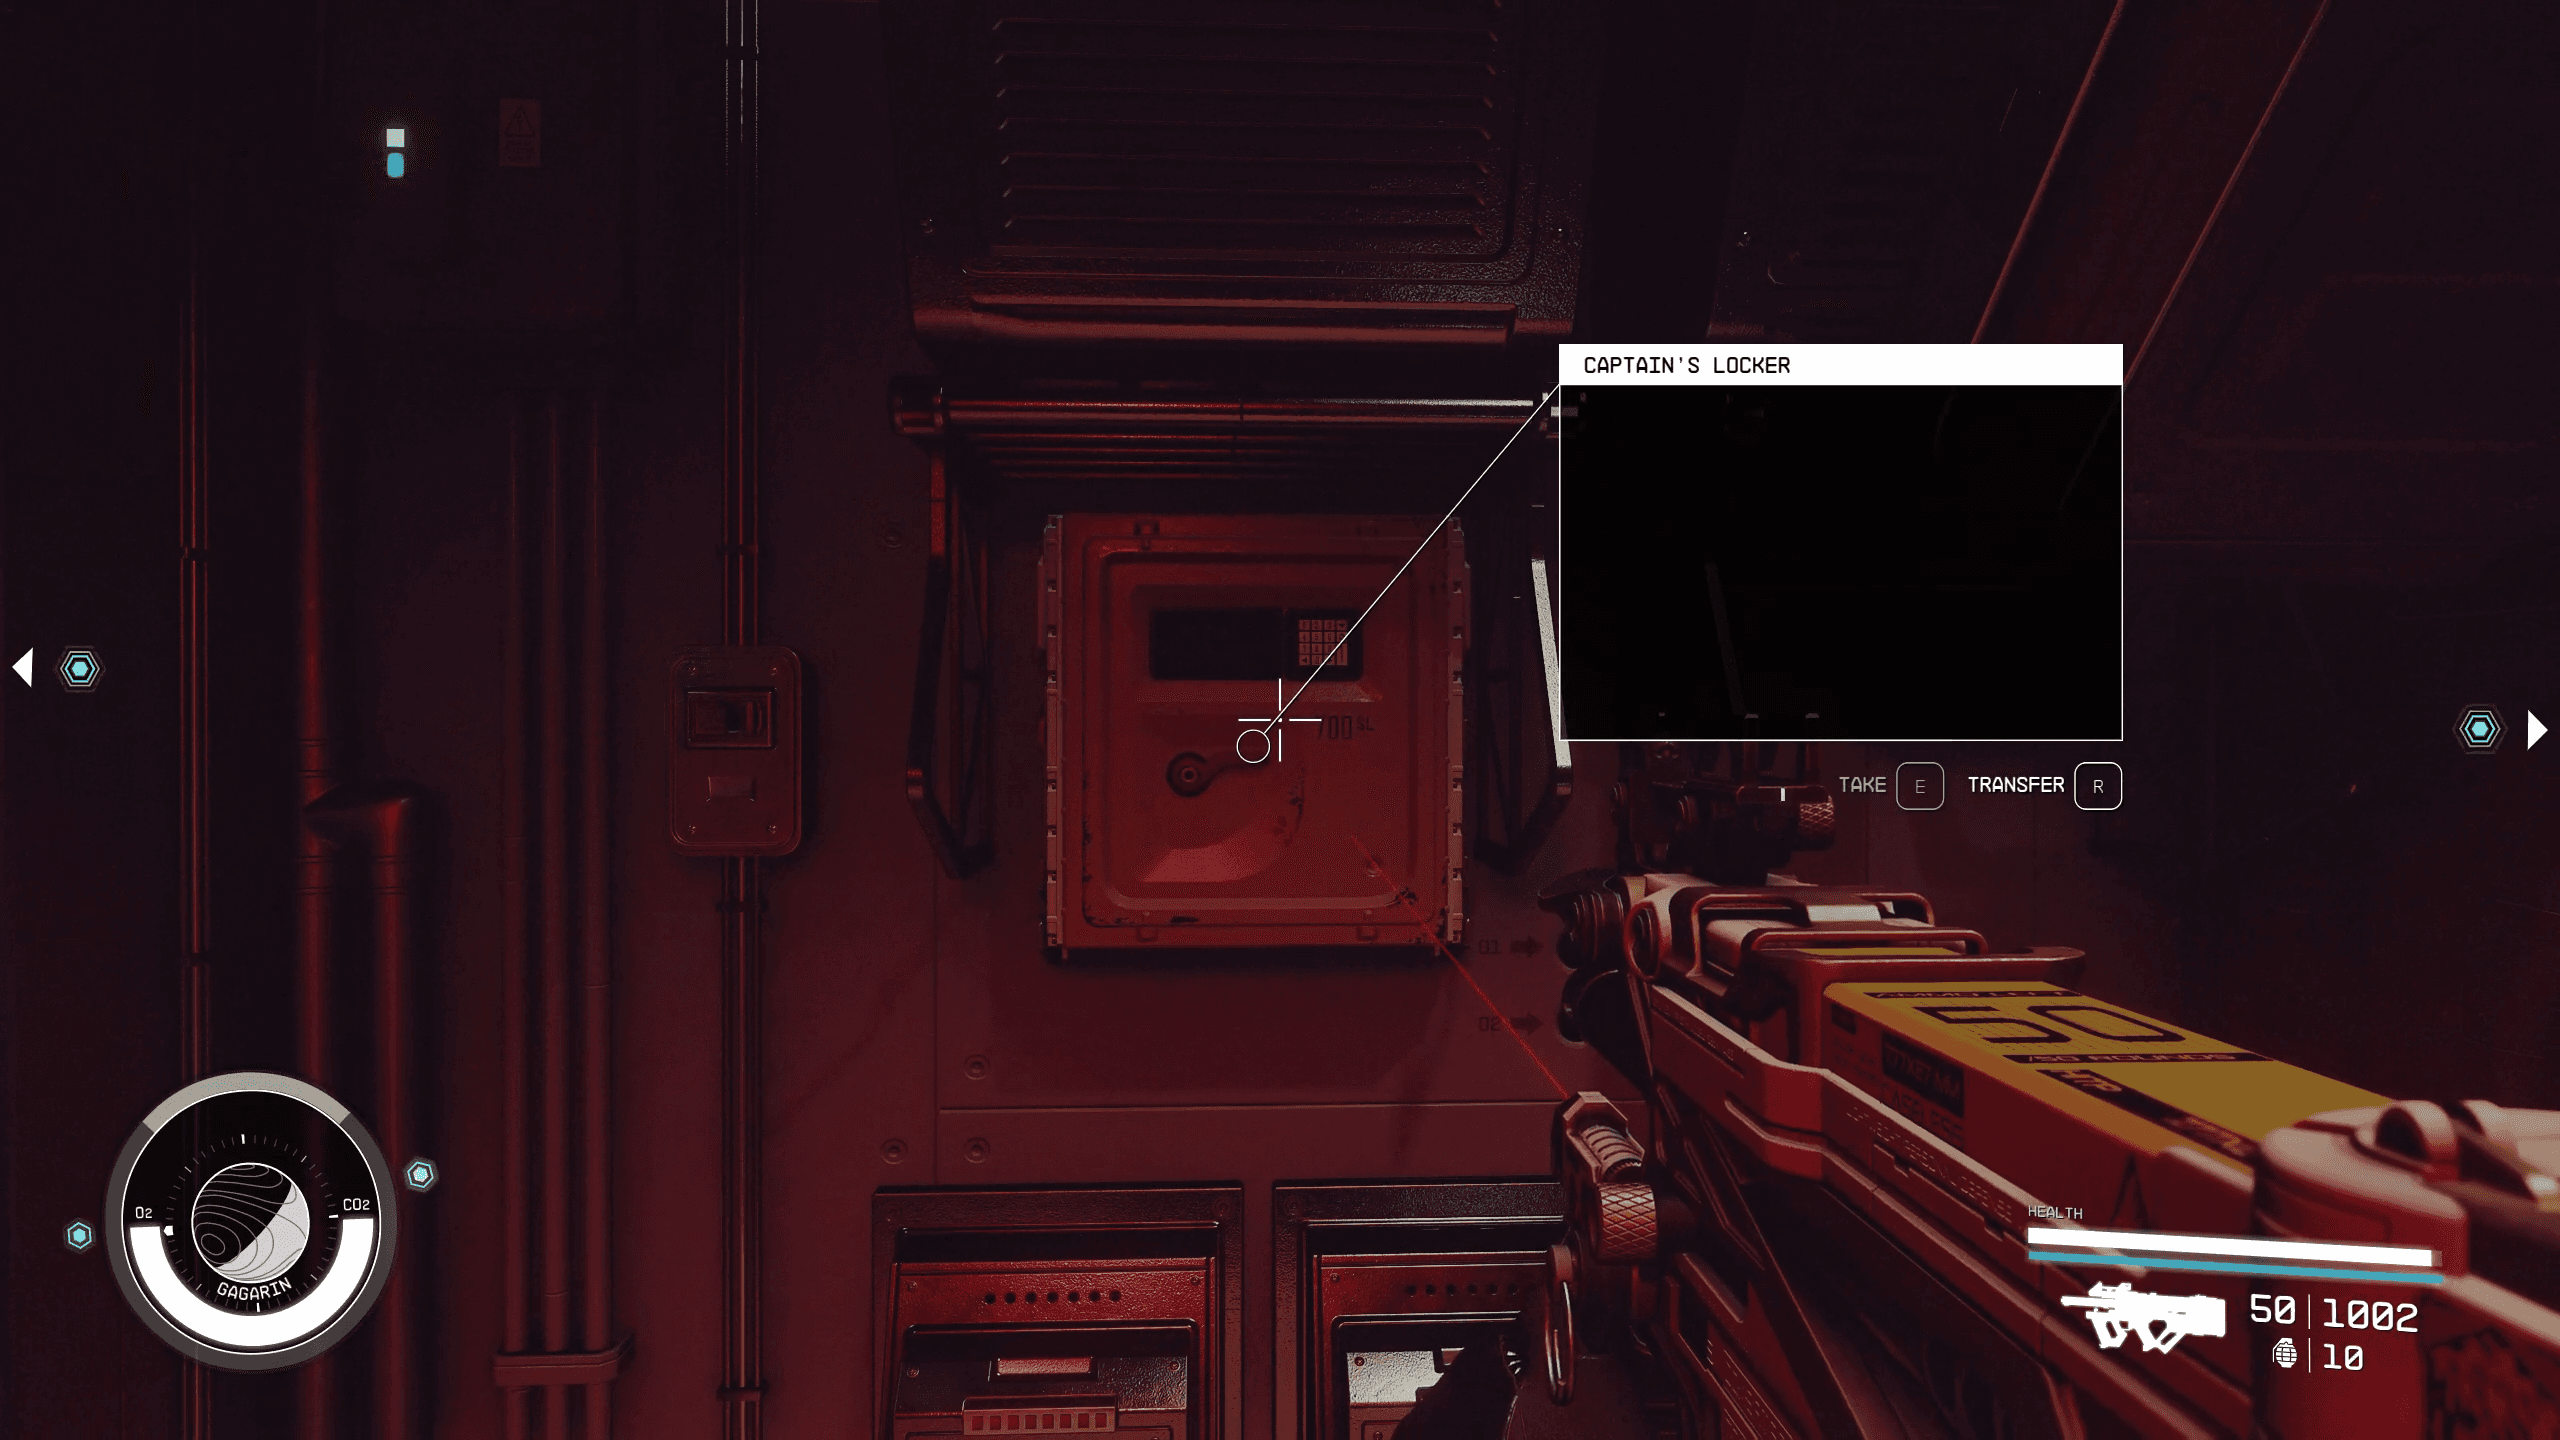
Your ship also features a captain’s locker which allows you to store a choice number of essentials. Think of this as a great place to store weapons, precious armor, things of value you want close by but not necessarily on-hand.
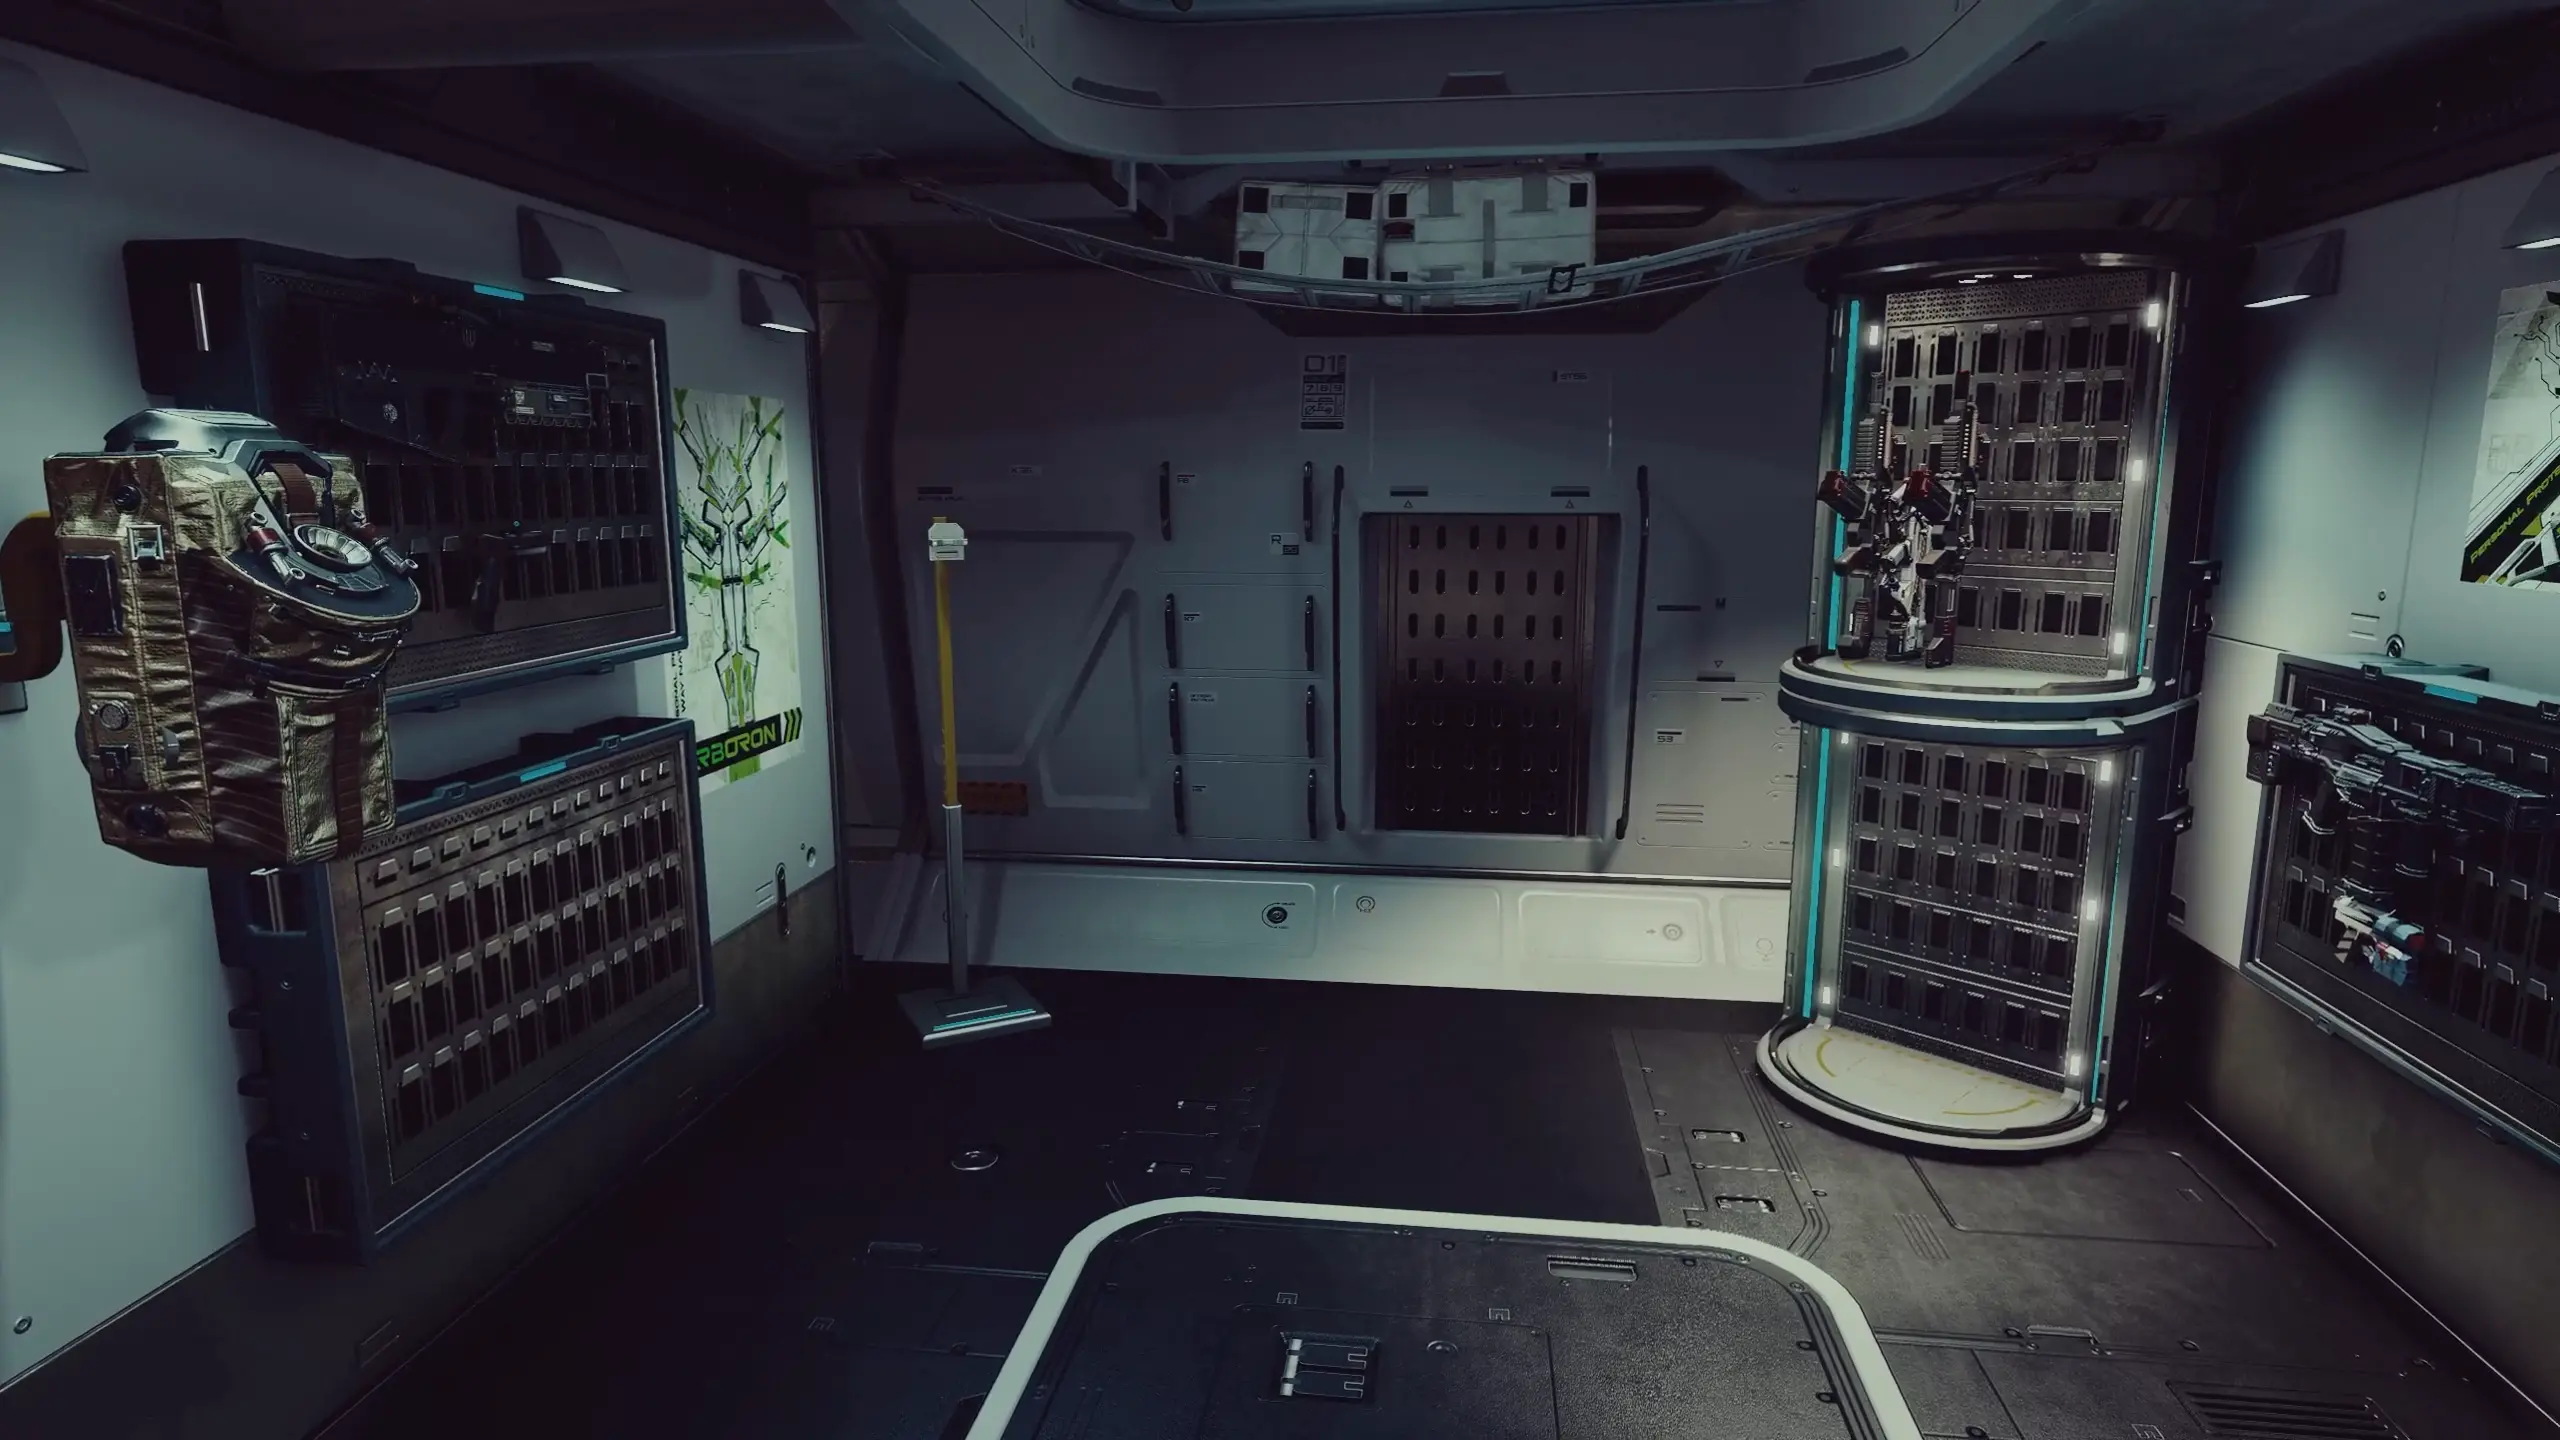
Depending on what HABs you have installed on your ship, you’ll also have other means to store gear. For example, my ship, the Razorleaf, has a built-in armory that allows me to store tons of weapons and gear without using up my cargo hold. Unlike your outpost, your ship cannot be customized from the inside out, all that customization happens in the ship builder mode. Depending on the HABs you have installed on your ship will dictate what things look like on the inside, but that’s something you don’t necessarily experience early on in the game.
In terms of gear, you can also rely on your companions to pick up the slack. You can offload anything from your inventory into their inventory but be warned you will need to manually retrieve it at some point. Whatever your companions are holding does not get pulled into any crafting station so they’re good as a small pack mule, nothing else.
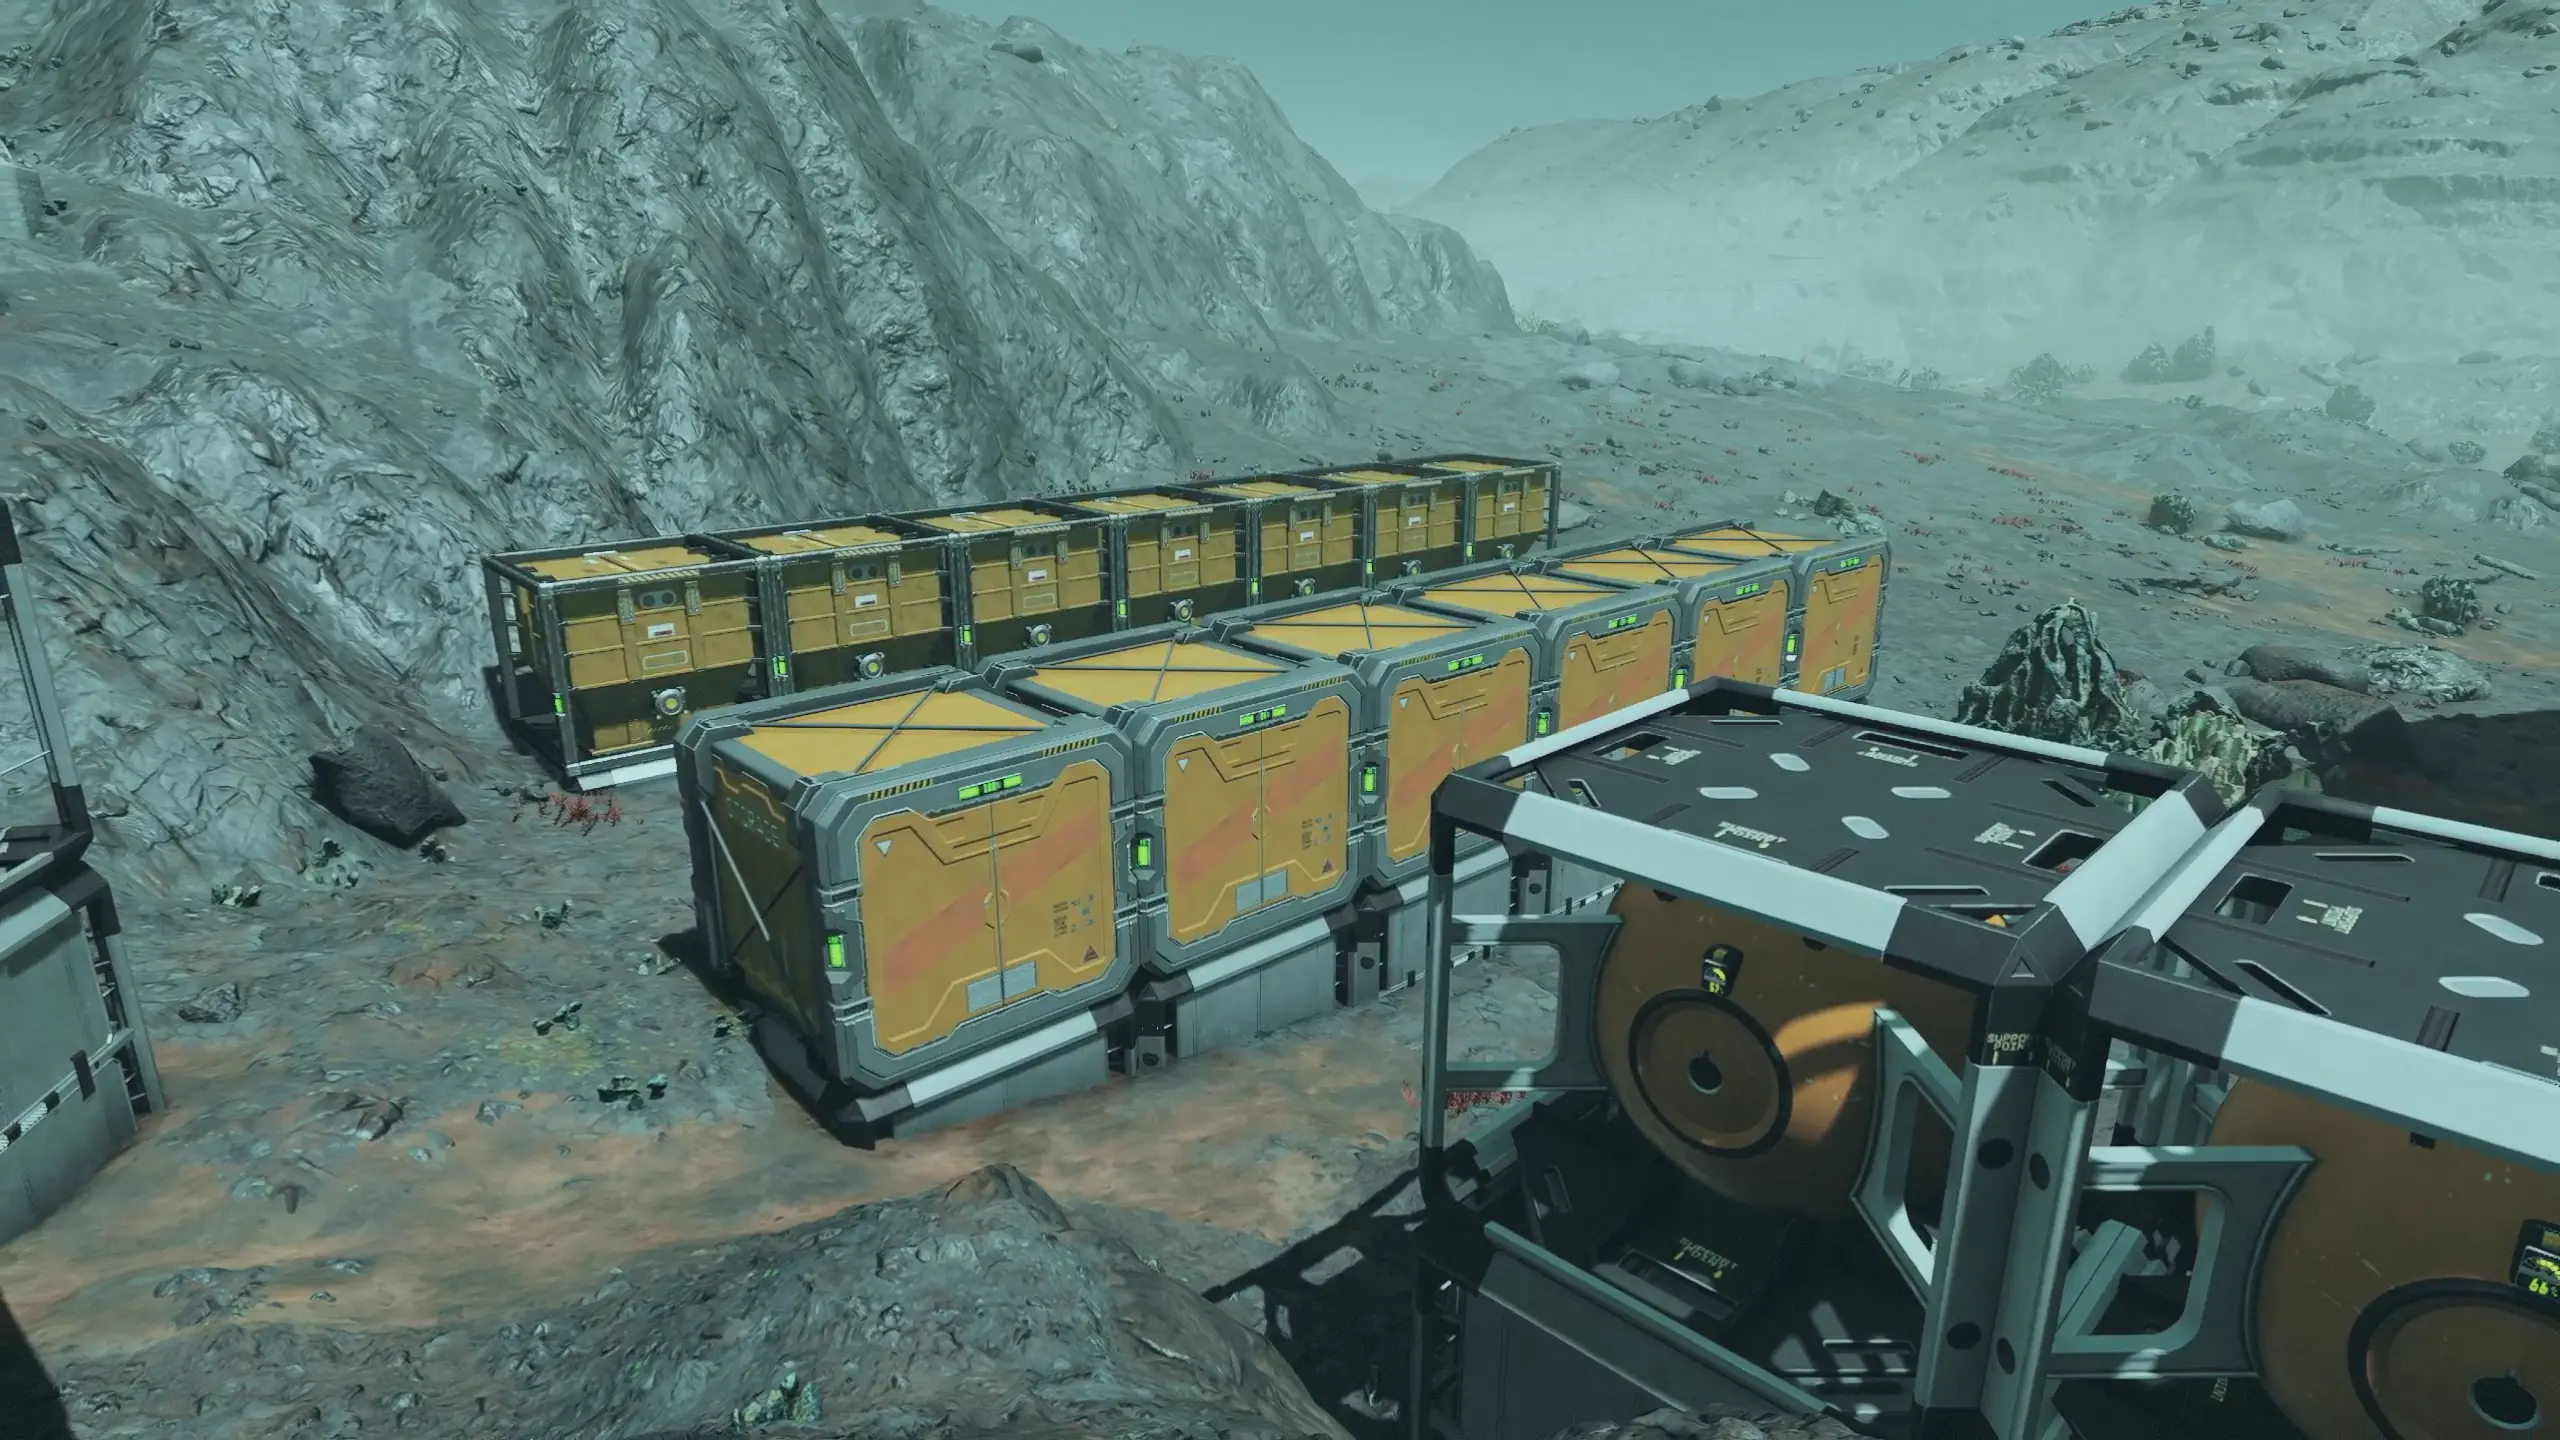
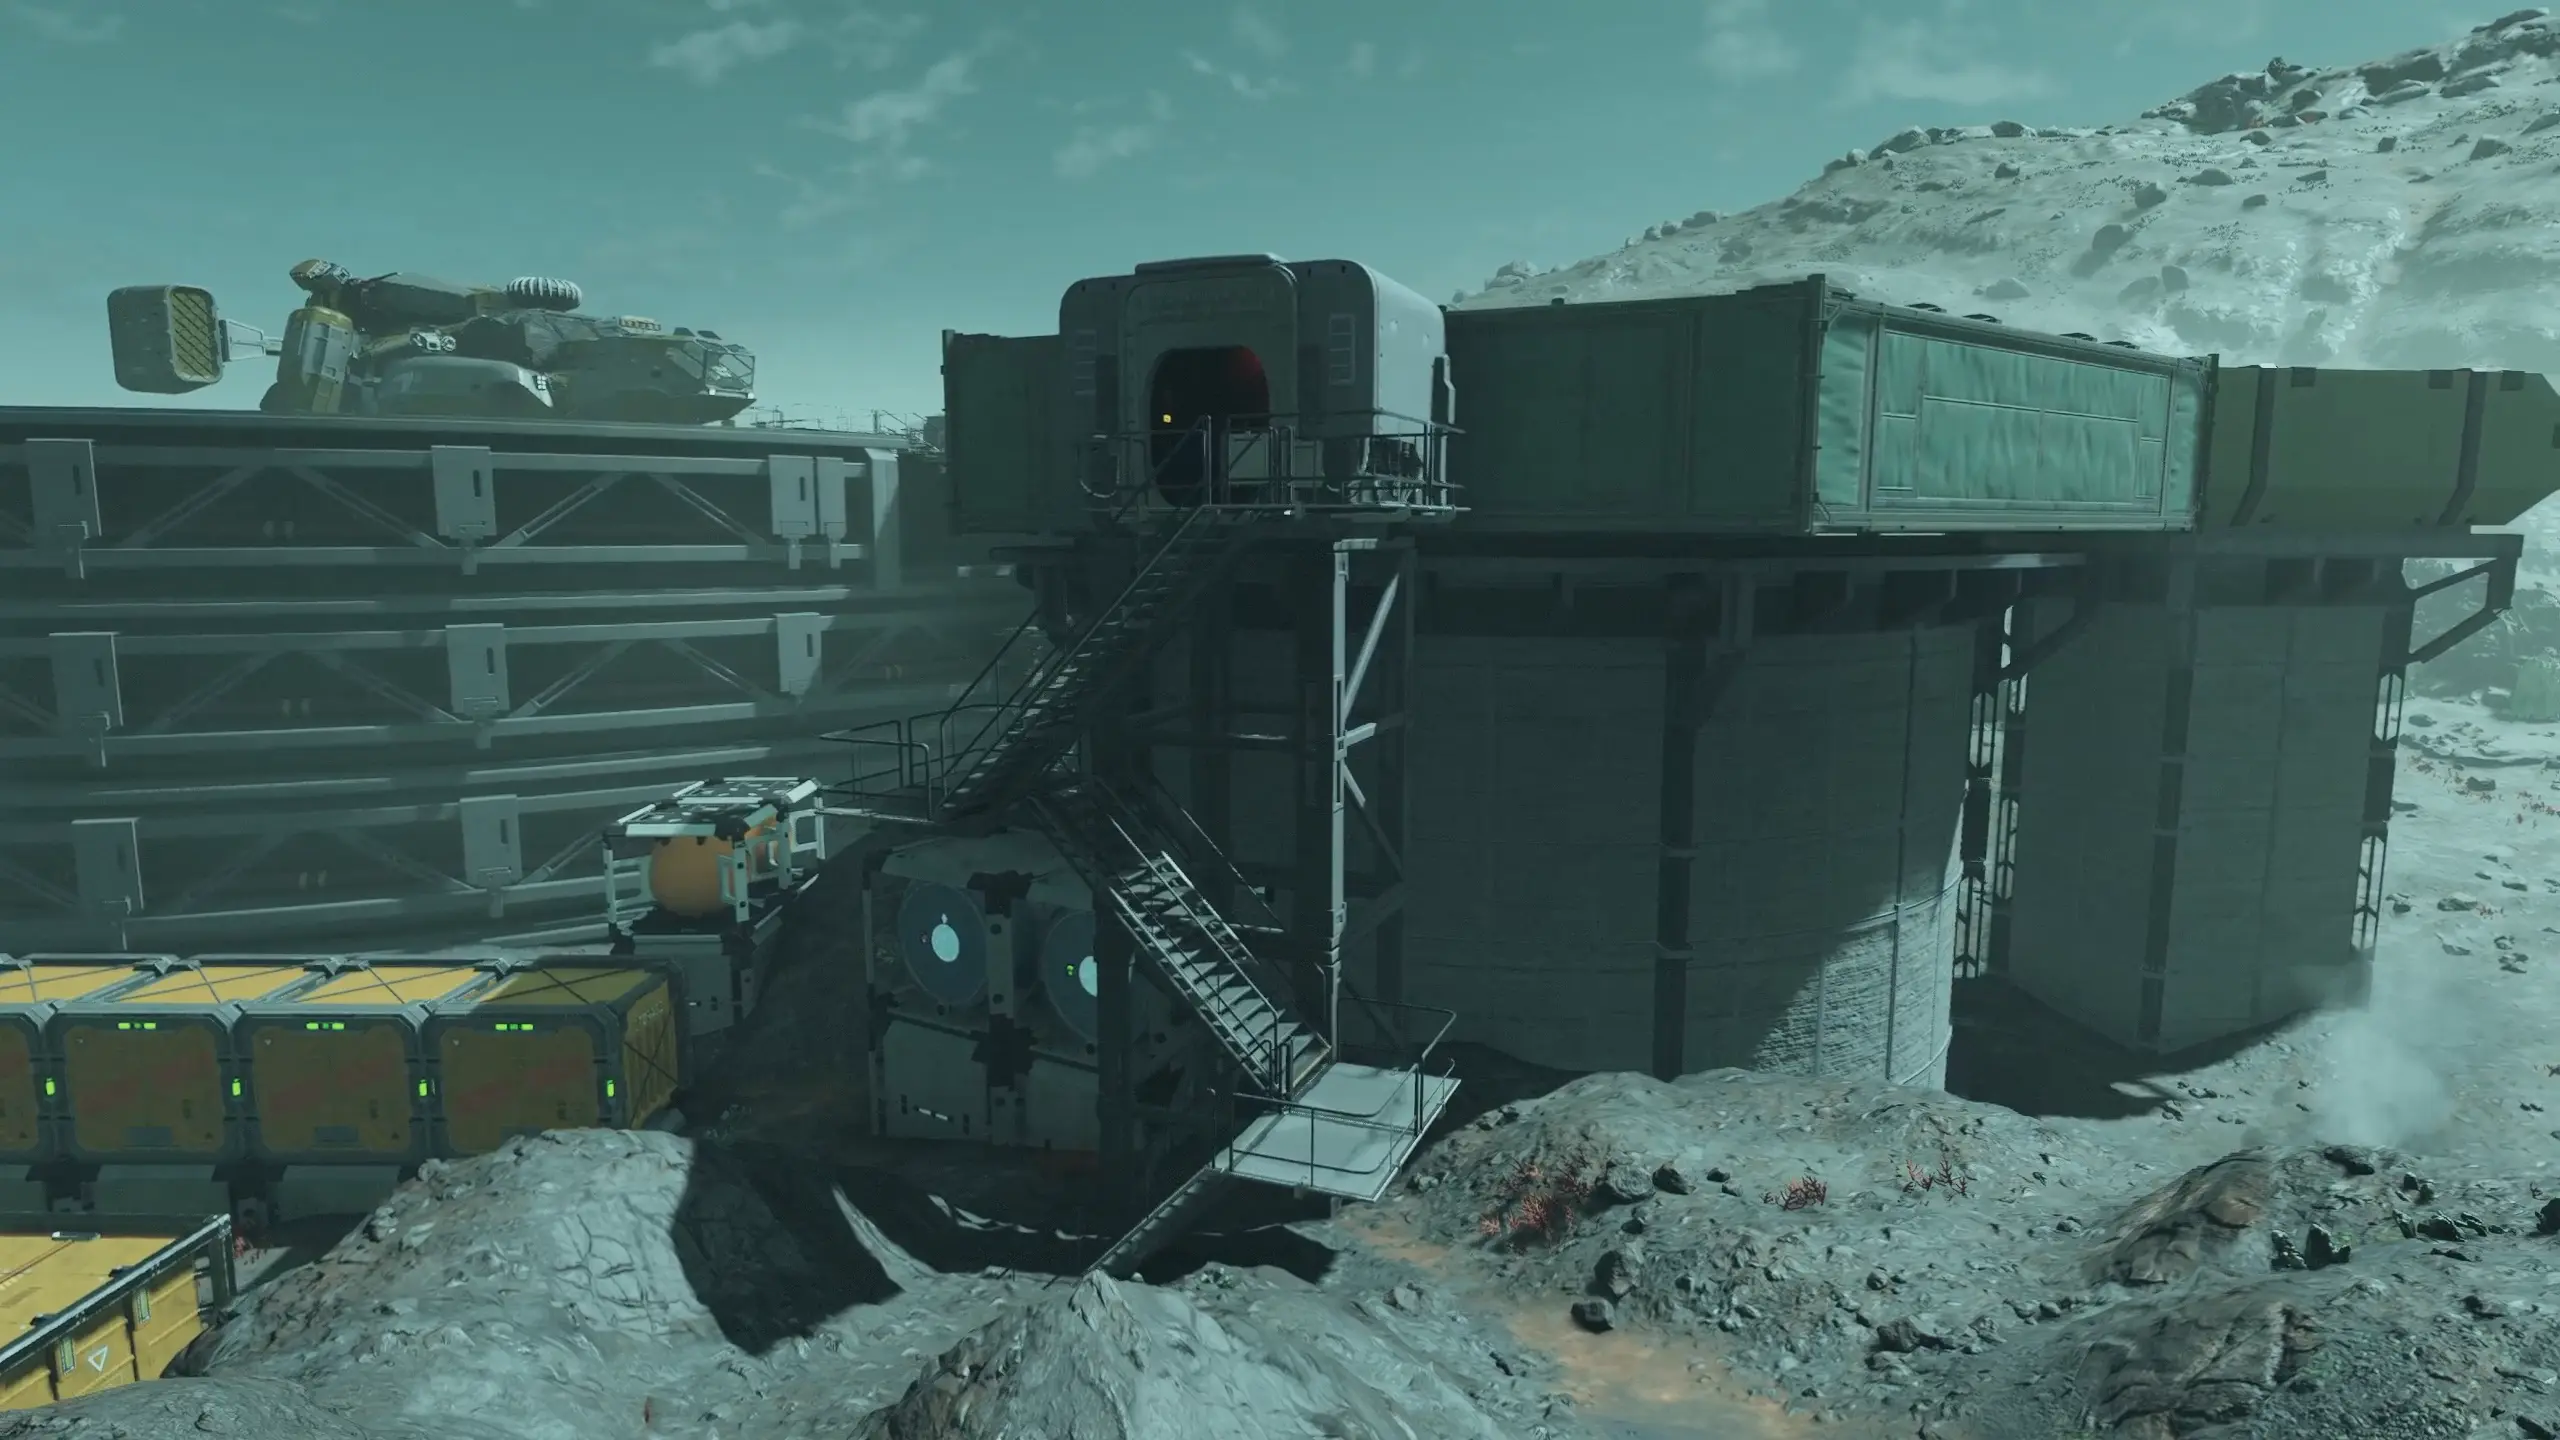
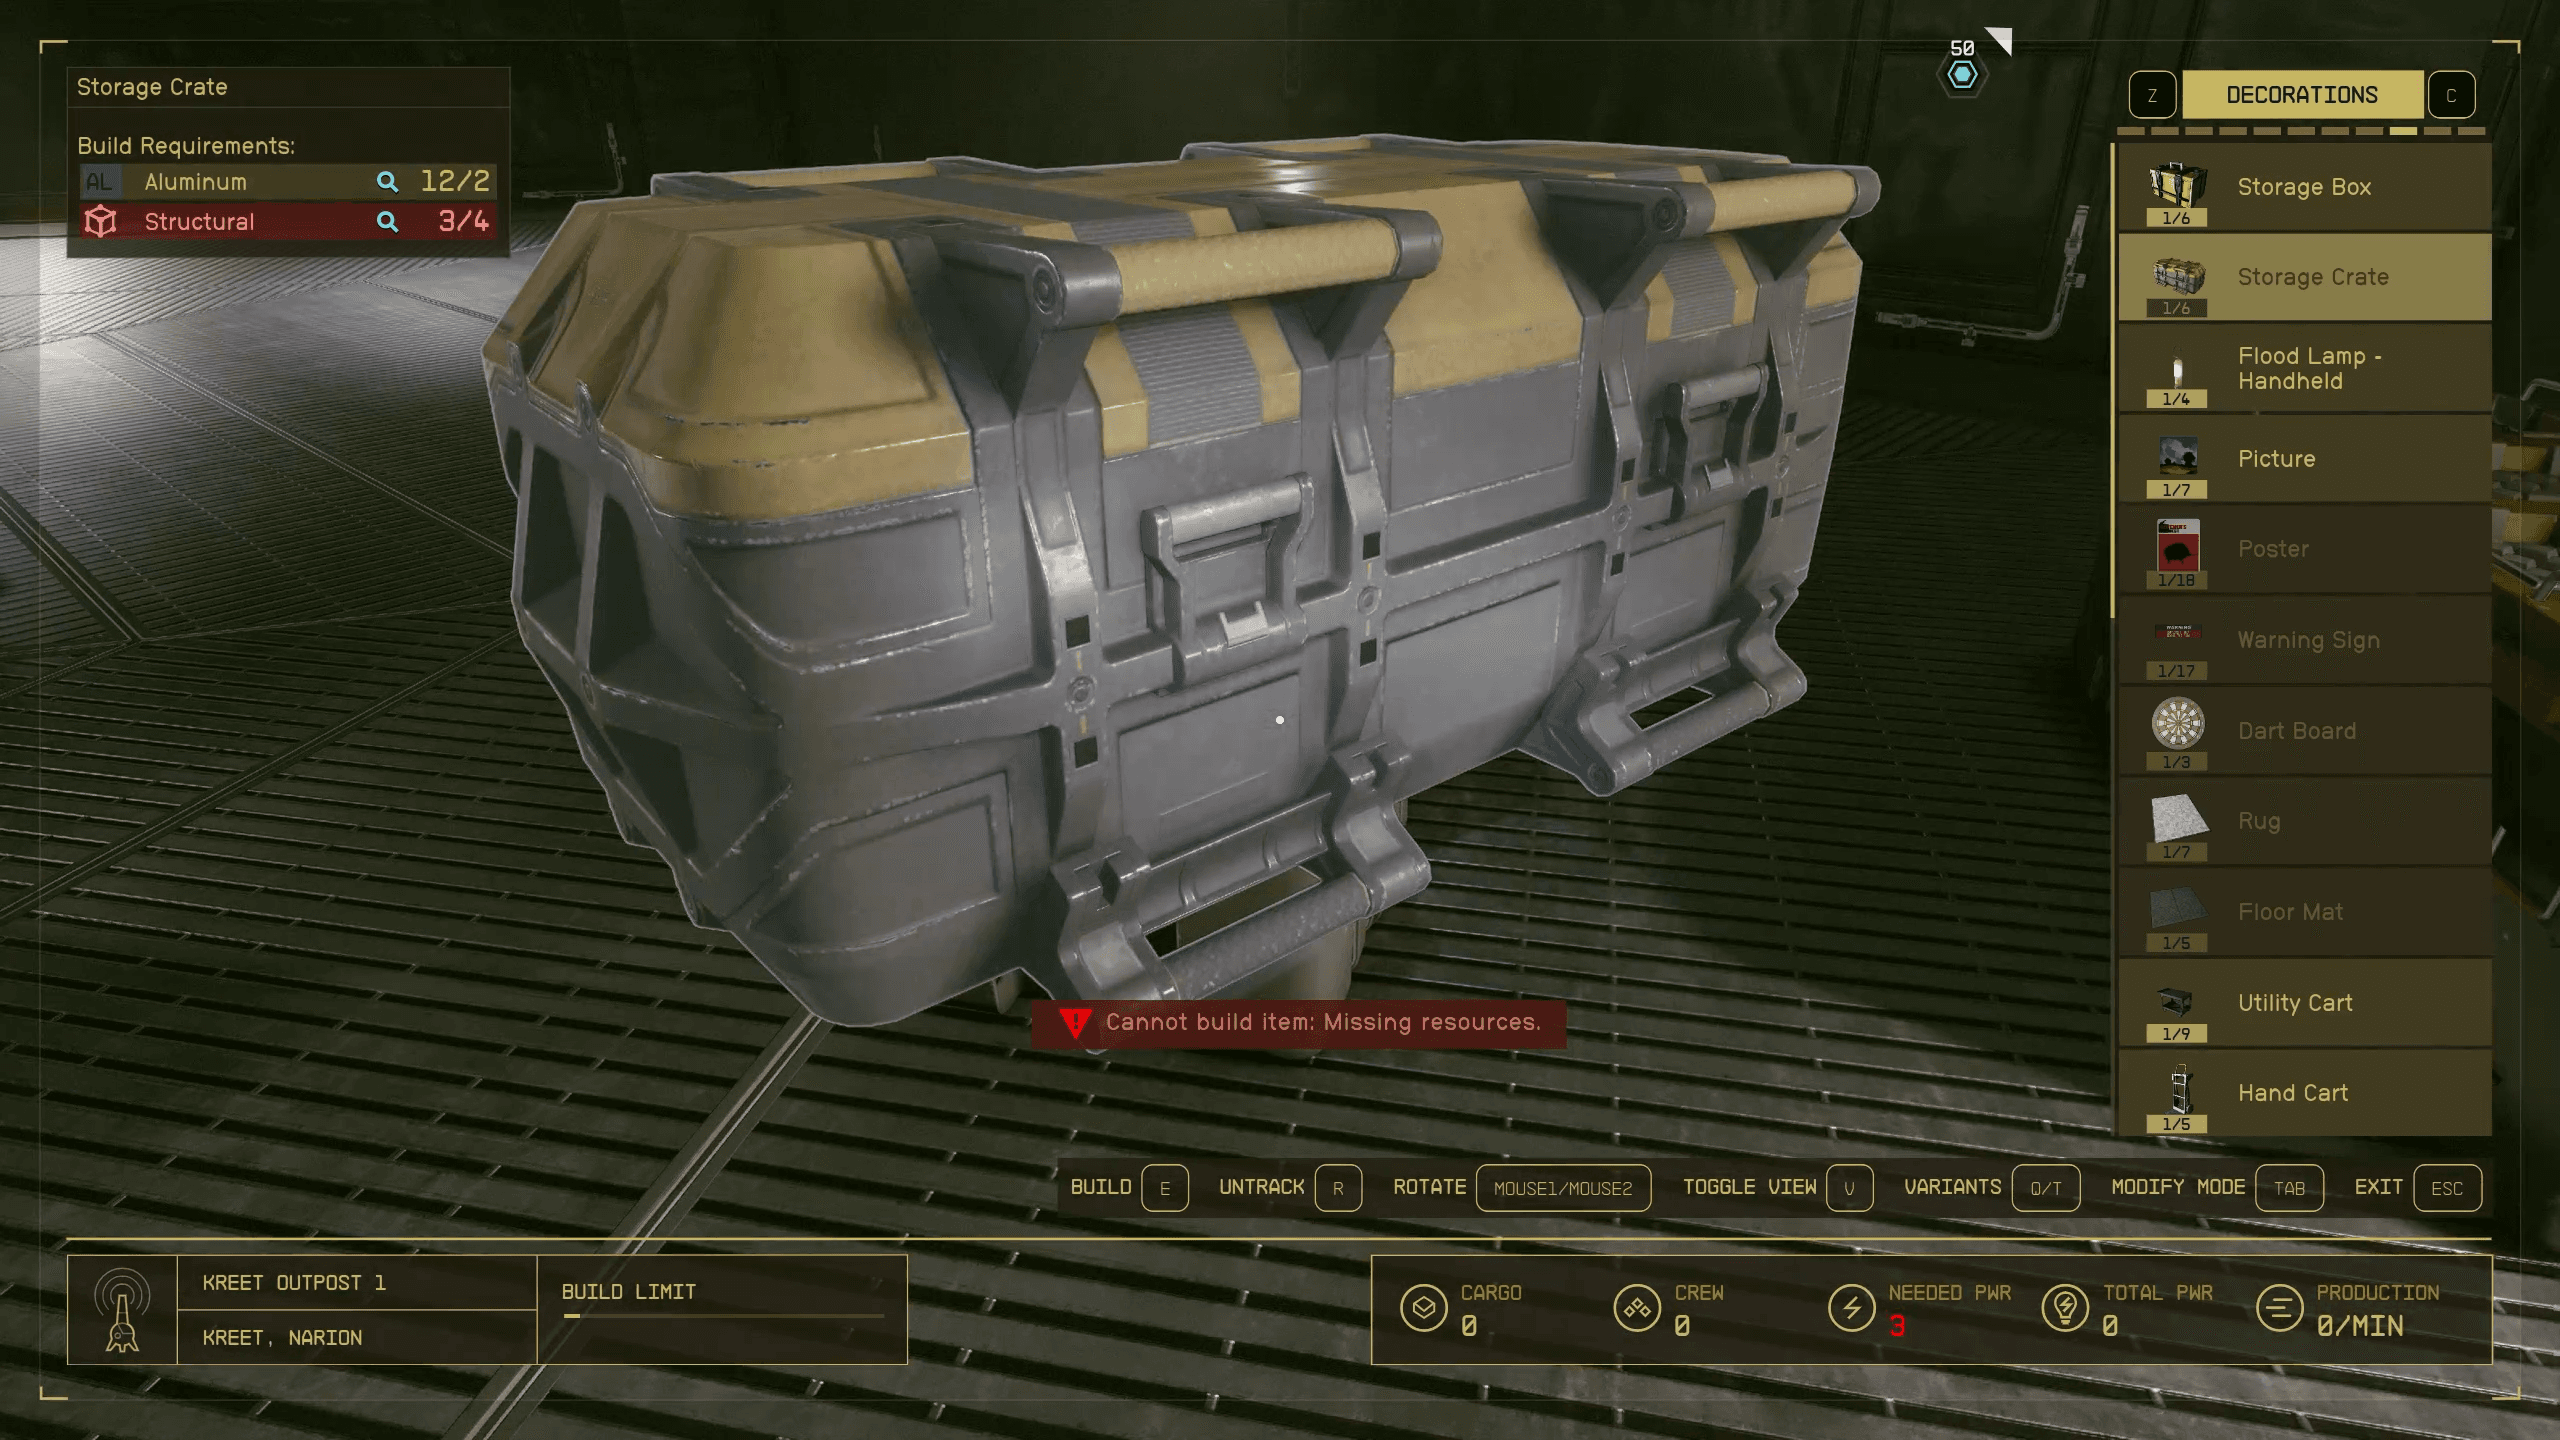
Then there’s your outpost, which is honestly its own game within a game. You could spend dozens if not hundreds of hours flying across the galaxy, farming resources, and working on your outpost without ever actually doing missions. It’s a familiar system, built on a foundation from previous Bethesda games, but the level of depth and customization here is impressive. What we care about at this moment however is storage and yes, your outpost or outposts can serve as a great way to store gear, stash weapons, and display armor. Like any good base there’s loads of flexibility and there’s a lot of ways you can interconnect various subsystems to make things seamless.
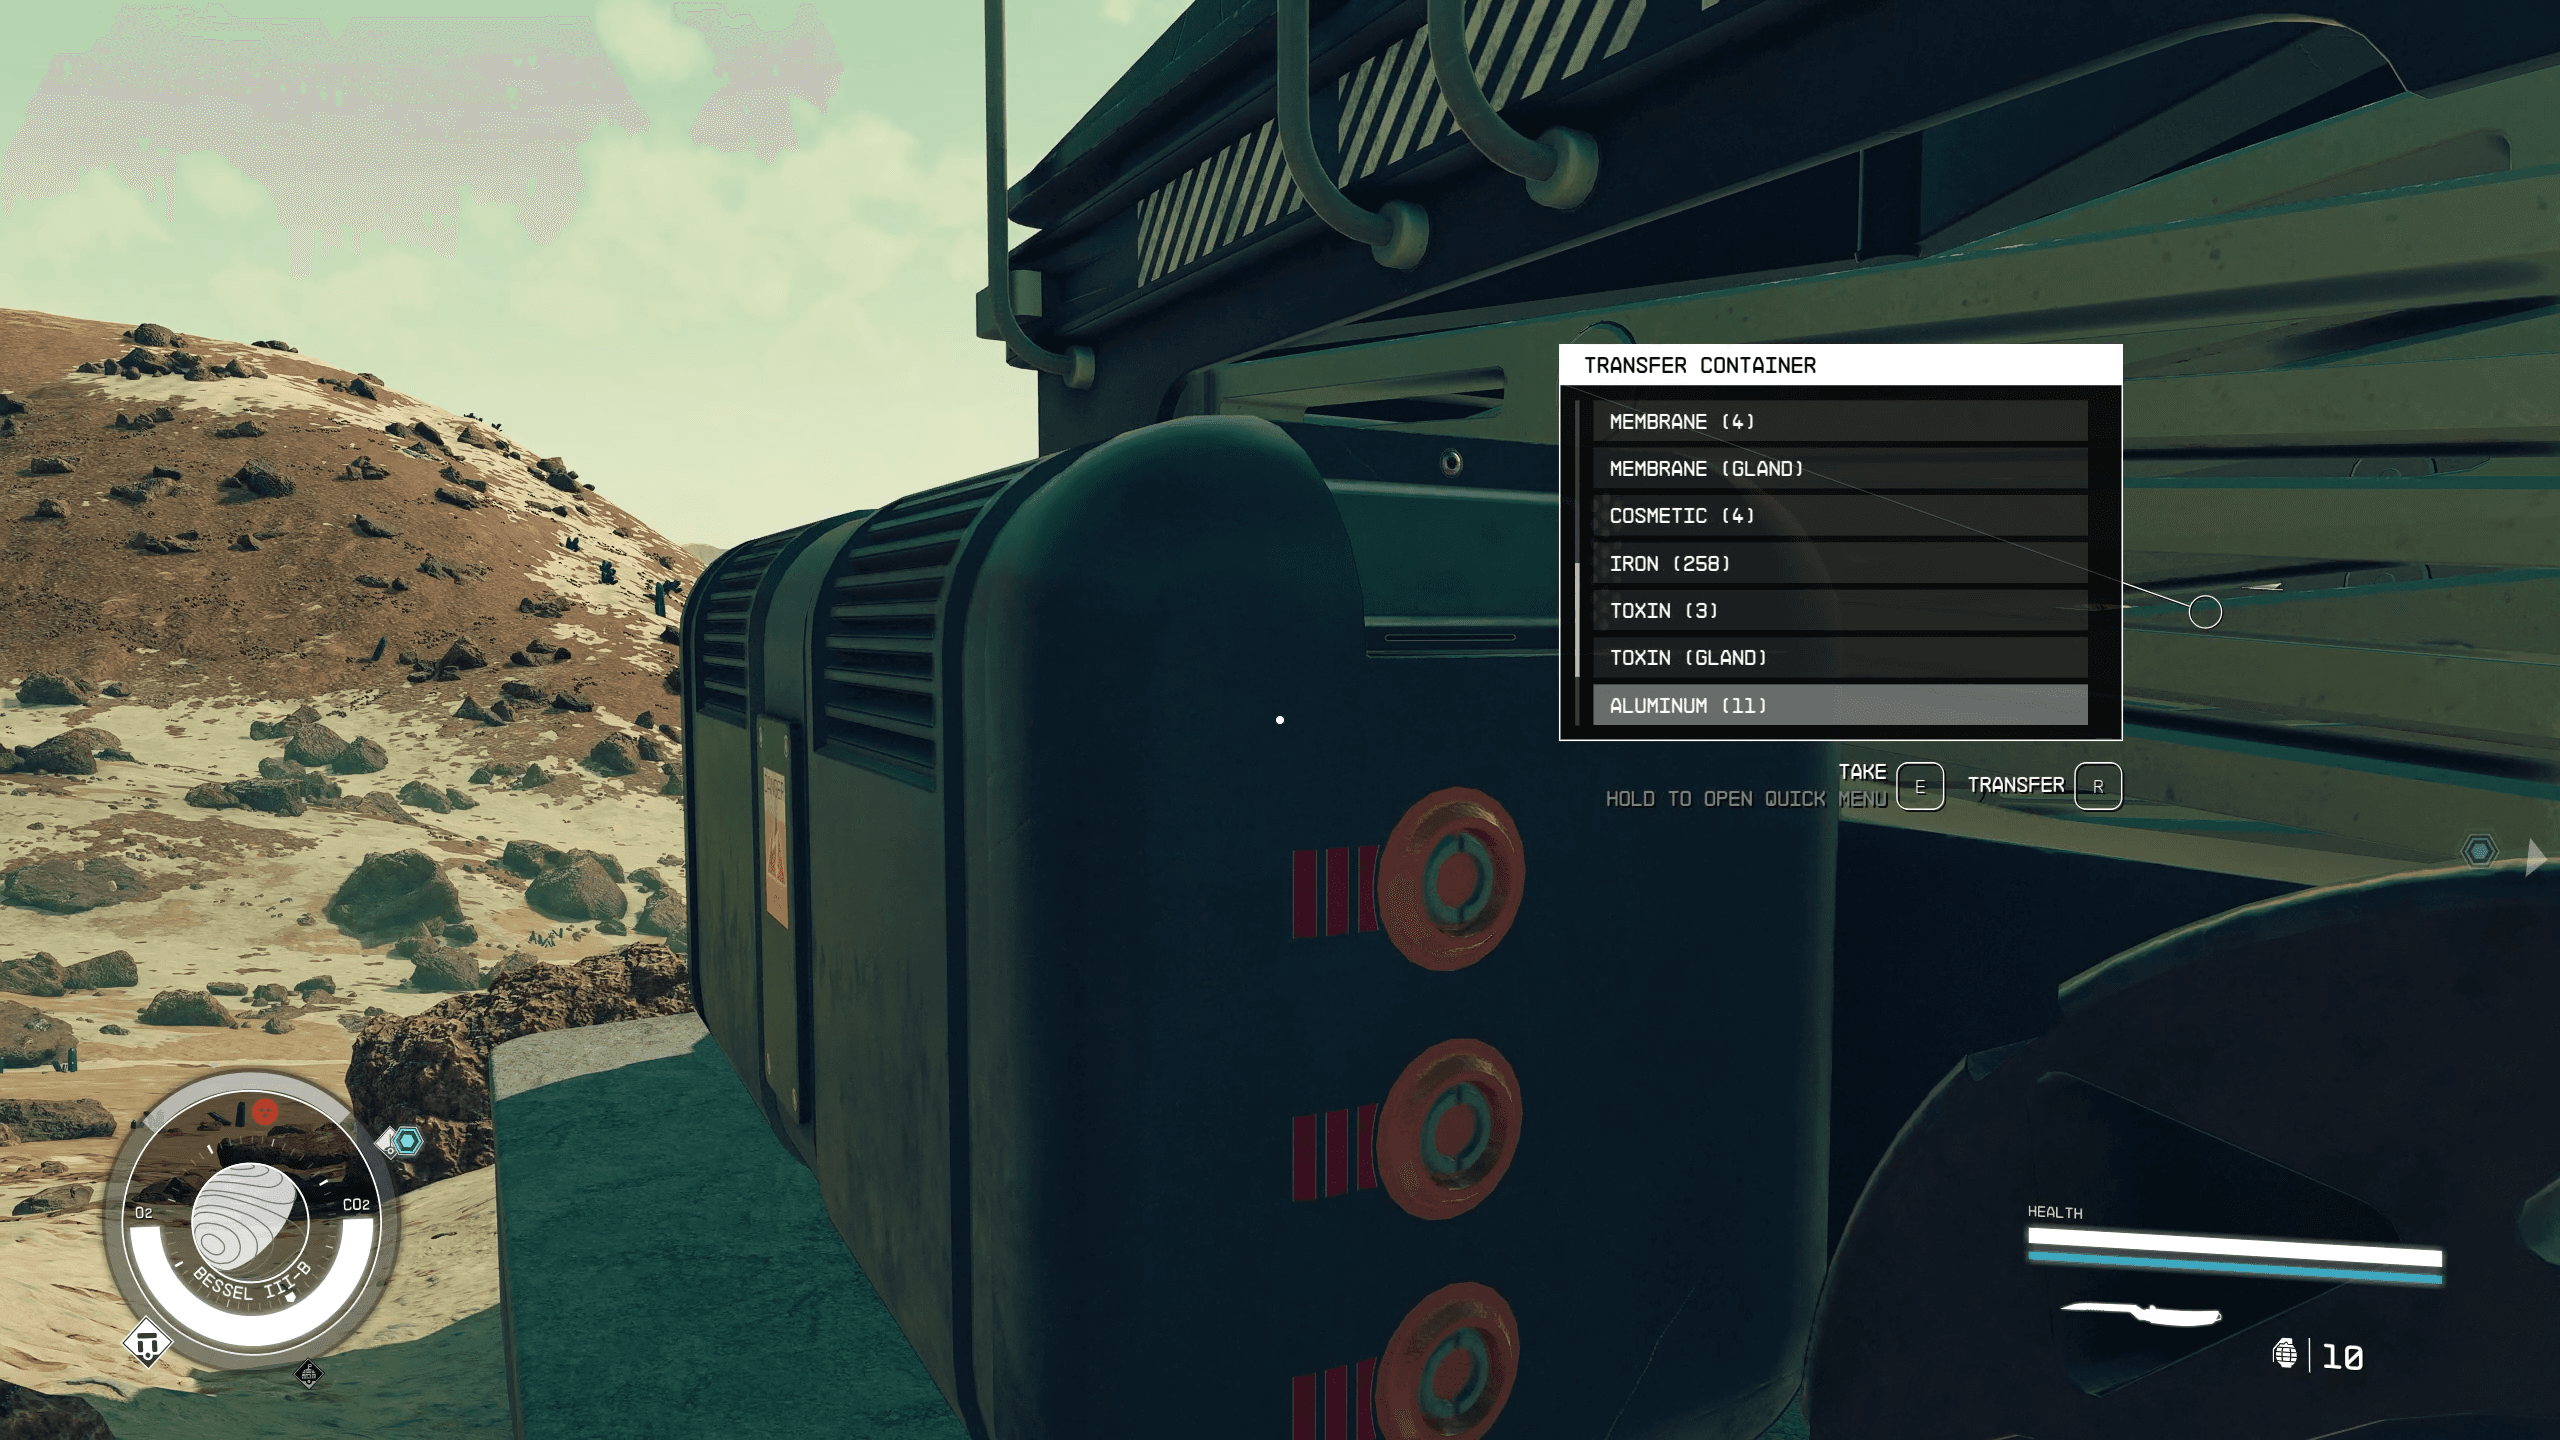
For example, you can build a transfer container, which allows you to move items from your ship to a temporary storage container. You can then link that transfer container to a variety of permanent storage containers and warehouses that will automatically pull in specific materials that match certain parameters. With enough time and effort, you can practically automate your base and since your crafting tables and fabricators can utilize resources stored at your base it’s an awesome way to keep your resource and crafting chain interconnected.
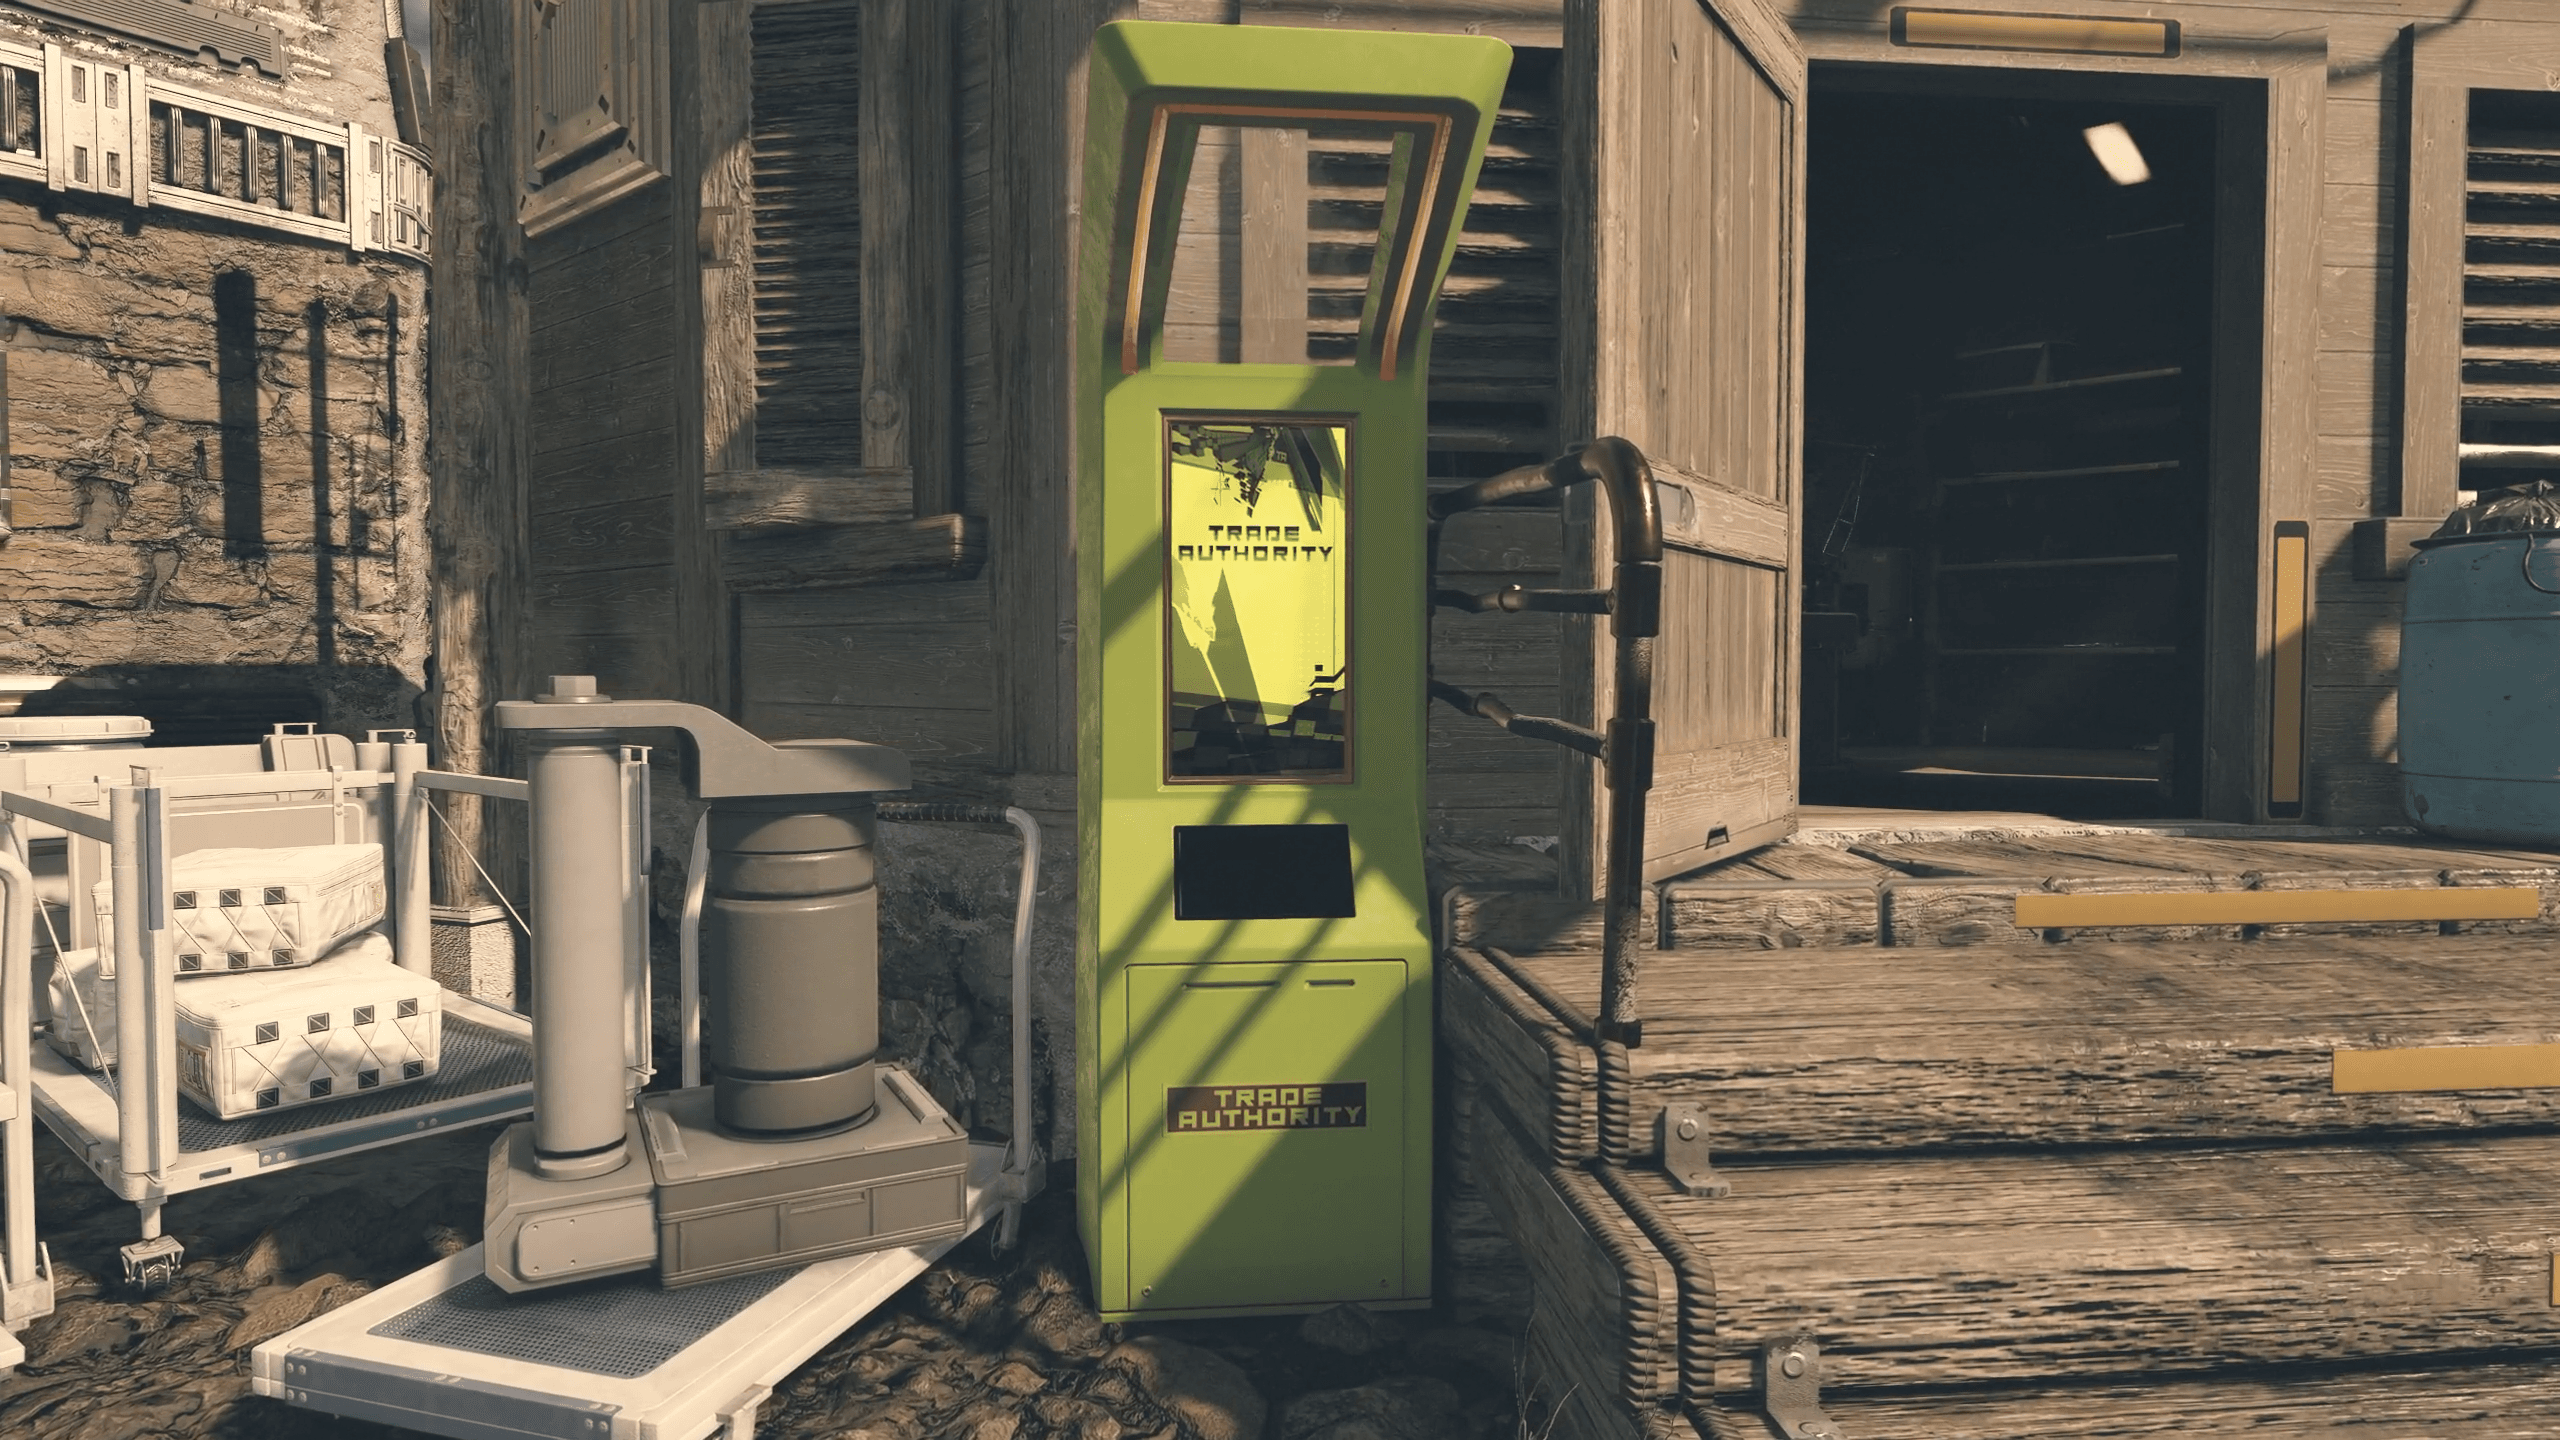
When all else fails, or you just need some credits you can take whatever’s weighing you down and sell it. For new players know that there is a bright greenish-yellow kiosk right near where your ship lands at each major city. This is a simple and effective way to sell good, but you should know different vendors have different merchandise *and buy and sell for different values so get comfortable with the local merchants.
Companions
We touched on companions briefly before, but I think it’s worth talking about them more in-depth. You’ll meet a lot of interesting characters throughout your journey and it’s wise to always consider bringing them on as part of your crew. With a fleet of ships and a handful of outposts to manage you’re going to need some help.
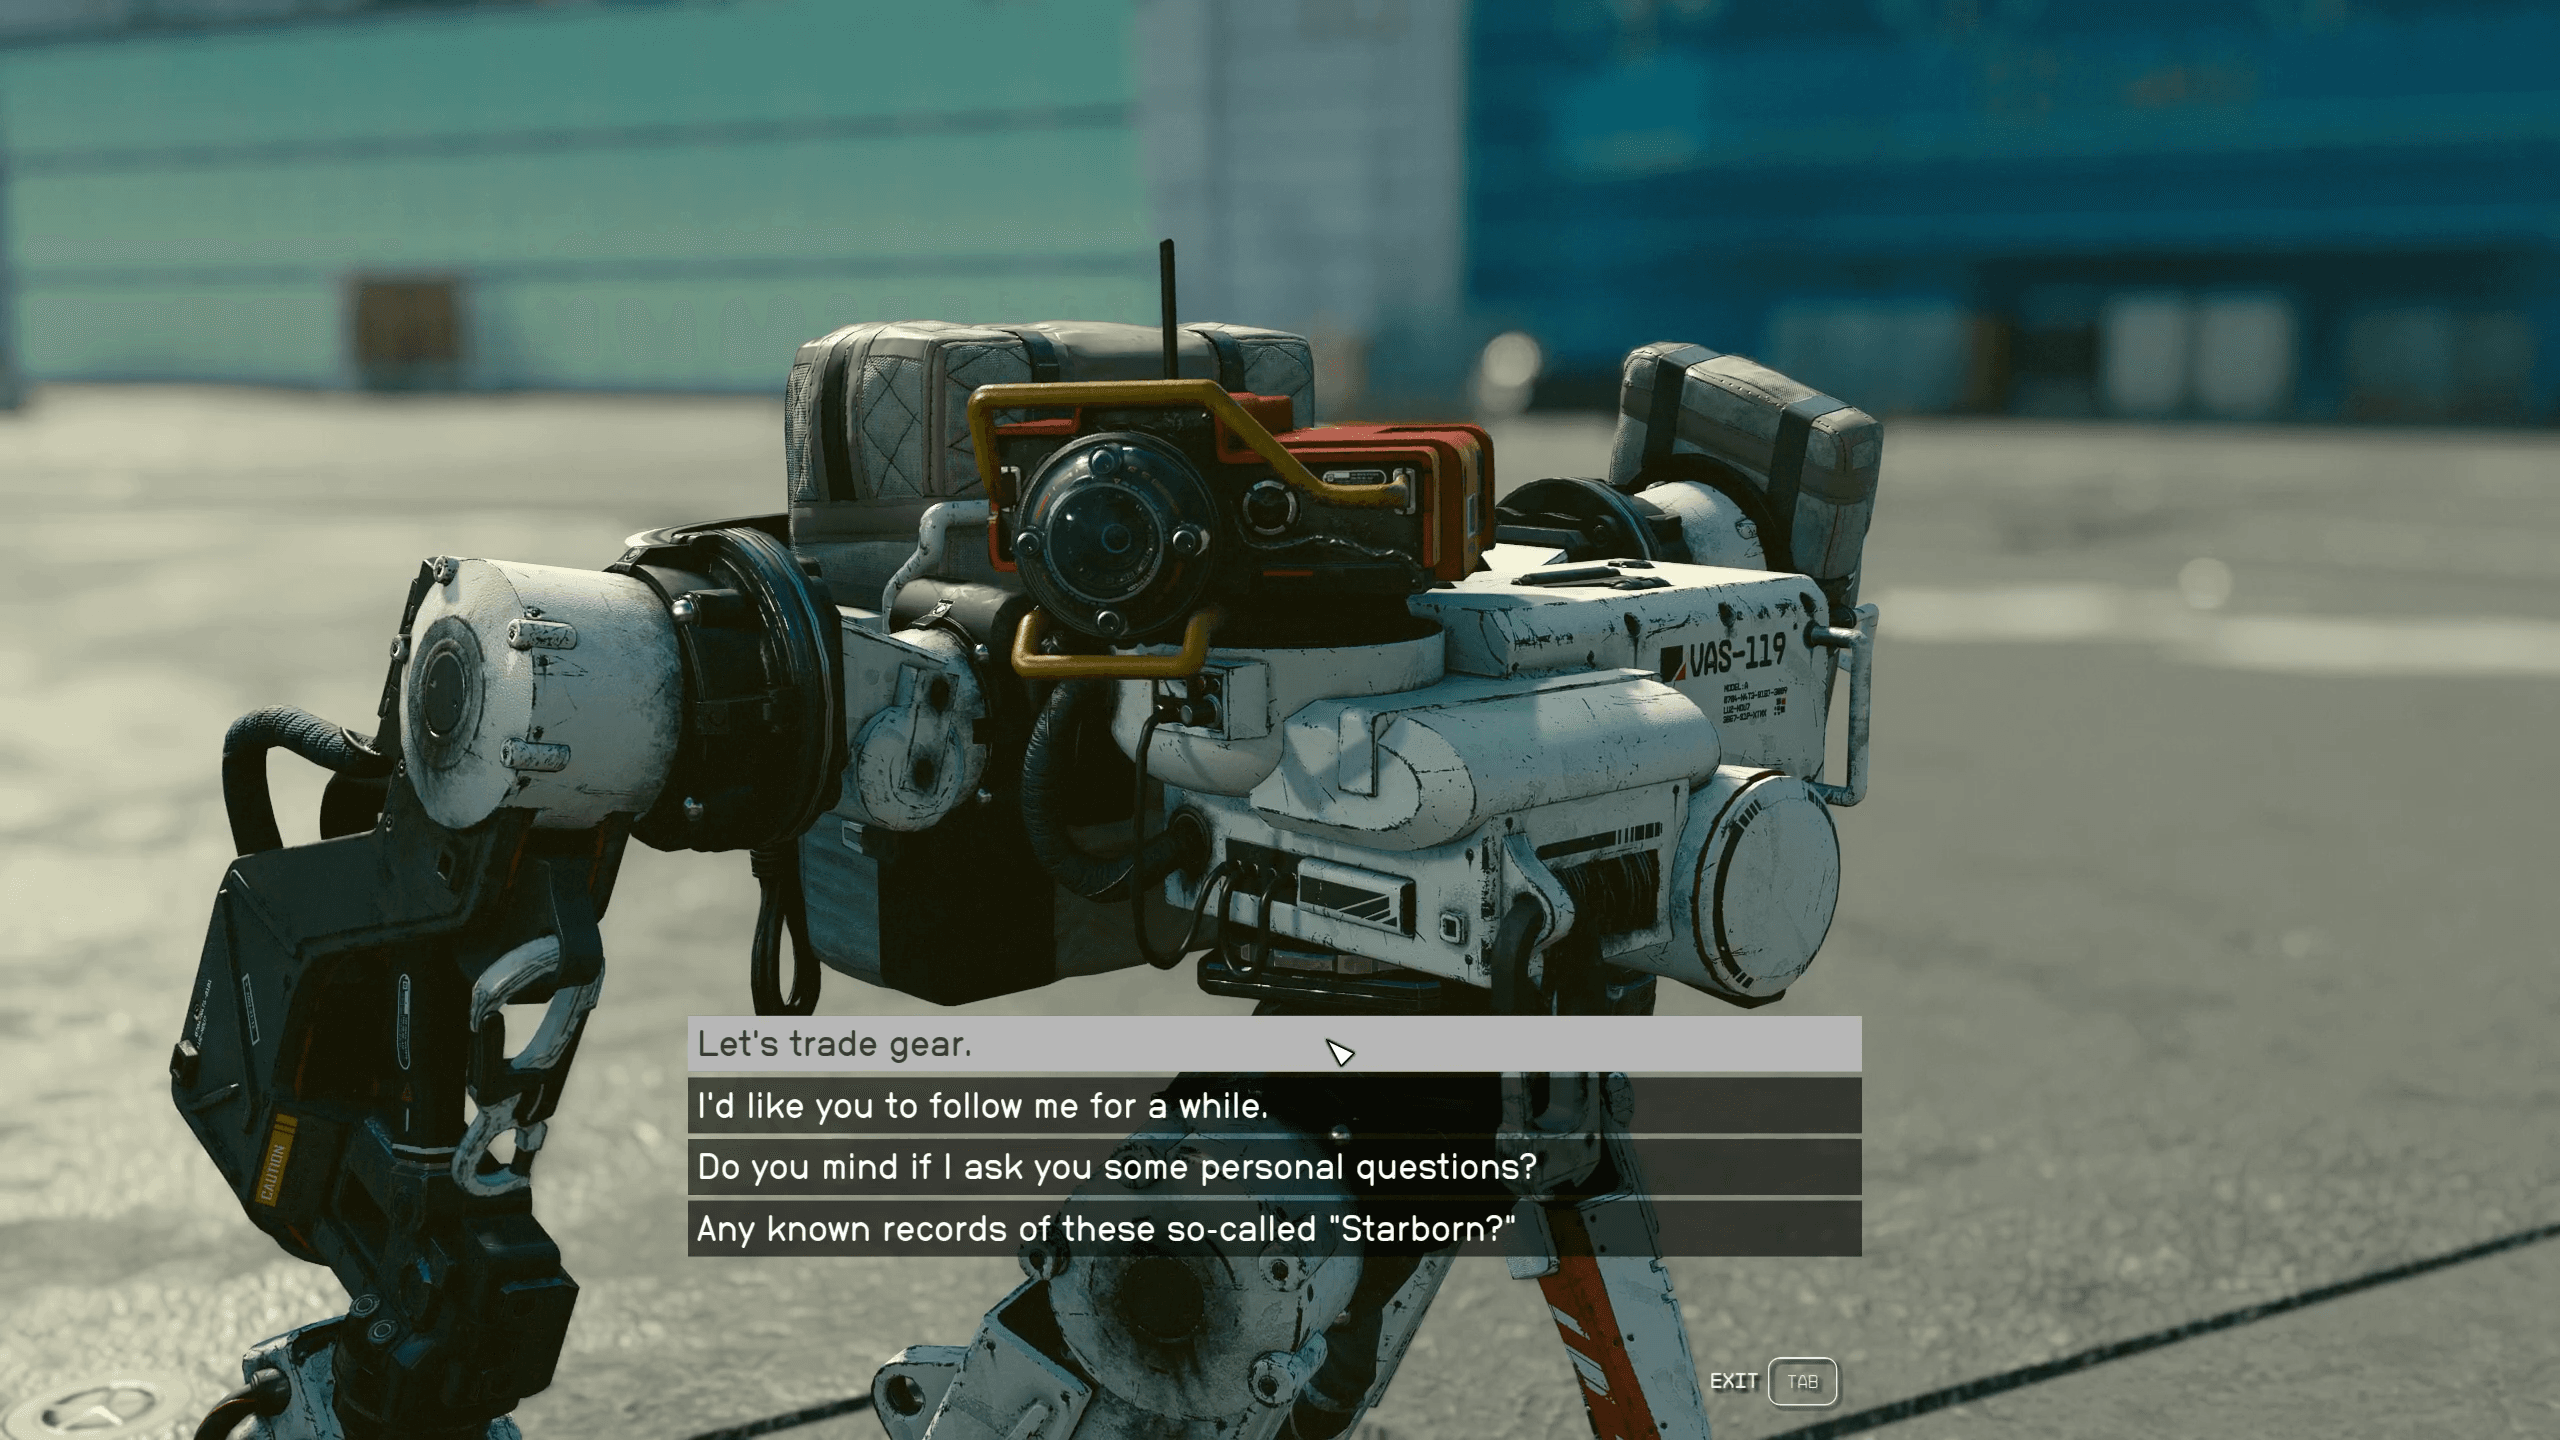
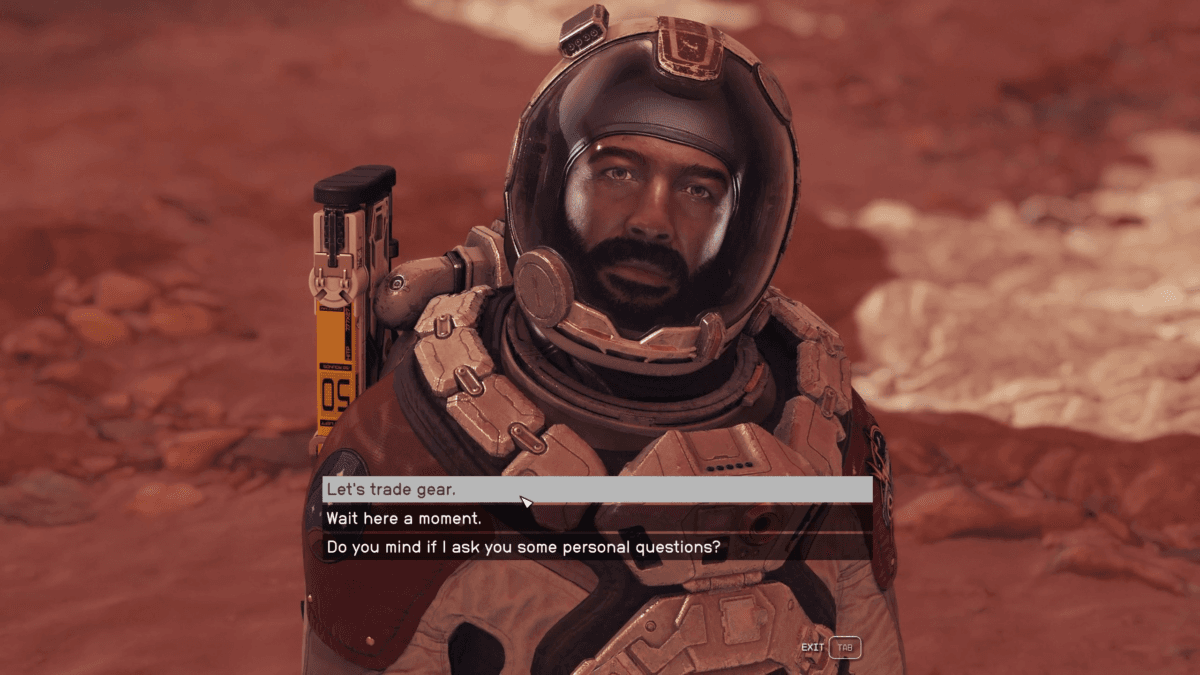
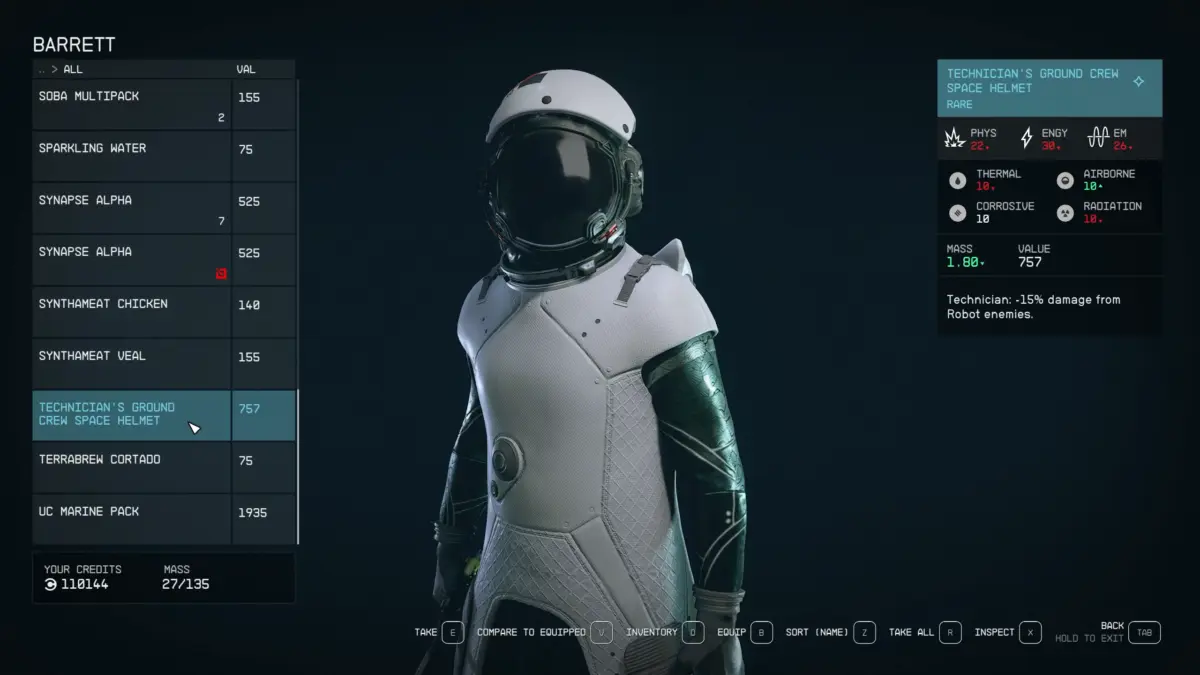
What I think everyone needs to know is that you can actually outfit your companions with gear, which makes them even more valuable while adventuring. To do this simply talk to them and ask to trade gear. From your inventory move over whatever items you want them to equip. Then flip back to their inventory and equip the item on your companion using the Y button on Xbox or B key on PC. You can do this with all the essentials, weapons, outfits, spacesuits, and helmets. I’m ashamed to admit it took me a while to figure this out, but that’s what happens when you’re so caught up in all the systems of an interconnected open-world game.
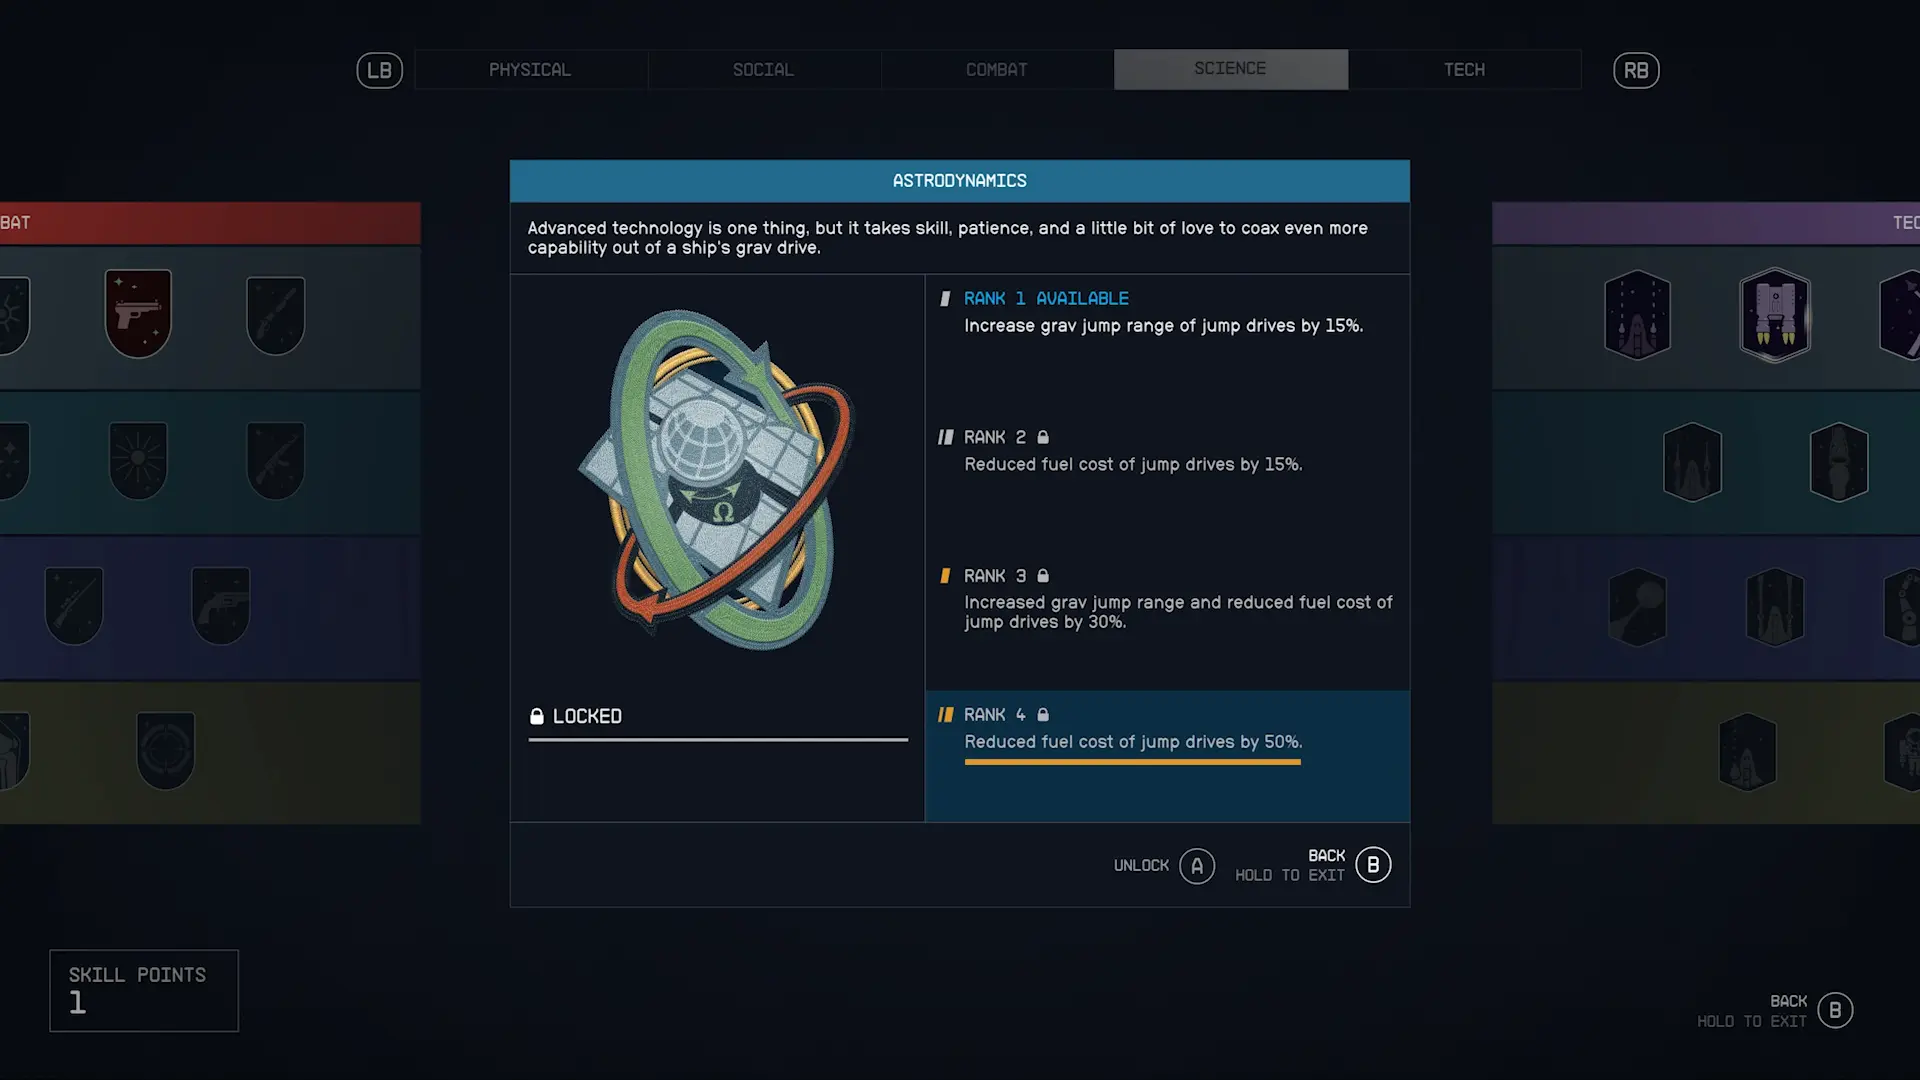
Remember too that companions each come with their own set of unique bonuses. You can quickly check your entire roster of companions by going to your ship menu. By pressing Y on Xbox or C on PC you’ll entire a new menu. Here you’ll see each companion in your lineup and what skills and ranks of those skills they possess. What’s most important about these skills is that they equate to the actual skill trees in the game. So, for example Sarah Morgan has rank 4 of astrodynamics. If we find that skill and then check out the rank 4 bonus, you’ll see that we get 50% reduced fuel costs when grav jumping.
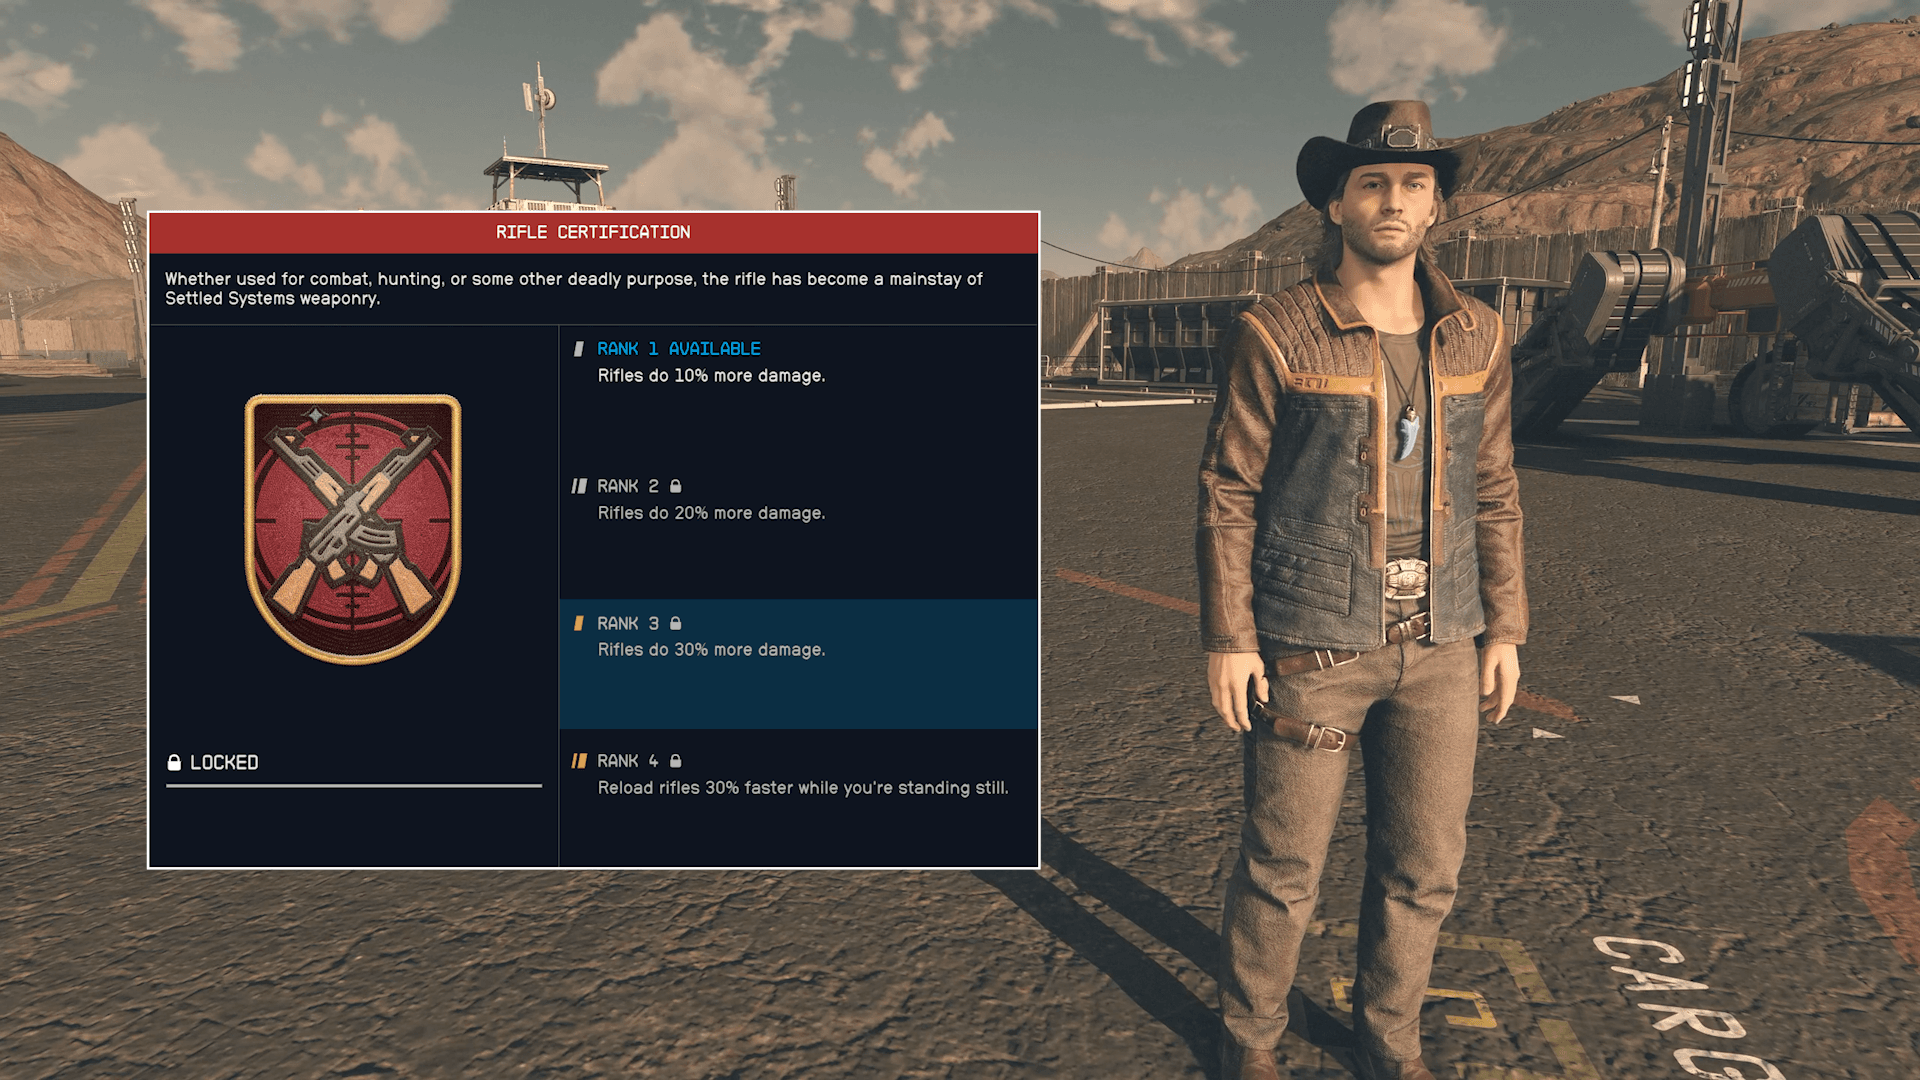
What’s critical to understand though is that these companion bonuses only take effect when they are assigned appropriately. In the case of Sarah, she needs to be assigned as a member of your ship’s crew to take advantage of that rank 4 perk. In a similar vein a companion with an offensive skill, something like Sam Coe’s rank 3 rifle certification is a boost for his skills, not yours. That means you need to pay attention to what gear you’re giving your companions to take full advantage of their skill set.
As an added bonus if you ever lose track of a specific companion, you can simply go back to that crew menu and assign them to your ship. The next time you climb aboard they’ll be there, magically returned from whatever desolate planet you left them on.
As you might have suspected, companions also have unique storylines and sometimes quests associated with them. The more they travel with you the more likely it is they’ll open up and you can uncover some backstory and potentially cash in on that relationship. Rotating out your companions every so often isn’t a bad strategy because as you’ve most likely figured out by now there’s a lot of galaxy out there and everyone’s got a story to share.
Ships
While you can buy houses across the settled systems your spaceship is where you really call home. It becomes an integral part of your exploration experience, and it can be a bit overwhelming to try and navigate everything the game throws at you all at once.
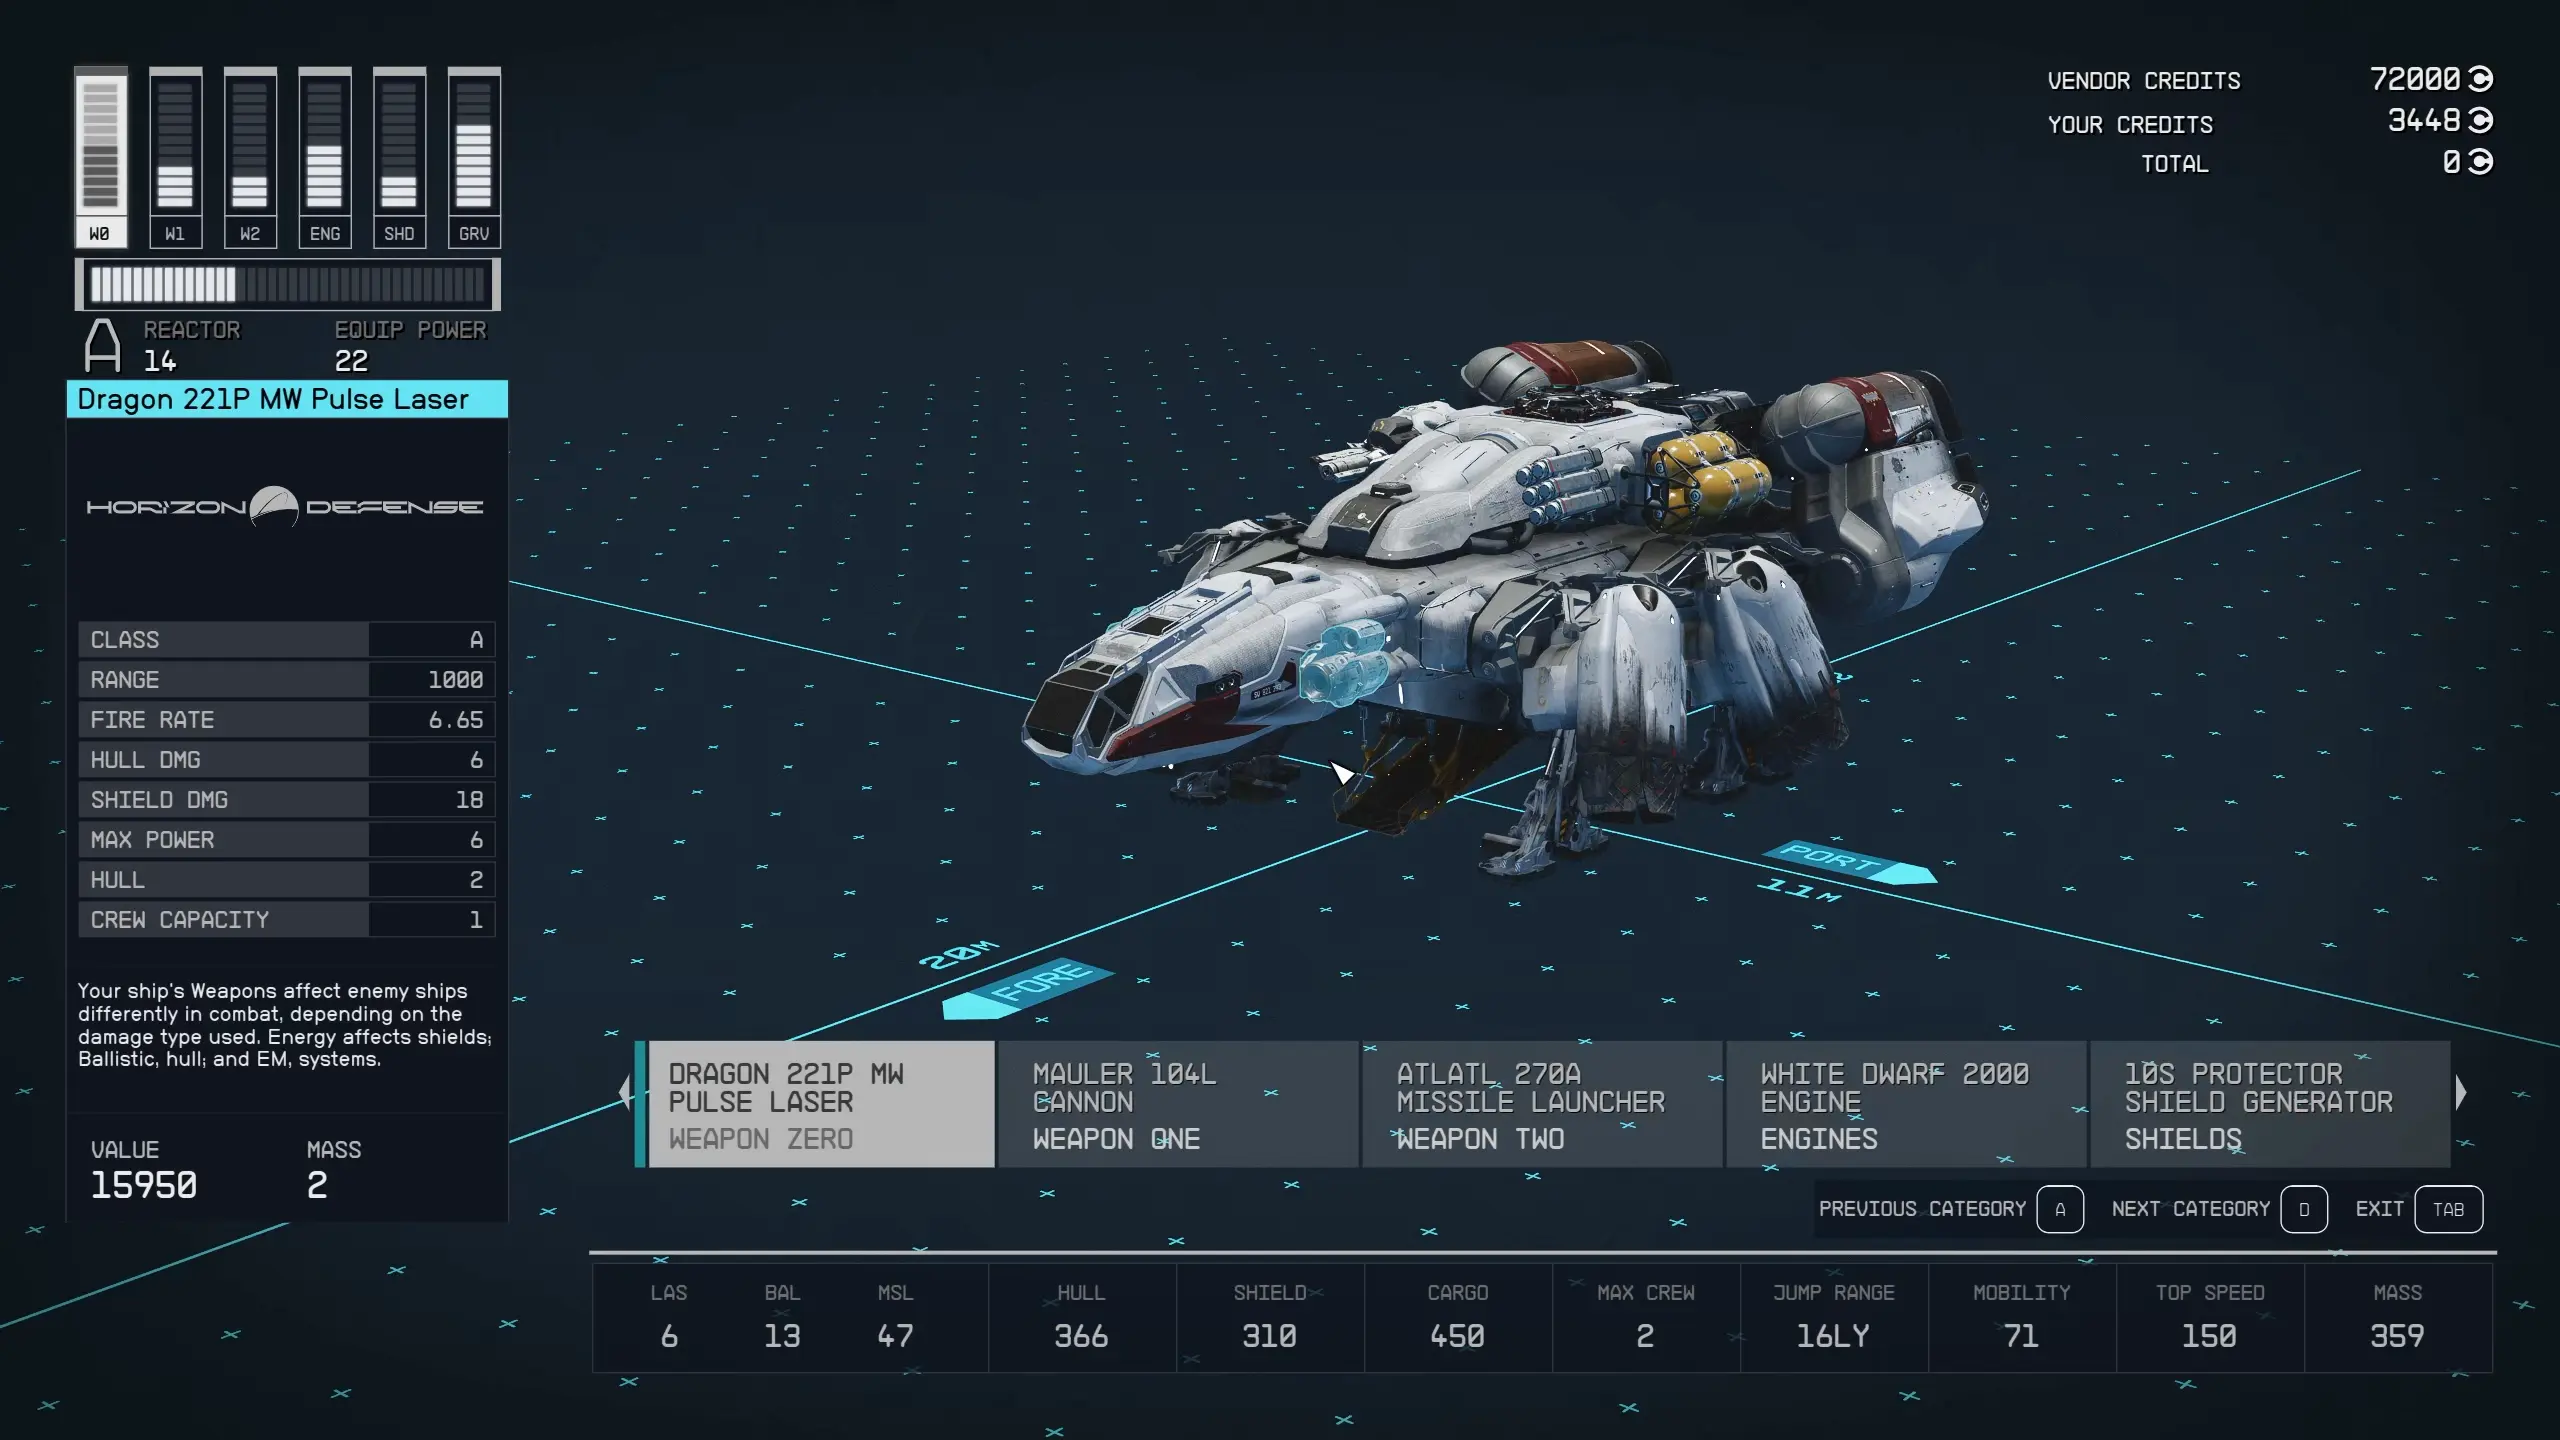
Not to take the wind out of your sails but ship building is more of an end game feature than an early game feature, but you can still tinker with ship building, just without the full breadth of the game’s many offerings. Your first ship is an ok starting vessel, but you will quickly outgrow its limited capabilities. The first thing you can do is upgrade the core systems. You can do this at any spaceport by talking to the ship service technician. Once inside the menu you’ll want to tap A on Xbox or E on PC to enter upgrade mode. Here you can quickly go through your core components. Anything tied to your ship’s systems can be isolated and individually upgraded from this menu. It’s a much easier way to view components and early on this is going to make a big difference. Oftentimes you’ll be fighting multiple enemies in space and if you don’t keep up with your upgrades or get an entirely new ship, you’ll quickly realize what the cold reaches of space feel like.
Before leaving any spaceport you’ll also want to scoop up any repair parts the vendors or kiosk have available. These are heavy so store them in your cargo bay but realize that when you’re in a firefight you can repair your ship, just like you would heal during combat. When your hull integrity is low the option becomes available and having a surplus of parts almost guarantees you’ll stay in the fight a bit longer.
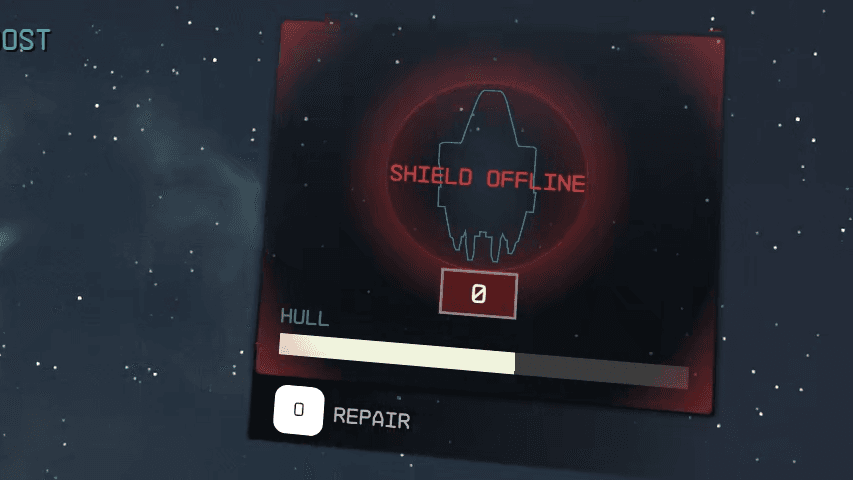
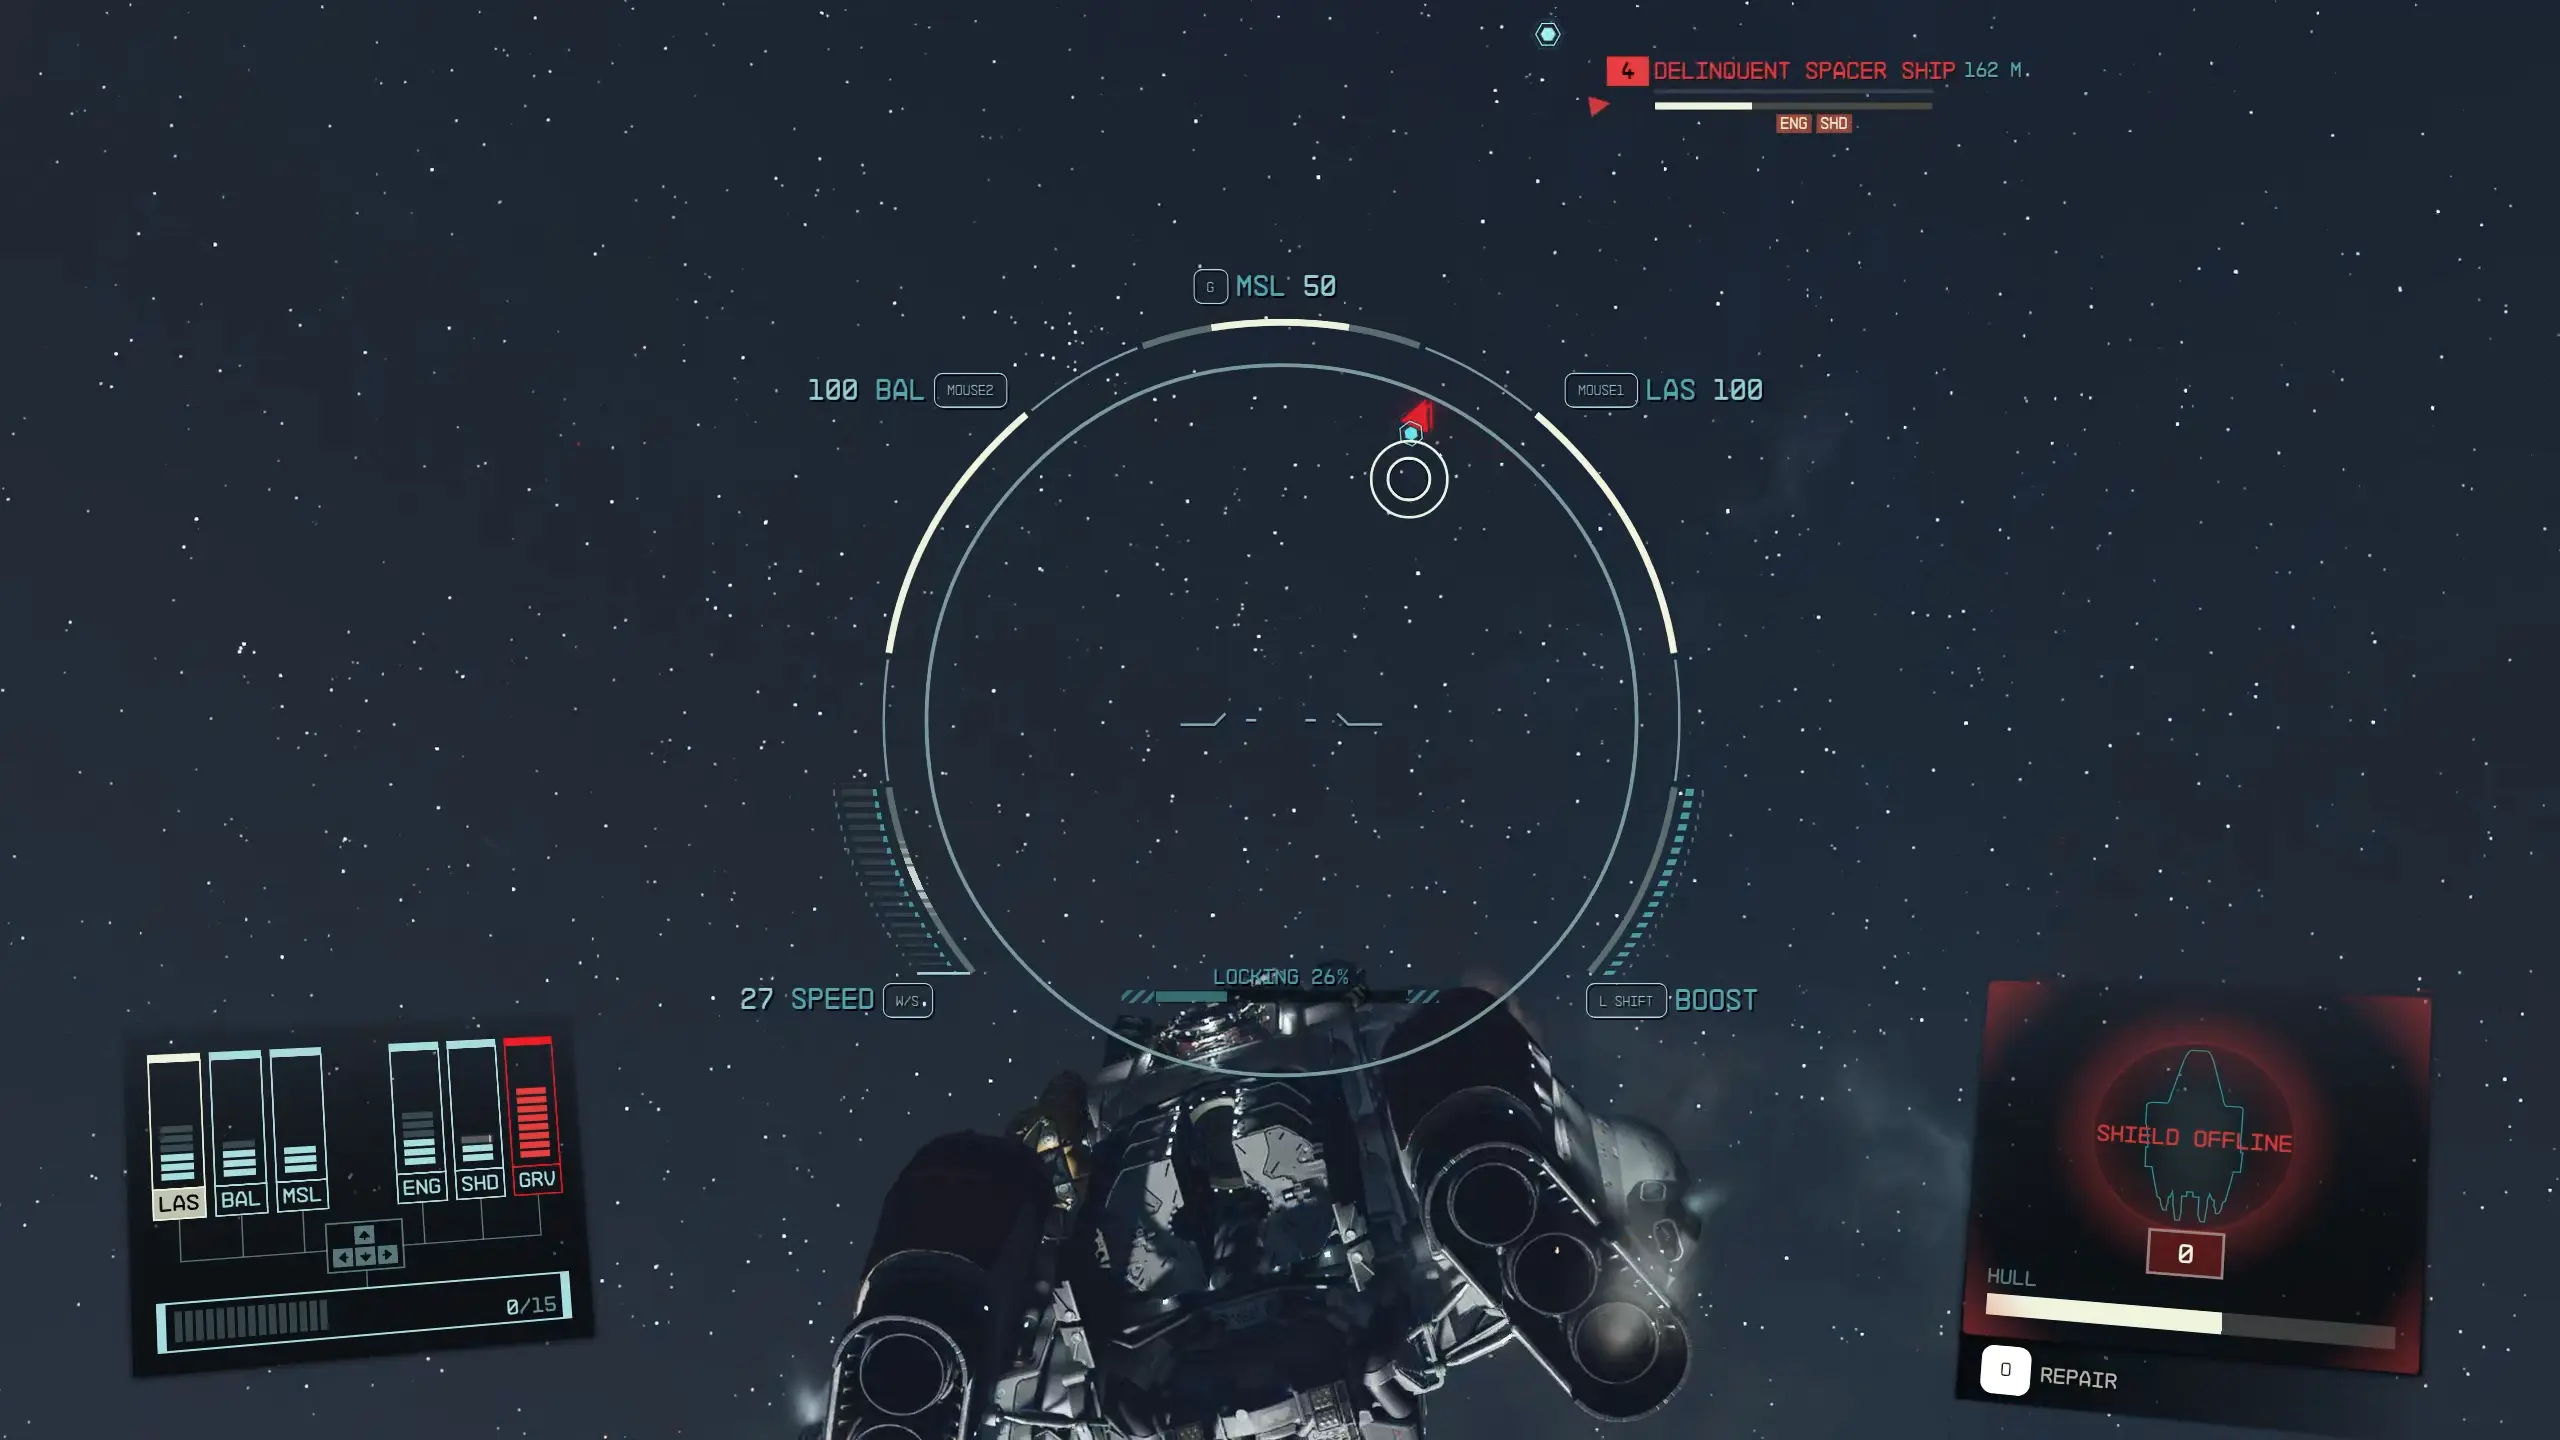
Remember too that the right companions provide huge bonuses when assigned to your ship’s crew so really pay attention to who you have available and what bonuses they bring to the table. There is a surprising amount of ship combat in this game, tied to all manner of missions and activities so don’t skirt over this important aspect of the game.
If you’re feeling adventurous you can dive into the game’s ship builder mode and let me warn you this is not for the faint of heart. You’ll always need to start with a base ship, you can’t build from nothing. From here you can navigate around and begin to move pieces of your ship around into new configurations, adding and removing elements as you see fit.
This is an extremely costly endeavor early on and you’re limited by what you can actually outfit your ship with. Depending on what city’s spaceport you’re visiting will determine what ship parts you have access to and the stock changes drastically depending on if you’re in one city or another so don’t waste tens of thousands of credits building a custom ship until you know what’s out there.
Some of these parts are even gated by skill progression. Within the tech tree, on the third tier is Starship Design. By allocating points into this skill, you’ll unlock new ship parts at each ship service technician. Certain parts, like reactors, can also be gated by the piloting skill so as I said before it’s going to take time and investment to unlock the best ship parts in the game, and it all comes at a premium.
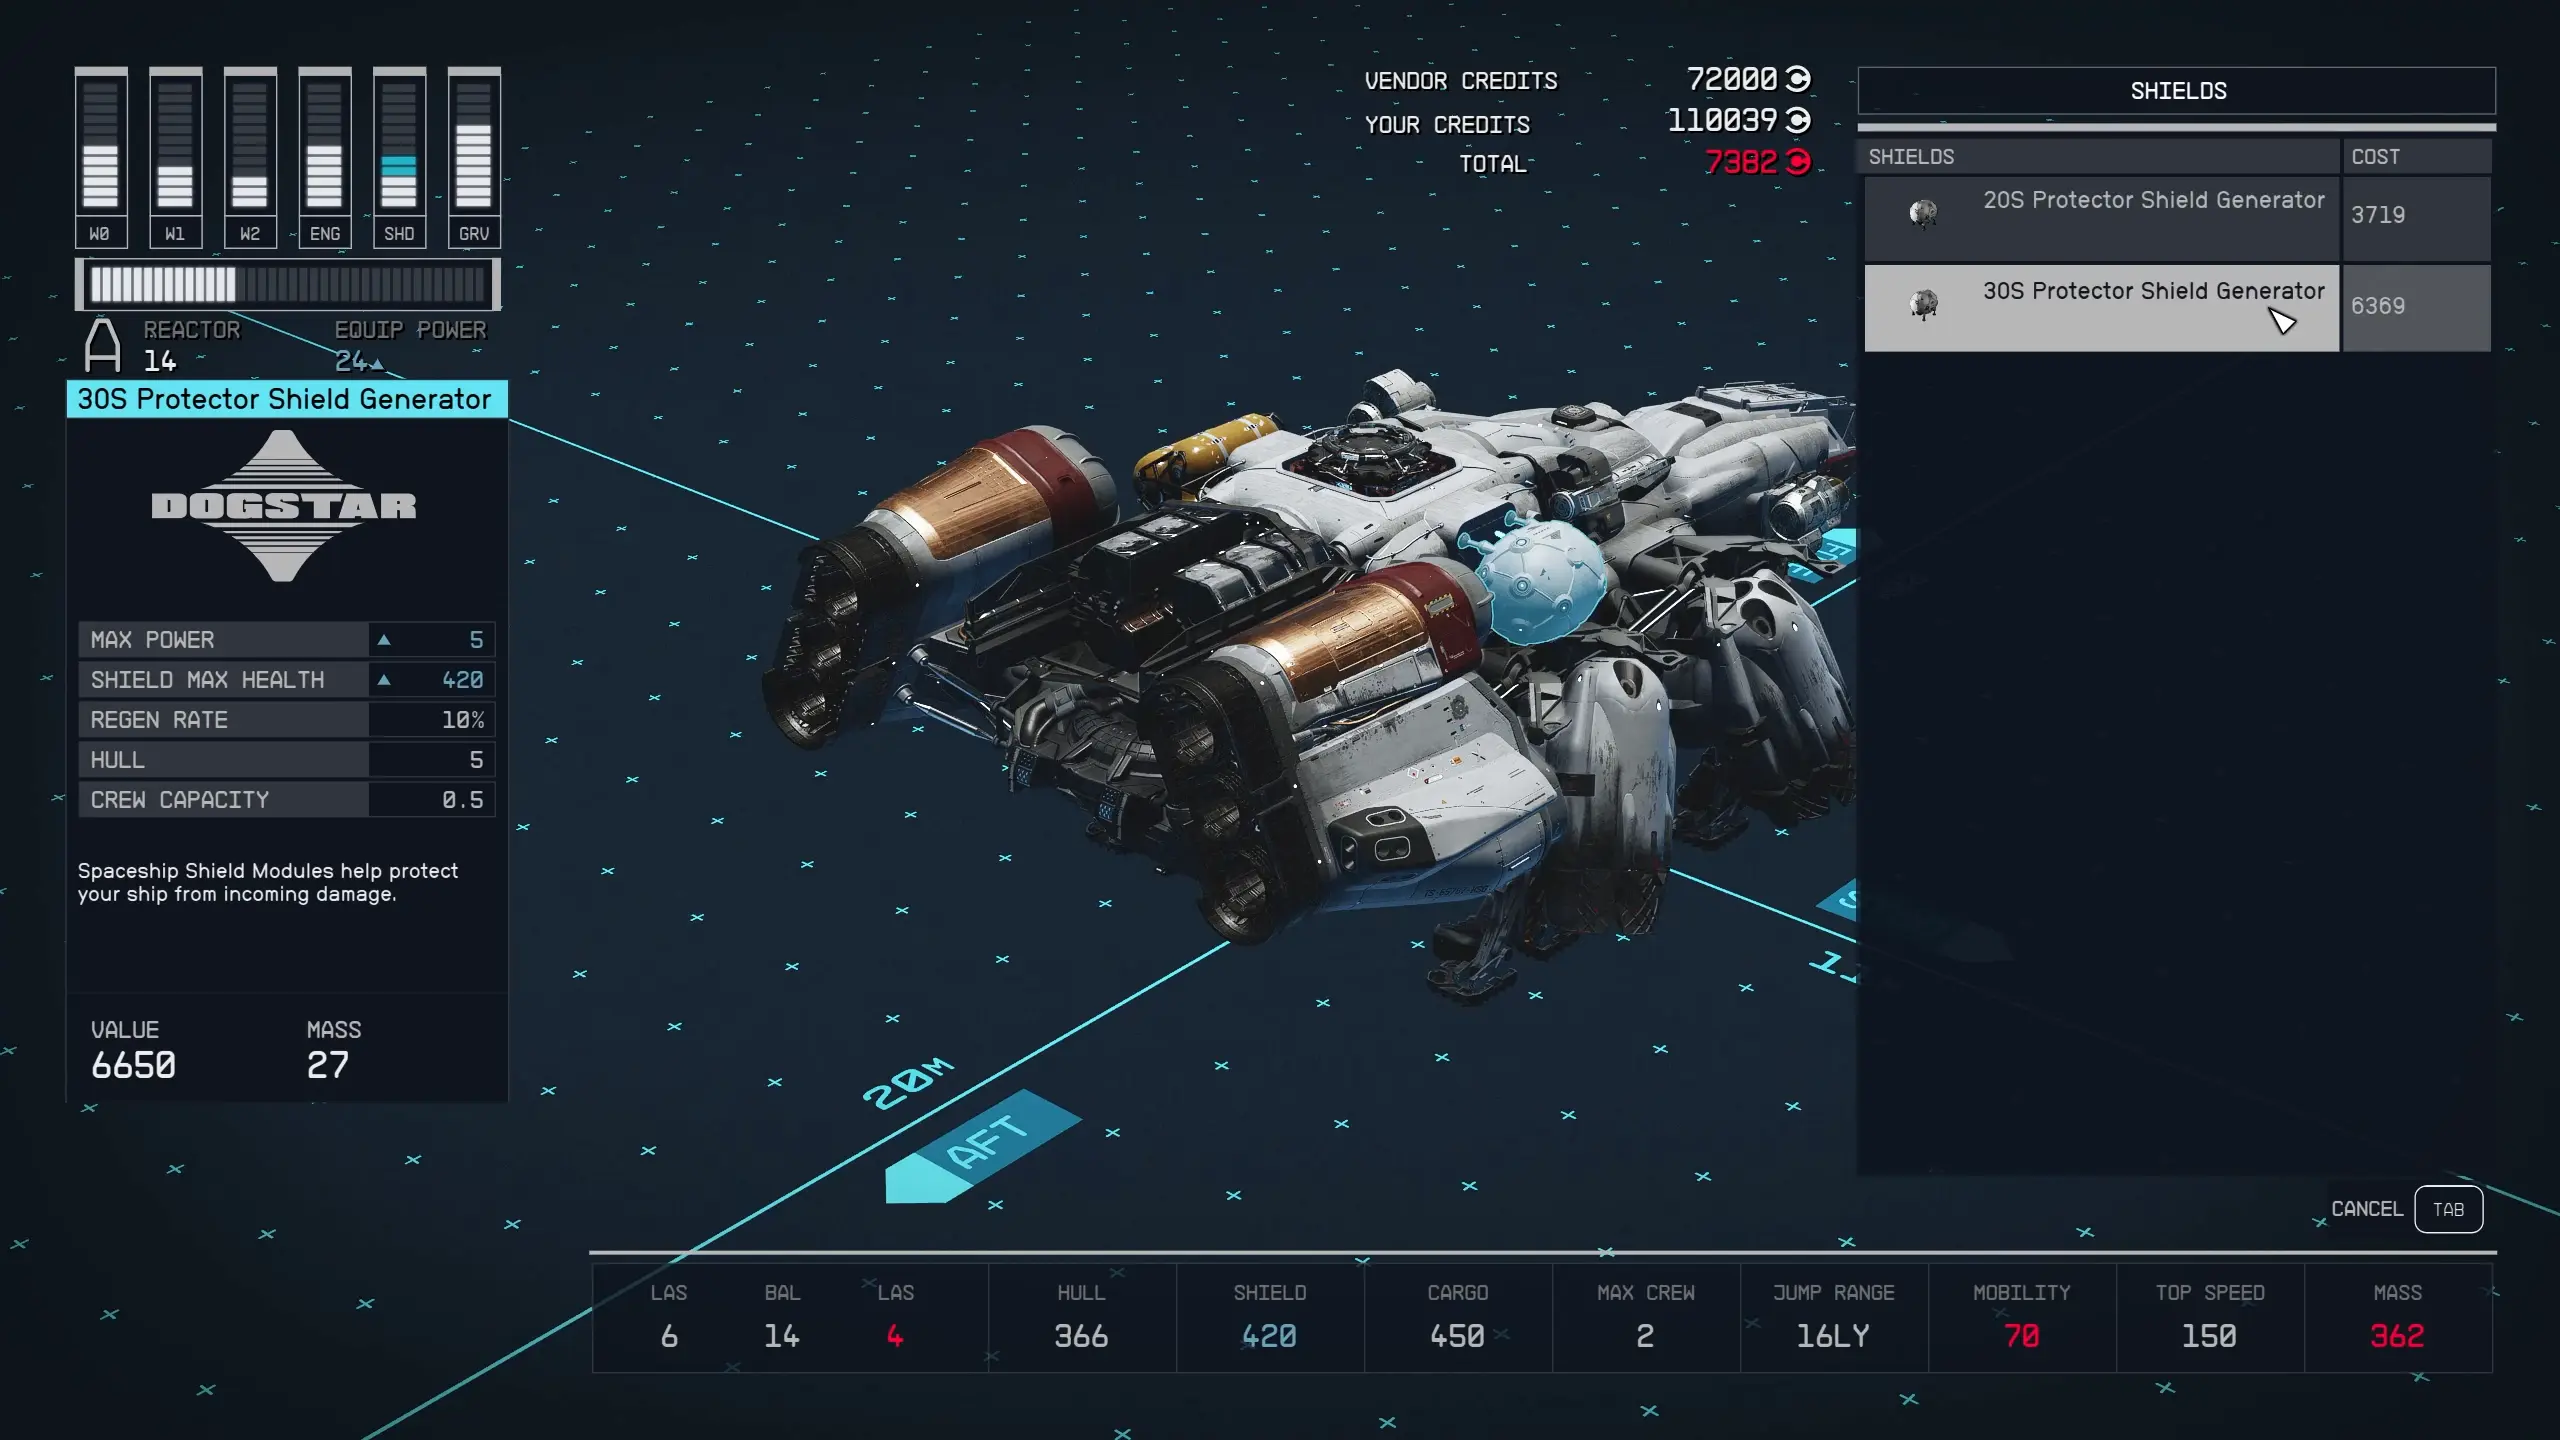
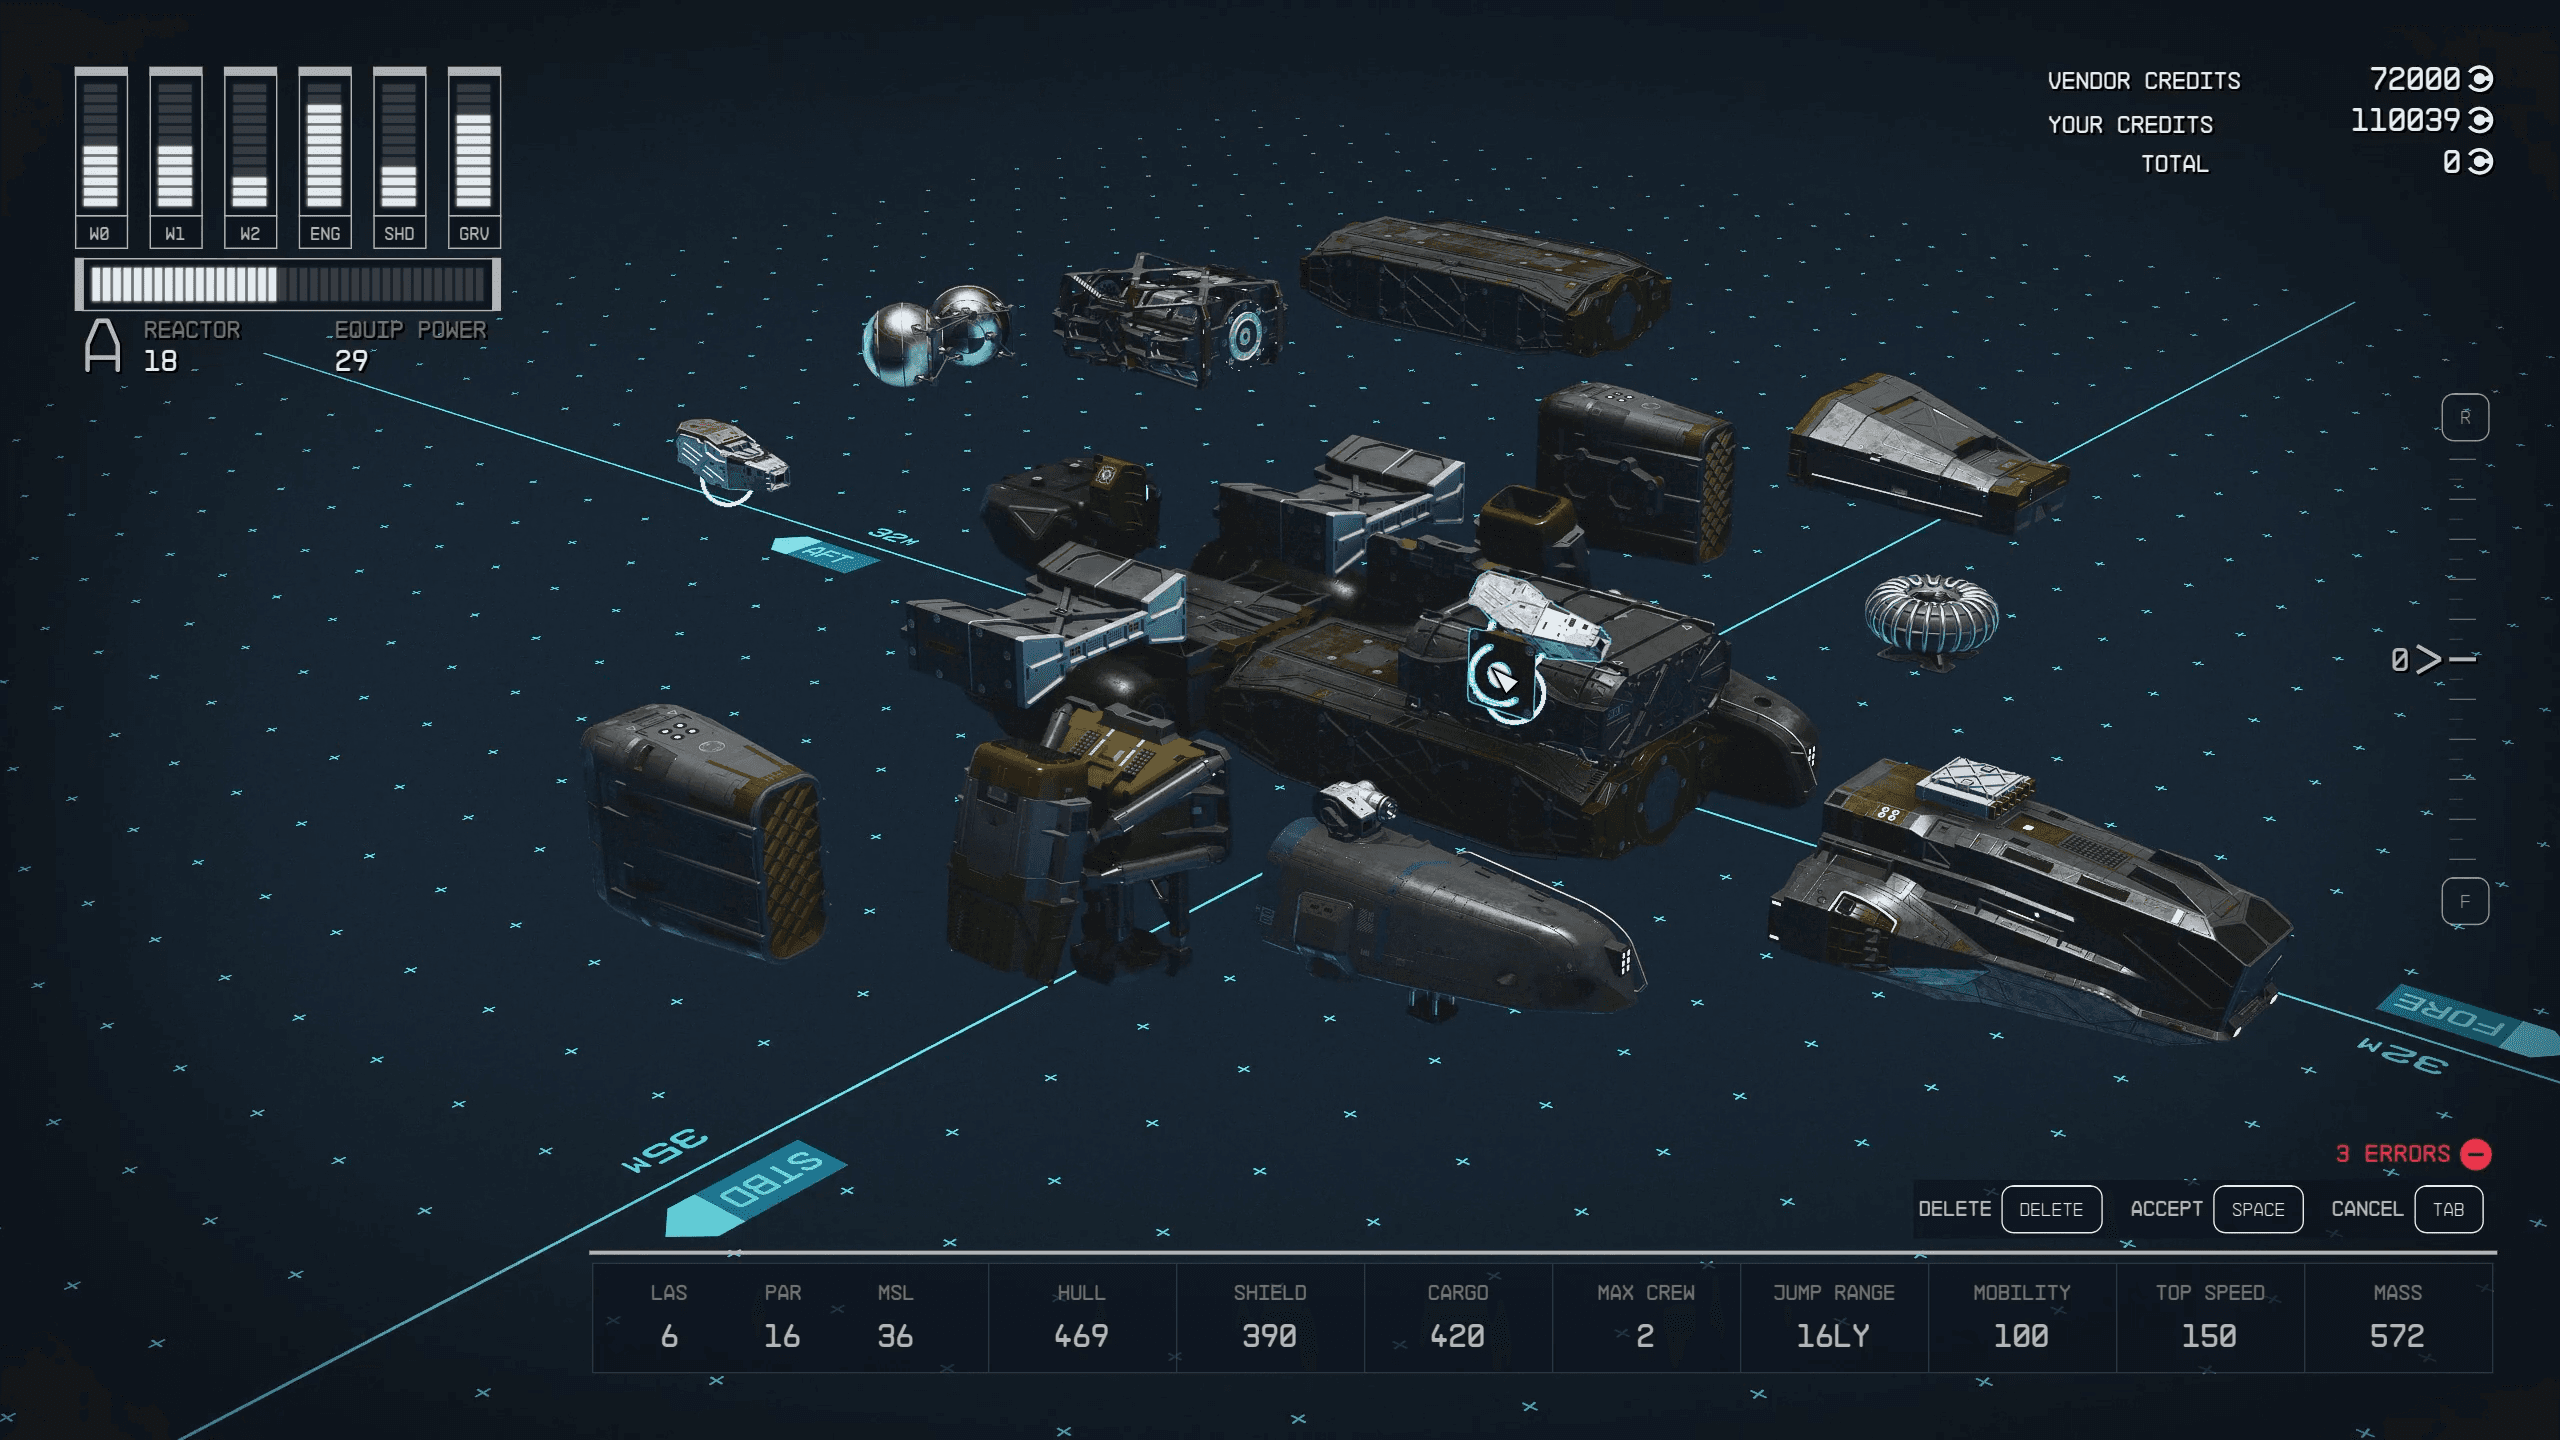

For those trying to build out your first custom ship pay close attention to the warning and guidance the game provides. If your ship is too heavy it’s going to be slow, and the game will try and warn you of that before you commit your changes. Some issues will just impact performance while others are downright necessary in order for you to complete a ship build. One thing that drove me nuts in the beginning were the weapons. In order to complete your ship checklist, you need to assign each weapon. To do this simply enter the ‘Flight Check’ menu by tapping C on a keyboard or Start button on Xbox. This will bring up a new screen with a messages tab and weapons tab. Toggle over and assign all equipped weapons and that error should go away. From the flight check menu, you can also rename your ship by tapping X on an Xbox controller or G on keyboard.

If life amongst the stars is more appealing to you, I’d recommend spending a lot of time with the ship builder, getting acclimated to its quirks and nuances, and then really leaning into understanding how parts work together. One thing I’ll call out is the different variations of parts, specifically HABs. With a part selected in ship builder mode use the arrow keys on your keyboard or left and right on the D-pad to toggle between different variations that have unique functionality.
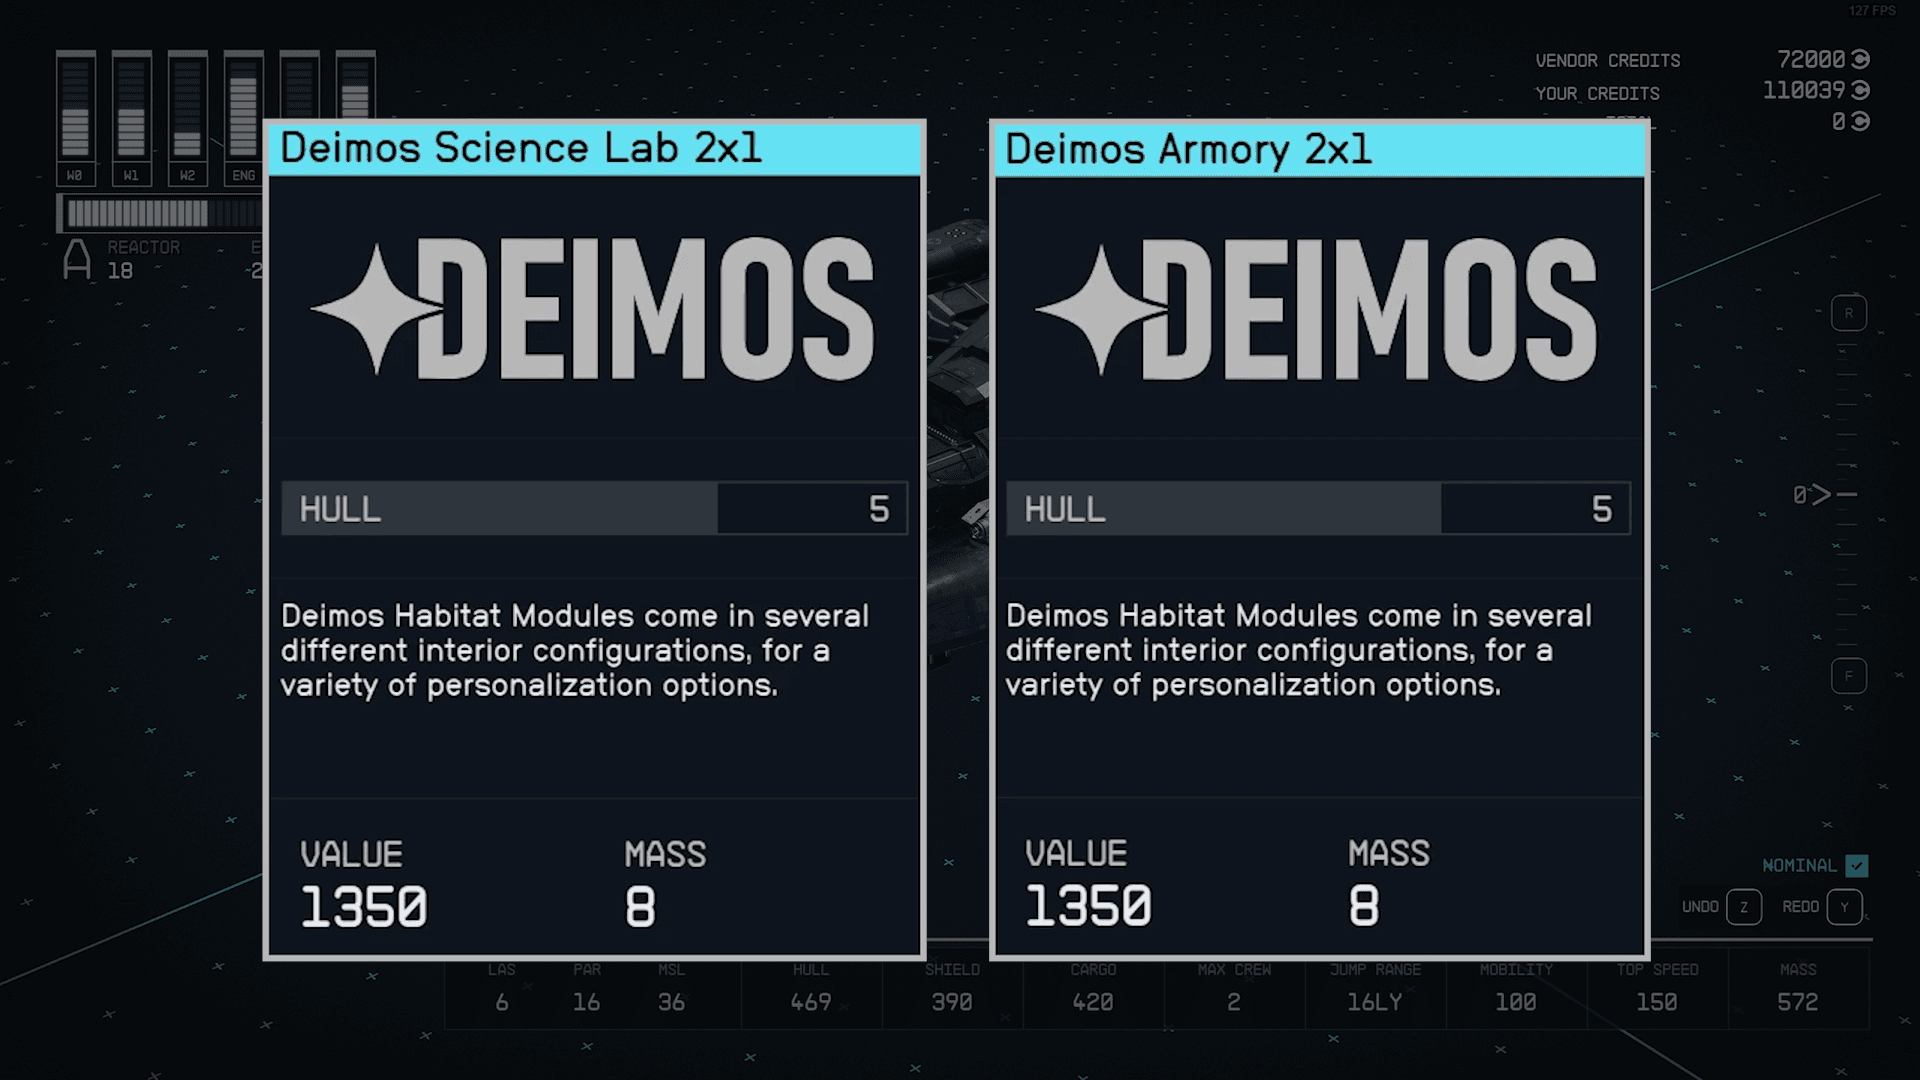
HABs come in all sorts of shapes and sizes and since you can’t manipulate the layout of your ship from the inside out it’s important to include HABs that fulfill your needs. If you want to stow extra armor and weapons, you’ll want an armory hab. If you want to be able to conduct research from your ship, you’ll need a science hab. The rub is each HAB adds weight to your ship so unless you plan on making a massive flagship, which honestly sounds pretty cool, it’ll become a balancing act, not something you should be afraid of, just a heads up.